Your Cart is Empty


Layering of a Hackberry, Part 1
Introduction
I was part of a small bonsai exhibition at a local shopping centre on Heritage Day, organised by a friend Francois Voges. There would also be public demonstrations and I was asked to do one of them. This content of this post is from the demonstration which I did and the images were very kindly captured by Jan Jurie Loots so I can share them with you today.
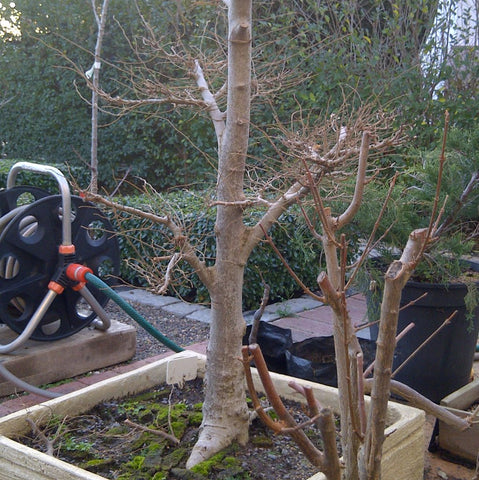
Image caption. The Hackberry just after I purchased it.
In 2012, I came into the possession of this Celtis sinensis or Hackberry. These are very commonly available throughout South Africa and they make very good bonsai. This tree presented a design challenge but after much consideration I decided I would make a broom styled tree out of it. So about a year or two after I had acquired the tree I removed a major portion of the trunk, placed the tree into a bonsai container with a better growing medium and allowed it to gain strength.
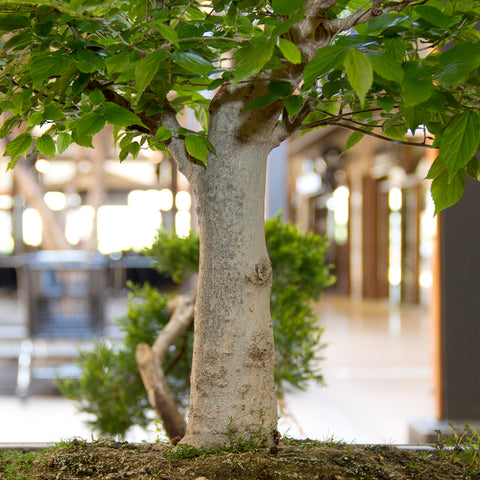
Image caption. Chosen front for this Hackberry as a Broom style.
You will note the trunk chop I did was not shaped at all, nether was it done 'flush' with the existing branches. It was however well sealed and was neatly cut with a sharp pull saw. From my experience with field growing trees I have found that it is better to do a rough cut and allow the tree to dieback to where it wants. Once this has been completed in a season or so, then I will go back and shape the cut properly to prepare it as best as possible for healing over.
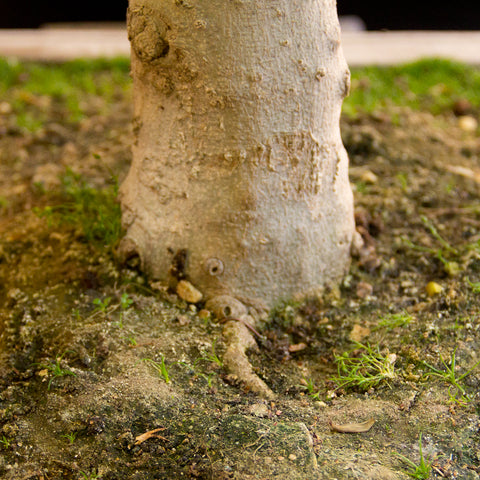
Image caption. The single surface root on the tree currently. For the remainder the tree appears to rise out of the ground like a light pole.
The challenge
The main problem with this tree was that the nebari or surface roots were virtually non-existent, other than a single surface root (You will note from the very first image that there is in fact another root which was buried when I potted it). So it gives the impression of a light pole in my opinion. One characteristic about good broom style bonsai is that they have great nebari. The roots must all emerge at the same level and they must radiate out from the trunk in all directions. This gives the impression of an old tree, firmly anchored to the ground. So I knew when I decided on broom style that I would have to do something about the roots.
There are several ways in which one can remedy problems with roots:
- Approach grafts. This is where a rooted cutting or seedling of the same species is placed in a groove created in the main tree, or tightly against it and secured in place. After some time the two fuse. Repeating this procedure many times allows you to create roots where there were none before.
- Thread grafts. Here a rooted cutting or seedling is passed through a hole drilled into the tree. As the hole heals and the cambiums of both come into contact they fuse and once again roots are created.
- Layering. This is where the stem is ring barked, rooting hormone applied and rooting medium is placed over the area into which roots can grow. It is probably the most commonly used technique to create superb deciduous bonsai, especially shohin sized trees.
It is method 3 which I selected and will blog about now. The other two are methods I use frequently but they are certainly more time consuming where layering could within 1 season dramatically alter the appearance of the tree.
Timing
Before we proceed I guess I should also say something about the timing of this procedure. I have only ever done layering more or less in the middle of spring. More accurately, when the new leaves are just hardening off (becoming more leathery and usually a darker green). To me this makes the most sense as the sap has moved to the upper areas of the tree from the root zone and the tree is loaded with energy which will place it in the best possible condition to survive the technique and issue the maximum number of roots. I am sure there are other times of the year to perform the technique, and no doubt the tree species will play an important part of that. The best is to experiment or speak with someone who is experienced and can guide you. Remember also that I reside in the Western Cape where we have a winter rainfall so your local climate may also dictate to you when you may proceed.
Once you have decided to layer there is no turning back
I should point out that once this technique is tried there is no going back. Regardless of how much bark you remove; whether you remove only portions or completely ring bark the tree, if roots do not develop your only recourse is to try again another year but you cannot style the tree as normal again as it will have terrible scarring. Bear this in mind before you decide to layer the best tree in your collection!

Image caption. Marking the tree with a marker to determine the line at which I want roots to emerge and by default where the future soil level will be.
The how
In this example the tree is vertical and I wish to keep it as such however when you layer you can change the angle of the tree completely simply by angling the cut when you remove the bark. As it is advisable to first check that your angle is correct to what you have in mind its a good idea to first draw a line around the trunk at the angle you require and then stand back and check that its correct.
You will need to make 2 cuts. The top cut is where the roots come out and the bottom cut determines how much bark you will be removing. The amount you need to remove will be determined by the species you are layering. In Chinese maples, as they have a tendency to heal over very well the cut needs to be very broad to prevent callous from healing the area and preventing root formation. I must admit to not having much experience with layering Celtis but I will also remove a broad band of bark - roughly equal to the thickness of the trunk. To play it safe you can also remove 'windows' of bark instead of ringing it completely, some species require this as they cannot survive otherwise however in others doing so will simply see the removed areas healing over.
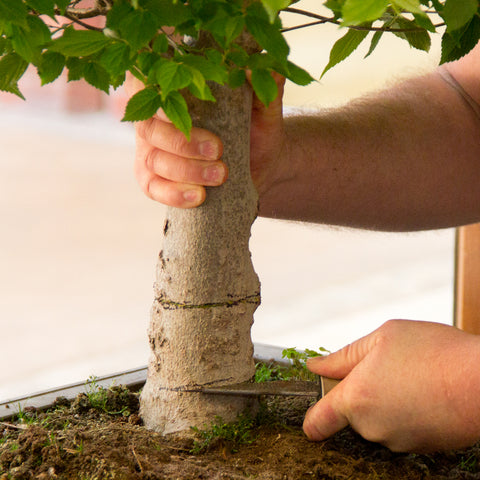
Image caption. Using a sharp blade (in this case a grafting knife) to make a deep cut through bark and cambium.
It's important that you use very sharp implements such as a cutting blade or a grafting knife as the cuts must be made very cleanly or you risk crushing the plant cells and this risks root formation. Be very careful when using these tools now as you will need to exert considerable pressure to cut through the bark. Make sure you position your hands out of danger.
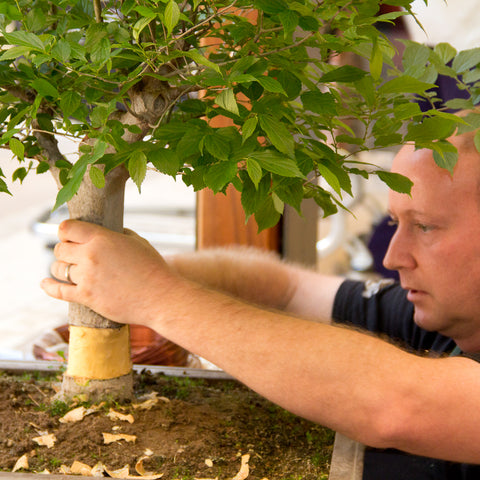
Image caption. Removing a complete ring of bark.
Make a deep cut along the lines as you have drawn them and then remove the ring of bark all around the tree. At this time of year, mid spring, sapflow is pretty much at its peak and so you should find that the bark separates easily from the hardwood below. The exposed area will be wet with sap in fact. It is very important that you remove all traces of cambium, the thin green layer which is found just below the bark. If you don't the tree will not issue roots as it has no need to as you have left the means for it to transport nutrients and moisture.
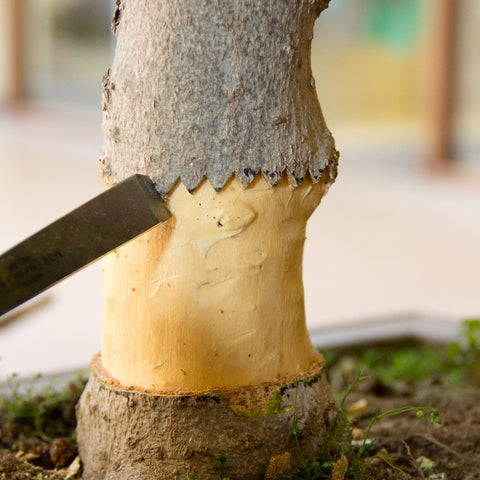
Image caption. Making V-cuts using a chisel to increase the surface area of the cambium
After removing the bark you may wish to make V-cuts into the top ring. This essentially doubles the surface area from which roots will emerge. In my experience it seems also to result in more even root distribution around the trunk as I think energy is directed into these V's, get trapped and roots are created. However I am not a botanist or anything of the sort so I might be talking total nonsense. I also think it might have something to do with the V's trapping the rooting powder better, preventing it from being washed away when you water. Whatever the reason, making these V incisions can only help. I use a sharp V-shaped chisel but you can also use a knife.
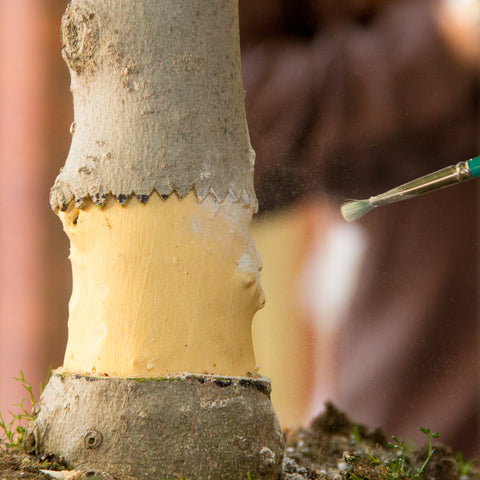
Image caption. Applying rooting hormone to the live tissue.
After you have made the V-cuts all round it is time to coat the living tissue with rooting hormone. These hormones will assist the plant in producing roots and greatly increases your chances of success. There are many rooting hormones on the market today but I recommend Dynaroot 3.
Dip a soft brush into the powder and dab it onto the edge of the top cut. Make sure you get it into all the corners so that it is properly coated. You may want to drip your brush into some water and make a paste of the hormone.
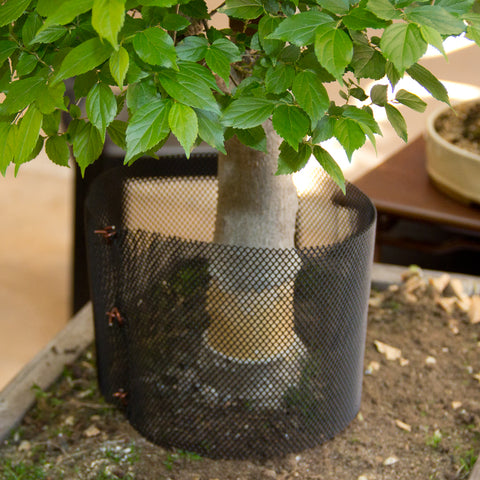
Image caption. Creating a retaining wall of mesh in which to place your rooting medium.
Using drainage mesh make a retainer into which you can throw your rooting medium. The holes will allow water to rapidly drain from the medium and will promote exchange of oxygen, which is what you need to promote fast root development. It is not necessary to secure the mesh retainer to the surface but you can if you like.
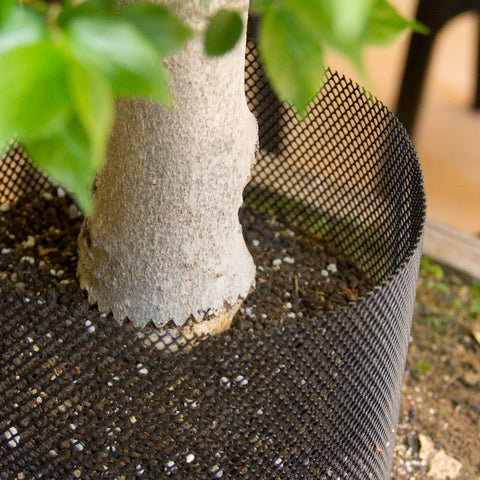
Image caption. Fill the mesh with medium till just below the top cut.
The rooting medium which you use can be made up of pretty much anything. The main criteria is simply that it must be coarse to allow a lot of oxygen exchange and it must not be too wet as this will slow root development. It of course should retain some water or you are going to have to wet it too often.
For my mix I have used LECA, Groperl and Peat. If you want something already mixed you can use my professional mix.
Such a mix will not compact, its coarse so will provide lots of gaps where the medium can be aerated and the small organic component will retain some moisture.
Fill your mesh retainer with your medium, which should be on the dry side to make it easier to work with, and keep filling until just below the upper cut which you have made. At this point stop.
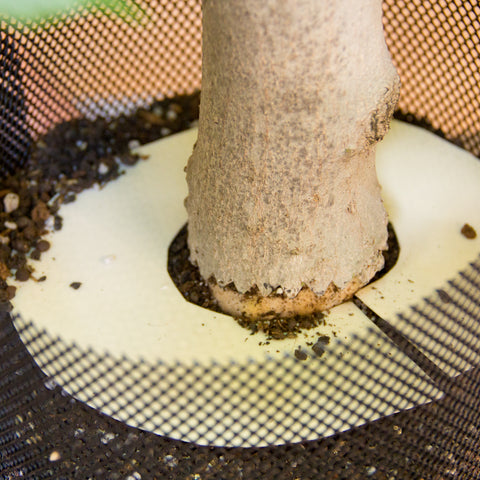
Image caption. Place a ring, I cut mine from an ice cream container lid, around the trunk.
Prepare a ring as depicted in the photo above. The purpose of this ring is to cause the new roots to grow horizontally and then down. This first curve of the roots is rather important so it is worth taking some trouble at this stage to ensure you shape them as best as possible. Its not all that important what the ring is made from, I used the lid of an ice cream container cut to the shape I wanted. You can use anything really, it just needs to be flat and cut roughly to the shape you need.
If you decide not to do the ring, you can possibly correct the roots later after you have separated the layer, by screwing a flat piece of board to the underside which will force any roots growing down into a horizontal position. However roots can break in this way so there is a little risk associated with doing it later.
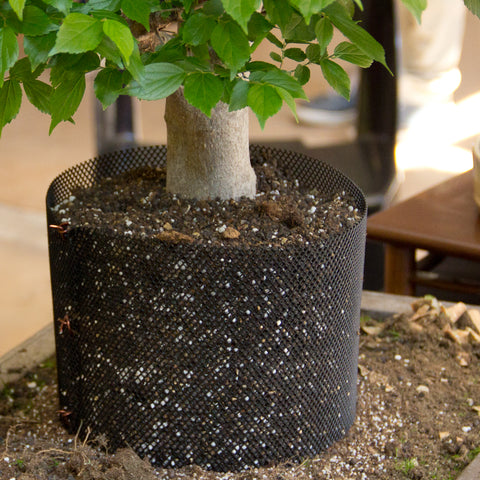
Image caption. Fill the mesh to the top with more rooting medium
You can now go ahead and fill the mesh with the remainder of your medium till the brim. Move the tree to a sheltered spot out of the wind and preferably under some shade cloth. Lightly water the rooting medium but not too heavily or you will wash away the rooting hormone you applied so carefully earlier on.
Aftercare
For the first while it is recommended that you check on your medium to see how rapidly it dries out. You can then adjust your watering accordingly. You don't want to keep it wet but it must never be allowed to dry out either. If it does get too dry, any roots which may have developed will very quickly shrivel up and die without you even knowing it. The tree might attempt to push more roots out or it may not.
After about 3 months or perhaps less, you should see signs of roots against the side of the mesh. The roots will grow out towards the edge of the medium and then stop when they reach the edge, and they will develop no further in that direction. Unlike layers wrapped in plastic what happens now is very interesting. Rather than circle the interior of a plastic bag new roots will emerge from the trunk. So I have found layers done using mesh result in much more roots than using other methods.
When you have been able to determine that there are indeed roots you might wish to begin fertilizing lightly with something like BonsaiBoost. In my years of experience using all manner of fertilizers I have never found any fertilizer which comes remotely close to encouraging as much root development as BonsaiBoost does.
When to separate
How long you wait before separating the layer will depend on the species which you are layering and also how patient you are. Some species can be separated only a few months after layering but I play it safe and wait till the following repotting season, in other words the following spring. I find that by then the roots have matured a little and are not as fragile making them easier to work with.
Without saying too much, essentially after separating the layered tree you will treat it the same as any other bonsai tree in your collection. The bottom part of the original trunk can sometimes be used to create another tree with, especially clump styles.
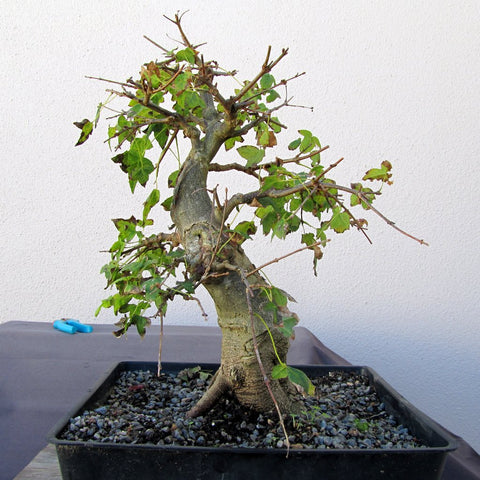
Image caption. Field grown Chinese maple with ugly roots, before layering.

Image caption. A season after the layering was separated.
10 Responses


Leave a comment
Comments will be approved before showing up.

Terry
January 27, 2016
1. Well within reason, don’t dilly dally. Have all that you need ready and work as quickly as you can in a sheltered spot.
2. The cells are damaged yes but this is why using sharp implements and finishing with a grafting knife is so important.
3. I don’t make any effort to keep these edges moist. Just get in, do what you need to do and then you’ll be fine.
4. In the article I mention and you can also read a similar article where I used a trident maple. The spring leaves should have hardened off. In other words the initial sap which was in the roots has flowed up into the tree. Doing it before then will essentially cut this off.
5. I would do it immediately as the tree will have a lot of built up energy from growing in the ground.
6. Thats a good idea. I think that would be a better solution. Although I have not done this myself I think it would be a good approach.
Thanks for the questions John. The Zelkova sounds great. Good luck with the ground layering, I’m sure it will be successful.