Your Cart is Empty


4 Year Development of a Cotoneaster from bush to bonsai
The cotoneaster featured in this blog post was grown from a rooted cutting which I bought from a local nursery. It was around that time when my wife and I got married and bought our current home. Soon after moving in, I planted the tree into the front yard in order to develop it further in the ground (You can read more about field growing here).
You too can achieve a tree like this in the same amount of time and from material which does not need to cost much or might even be free. In this post I would like to share with you the process so you can follow the same or change it to suit your situation.
Don't feel like reading? Watch the whole exercise on home video! Or better yet, watch the video and then read through the blog text which follows to make sure you caught all the details.
Garden Yamadori
I am sure you are familiar with the word "Yamadori" which is a Japanese term and is used to refer to trees which are collected from the wild.
Garden yamadori then refers to trees which you collect from your garden. In this case I did not technically collect it, I first planted it in the garden so I could make use of the space to field grow the tree while at the same time appreciate it for a few years as a garden bush. I have done this with several trees and in my opinion the approach works great as you get to appreciate the plant as a garden specimen for some years and then it gets to reinvent itself as a bonsai tree.
You could develop the tree in an oversized plastic container or wooden box (watch my video on how to build a wooden box) but I doubt the development would be the same as one can get when the plant is in the ground. In fact I am pretty certain of it.
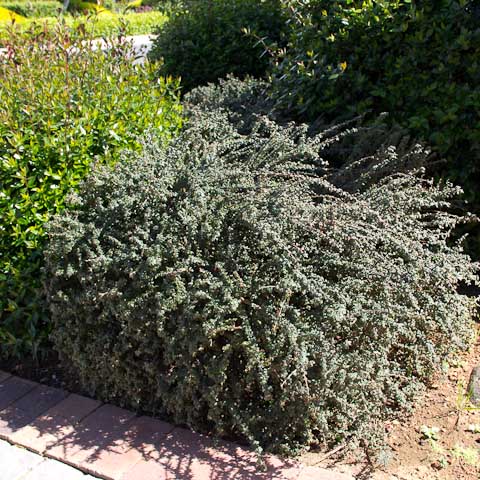
Image caption. The cotoneaster bush destined to be a bonsai tree. I used the garden to grow the tree for several years so that it could develop the trunk. While it was in the ground it was shaped like all the other bushes in my garden, clipped to encourage dense foliage.
While still in the ground I pushed some of the long shoots into the soil and got them to root. In the future when I would remove the tree I would still have a bunch of young trees which would remain, which I could develop again each into a separate bonsai tree. As they are genetically identical I can expect the same behavior from them as the mother plant, and they will also be mature enough to immediately begin flowering.
Early Stages
With evergreen trees, shrubs or bushes such as the Cotoneaster, it is best to wait until the tree is quite active and the weather is warmer before repotting them. I lost quite a number of rooted cuttings by digging them up too early in spring only for an unexpected cold spell to come in again. So I waited until October before digging the bush up.
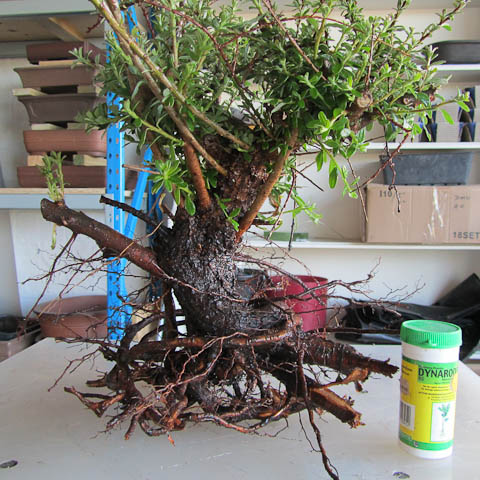
Image caption. This photo was taken just after it was dug from the garden. It was October 2012. The bottle of Dynaroot provides some idea of scale, but it was also used initially to encourage rooting as I dusted the whole root ball with the stuff. I use the same treatment on other collected trees.
Post-Collection Treatment
A root cutter was used extensively to reduce the thick roots and branches which had developed while it had grown in the ground. I also dusted all the cut edges with Dynaroot rooting hormone powder (#3 for hardwood cuttings). The overly long branches were also reduced and sealed to prevent loss of sap, possible infection and of course good callousing (healing), using some Kiyonal tree sealer.
Growing Medium
To get the Cotoneaster to root quickly and strongly, I chose my Professional Mix. The quick draining mix would ensure the root zone got a lot of oxygen and would encourage rapid development of new a new feeder root system. The peat would retain the moisture needed to keep the new roots from drying and the LECA would ensure the structure would be maintained for several years.
I chose a slightly too large ceramic container to plant the tree into. As it has just been collected a lot of development work needs to be done so I did not want to be in a rush to get it into too small a container too early as this would add years to the time needed to develop the tree. Conversely an overly large container would simply be a waste of growing medium, fertilizer and water. Knowing the difference is perhaps a little tricky to a novice grower so if I were to guess I'd say the container chosen was about around 3 times the volume of the final container I imagined for the tree.
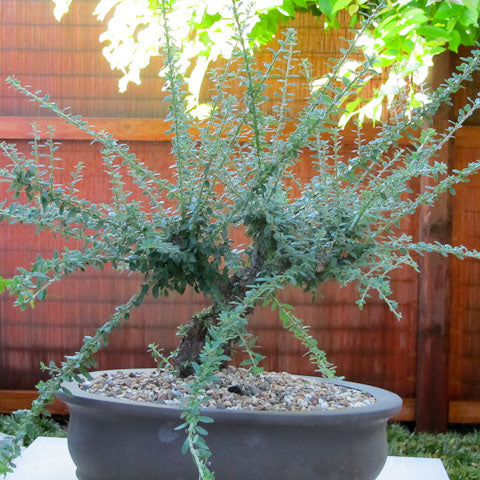
Image caption. January 2013 and the tree has responded well after repotting and has pushed out a lot of new growth.
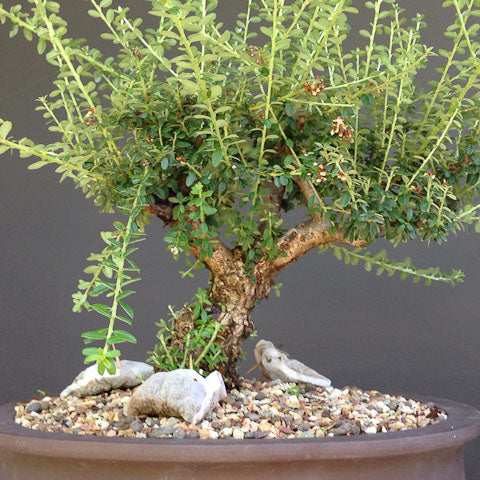
Image caption. December 2013 and the tree continues to grow well and I am leaving the branches to develop as much as possible strengthening the roots and of course thickening the branches at their base.
Sacrifice Branches
Sacrifice branches are branches which are allowed to grow without being cut at the tips resulting in them constantly extending. They are encouraged to grow as long as possible and in the process results in the branches thickening at the base. If these branches become overly bushy and begin shading the inner parts of the tree then you may find those branches or branchlets begin to weaker. In such a case you should remove the side branches of the sacrifice branch to allow more sunlight to penetrate the core of the tree. You can read more about sacrifice branches in these previous blogs.
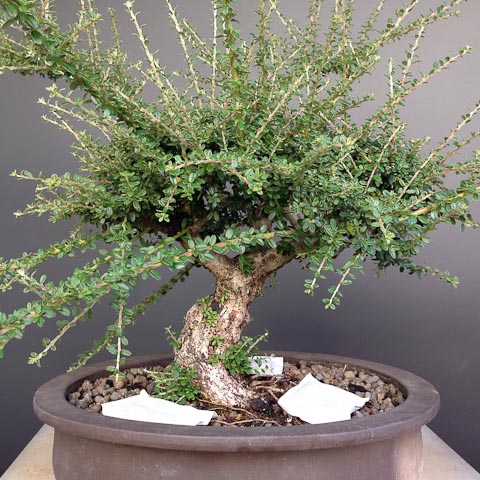
Image caption. December 2014, and the tree is beginning to show some maturing in it's final "African" umbrella shape.
Fertilizing
A good fertilizer is needed to support healthy growth on the tree. You don't want to use something too strong in Nitrogen as this growth tends to be very green and too vigorous with very long internodal distances. I find that BonsaiBoost suits my needs, I just use more sachet's when I need more aggressive growth. Whatever you decide to use, try to use an organic rather than chemical fertilizer as it is much less likely to harm the roots of the tree if you do use too much. Solid fertilizers also have the benefit that they will slowly release nutrients, unlike liquid types which you will need to provide frequently due to the watering schedule typical of the maintenance of bonsai. However a foliar week every now and then using liquid fertilizer diluted with water like Seagro or Sea Secret is a great treat for our trees too. Kelpak is also very advisable in situations like this when you want to promote root development as although it is not a fertilizer, it does contain auxins and other hormones which promote root development (I use it on all my trees a few times throughout the growing season)
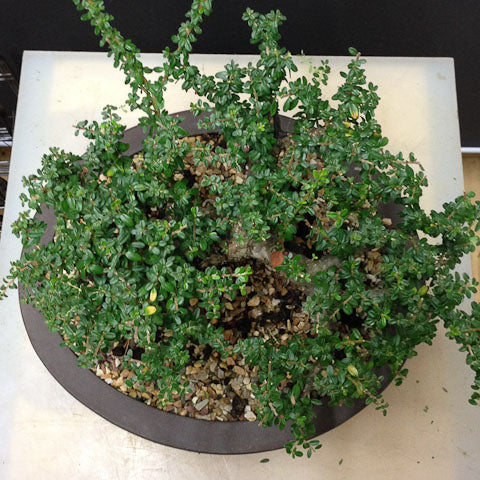
Image caption. When developing a tree's skeleton or basic branch structure it's important to also look down at it from the top. In this way you can very quickly see if the tree is dominant in any areas (front, back, left or right) and where further development is needed.
Formation of Structure
At this early stage of the trees development it is important you not rush the process of developing the primary branching. These branches should be thinner than the trunk, and thinner than the branch lower than itself on the tree. The primary branches should not continue uninterrupted with little branchlets shooting at frequent intervals off to the side like the backbone of a fish. Instead the branch should ramify some distance from the trunk but far enough away from the projected/intended outline of the tree canopy so that there is still room for finer ramification. The process of ramification takes time, especially in the beginning, but after a while ramification increases exponentially.
The present
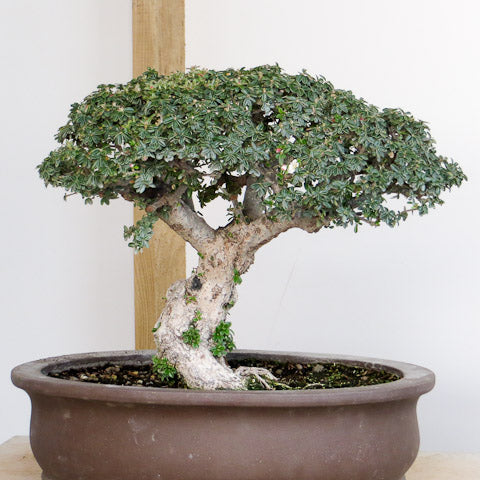
Image caption. Present day, October 2016. The tree has a case of brown scale, which it seems to be prone to, so it was sprayed twice in winter with lime sulphur - hence the bleached appearance of the leaves and trunk. I cannot recommend this treatment enough on all trees during winter as a means to preventing the overwintering of all manner of pests including fungi.
After recently receiving akadama and pumice from Japan I was eager to repot the tree into this medium. The tree has now been growing for 4 years in Professional Mix, and although the tree is healthy and is covered in flowers in summer, the initial development pot is now too large for the tree's next stage of development. So I felt the tree deserved to get a pot upgrade and some new growing media.
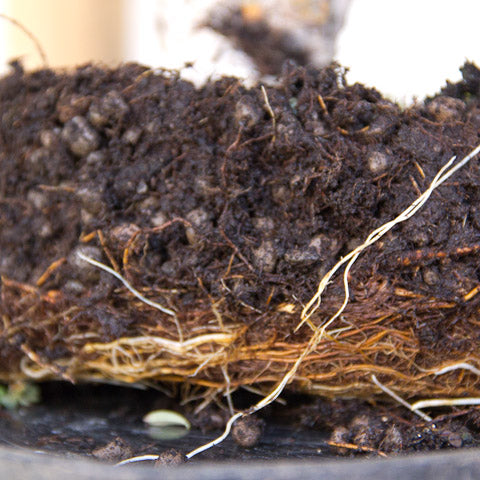
Image caption. Its a good sign when you inspect the roots and find many healthy white roots developing. It is also confirmation that repotting can proceed.
Waiting till the weather warmed up a little, I decided to repot the tree in middle Spring. Using a root sickle I was easily able to cut the roots which had grown up to the walls of the pot and ease the tree out from the growing pot.
Wet vs Dry mixes
Many white roots were visible which was a sign that the tree was healthy and was thoroughly in growing mode. The entire pot was filled with a fibrous root network. I, and many others have found this to be typical of the Professional Mix. Rather than simply having a few long roots which coil and coil around inside the pot, a fibrous root system is able to support a higher level of ramification. Coiling roots end up being cut off and are unable to provide the what ramified trees need. Such roots are typically found in mixes which are either too water retentive or where the tree is kept too wet and sufficient oxygen is absent.
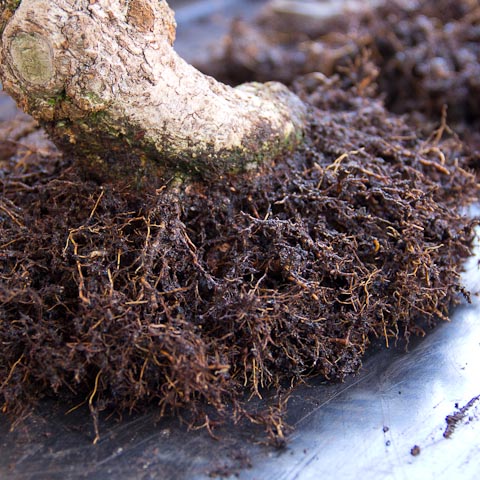
Image caption. In an effort to remove all the old growing media an ice pick was used (modified screwdriver) to gently aerate the root ball and at the same time ease out the old media.
Removing old growing media
Rather than wash the roots off with a hose, I cleaned the root ball of the old growing medium by gently working it out with a ice pick. In my experience it is ok to rinse a bonsai tree which has been growing in the field and you want to remove that soil or perhaps a tree which is still relatively young in development with few fibrous roots, but when the tree is more advanced and has a developed nebari with fibrous roots then I think you do more damage to the roots by drenching them and then struggling afterwards to get new growing media to penetrate.
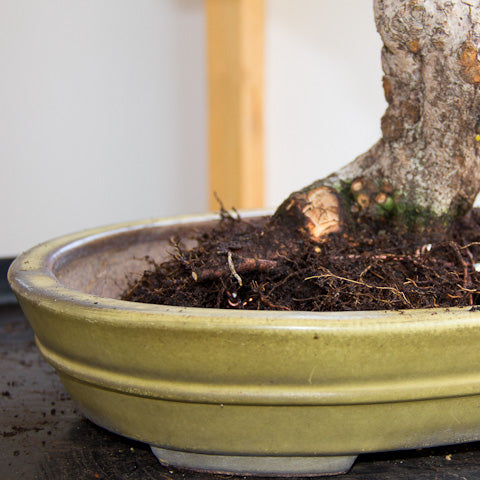
Image caption. To complement the colours of the flowers, and in particular the pink of the bud just prior to it opening I have chosen an old Hattori pot from Tokoname.
The new pot which I have chosen, an old Hattori pot which once was probably a vibrant yellow but which has over the last 30 - 40 odd years of use, developed a very pleasant patina. This is similar to the character which an antique piece of furniture develops with use over many years, and should never be cleaned off or removed in some manner. Old trees belong in old pots, and when this is done the tree maturity is enhanced and the overall impression of the potted tree is more convincing.
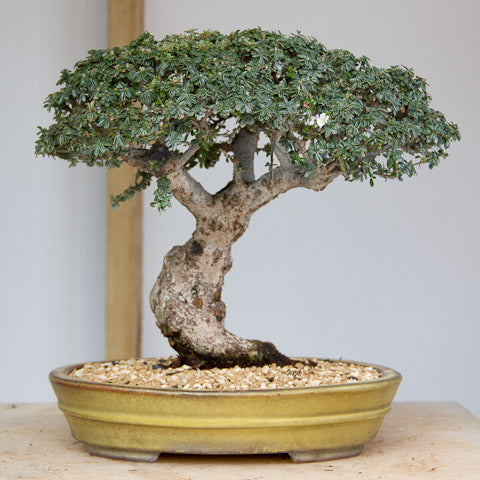
Image caption. The tree repotted into akadama and pumice has been completed, all that still needs to be done is a thorough watering.
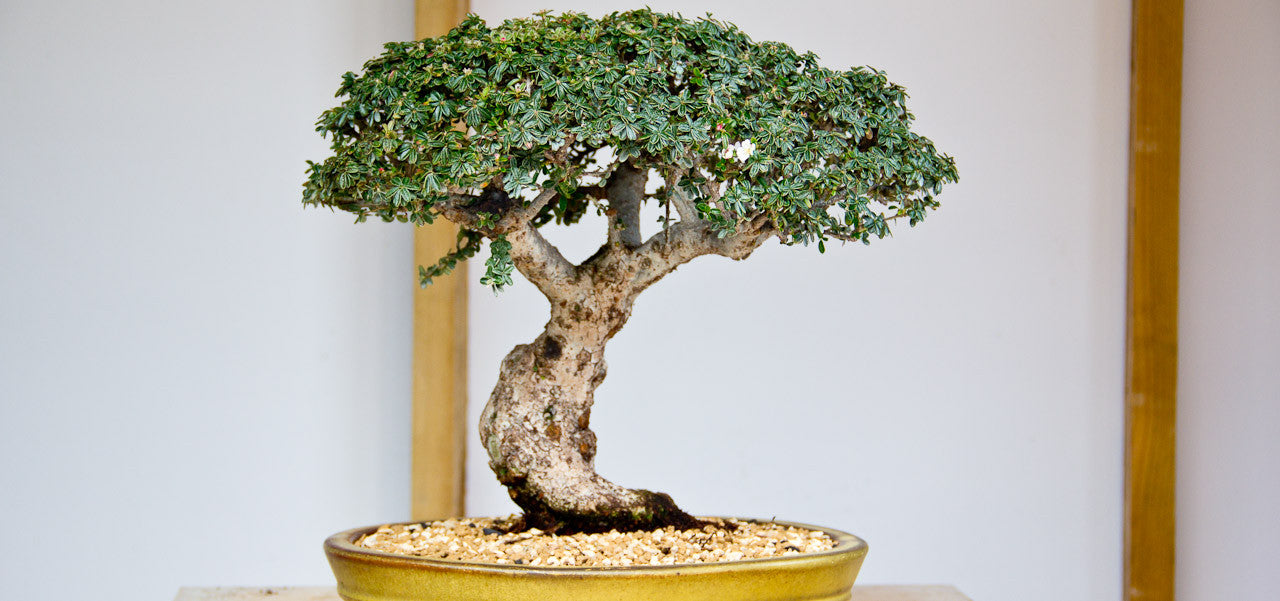
After completing the repotting process, which you can read more about in these previous blogs, the planting has been enhanced. Of course as the pot is shallower it makes the trunk appear even thicker, but there is visually better balance. The aged appearance of the pot works well with the gnarled trunk and compliments the green of the leaves. The reduced volume of growing space afforded to the tree in the new pot will result in slower development however as I am using a mix consisting largely of akadama this will allow me to use much more of the available volume in the container (remember that Akadama is the only medium which roots can fully penetrate). Although there are some areas of the tree which need further refinement, it is now preferable that this takes place at a more controllable pace, seeing as I have many other trees plus many other demands on my time!
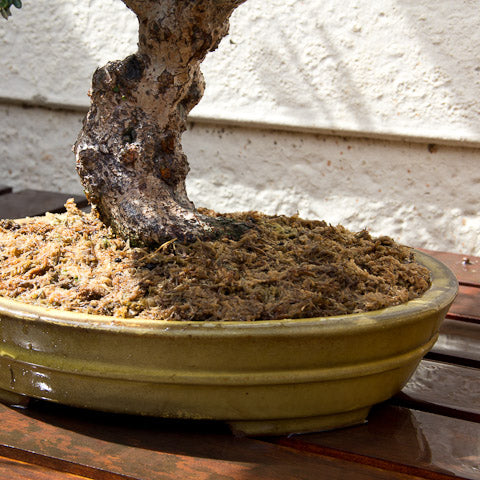
Image caption. In order to retard drying of the surface of the pot I have used sphagnum moss. This will encourage rooting at the surface, these roots then moving down into the pot.
Mulching
Its easy to forget that because our bonsai live in very small containers the space in which their roots can develop is very restricted. This is reduced even further should you be using a largely inorganic growing medium such as stone, leca and other hard components. So it is important to encourage roots near the surface of the planting. Should you fail to do this, roots will simply delve into the soil to get down to the moisture in the lower parts of the pot. To accomplish good surface rooting should use a mulch or moss or other medium which can increase the level of moisture at the surface. What also works very well are large pieces of broken unglazed clay pots scattered around the surface! This should be kept in place for a period of time, to allow the surface roots to develop and then to grow down into the pot. You can at that time begin to remove the mulch or medium you were using.
7 Responses


Leave a comment
Comments will be approved before showing up.

Rick basra
May 14, 2018
Thankyou ..