Your Cart is Empty


How to repot your bonsai
In previous blogs I wrote about the background of repotting bonsai trees. In this post we will go through the practical steps.

Image Caption. The tree I will repot and use as reference is a chinese maple in need of repotting. This maples roots are pushing the tree out of its pot. Its best to repot the tree before the situation gets worse.
Before starting you should prepare your chosen container, your growing medium and have all the tools you are likely to need at hand so that once the trees roots have been exposed you are able to work rapidly and get them covered again - dry roots are dead roots. I would also suggest that you allow the tree to dry out a little more than usual as this makes removing the old soil from the tree easier, and with less potential damage to the roots.
You will need:
- A sickle to cut the old roots away from the edge of pot to enable you to remove the tree (this is an especially useful tool if you have a pot which balloons outwards). If no sickle is available then use an old knife.
- Root hook and rake to help comb out the roots.
- Sharpened pair of scissors for cutting the roots. This pair of scissors should not also be used for cutting branches as their cutting edge will be damaged.
- For larger roots a root cutter is a very useful tool to have.
- Ice pick or sharpened screwdriver, to loosen compacted root ball.
- A spray bottle with water for keeping the roots moist while working on the tree.
- Chopsticks or some other blunt implements for working the new growing medium into the roots.
- Enough prepared growing medium for the repotting job at hand and a soil scoop or similar tool to assist you transferring your medium to the bonsai pot. The medium is best used dry. Don't use a wet mix as it makes it difficult to get it in between roots without damaging them.
- A suitable pot with the drainage holes prepared with drainage mesh wired into position.
- Wire for securing the tree into the pot. Some rubber hose or pieces of an old tyre inner tube is useful for protecting the roots which the wire makes contact with.
Some growers like to submerge their newly repotted trees for a few minutes in a tub of water with something like Superthrive or other cocktail intended to help the tree cope the stress. The purpose of submerging is to make sure there are no air pockets in the mix. This may work for some mixes but for other the media may float. In general if you have done a decent job of working media into the root zone you should not need to do anything more than a thorough watering. If using the latter method then you need to water until the water running from the drainage holes is clear.
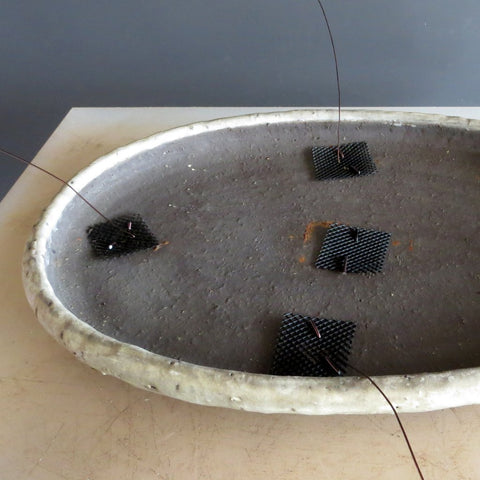
Image Caption. The pot we are planting into, prepared with drainage mesh to prevent loss of medium through the drainage holes, and wire for securing the tree into the container. I use aluminium wire for this but you could use galvanized wire, however the latter will only be functional for one season as it will rust rather quickly - although by then the tree should be securely anchored by its own roots in the pot.
If it's a sunny day it is best to work in the shade as this will slow down the drying of the roots after they become exposed. After you have prepared all the tools described above, cut the wire keeping the tree in the pot from the last time it was repotted.
Carefully lift the tree from the pot. Use the sickle or an old knife to cut away the roots at the edge of the pot if necessary. Pots with an undercut, from a lip, present the biggest challenge and you may need to spend considerable time in cutting away the roots which will prevent the tree from being lifted.
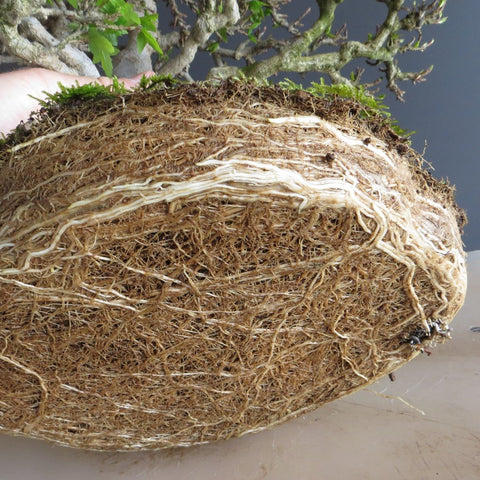
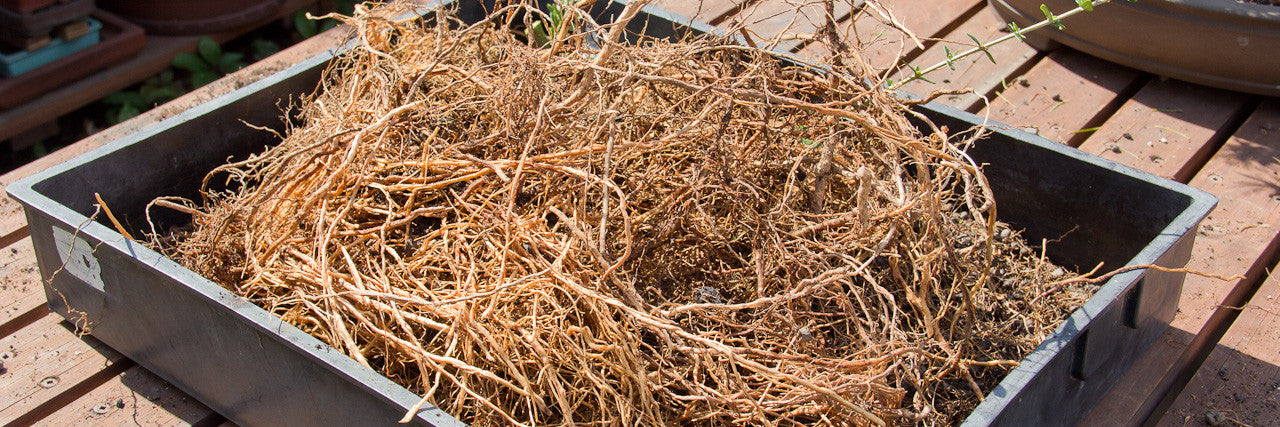
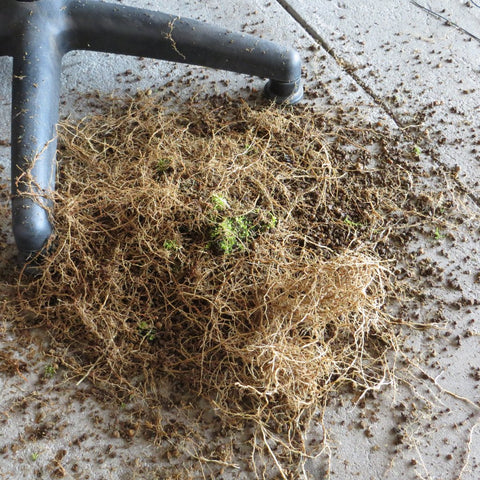
Image Caption. Lots of roots! This amount of root growth is typical of strong growing species such as maples, planted in a suitable growing medium.
Place the tree onto a flat surface and begin to comb out the roots at the edge of the root ball. Perform this gently so as to limit the damage done to the roots. Trim the root ball by around 30%, cutting back any thicker roots you encounter with a root cutter.
Tilt the tree so you can repeat the process under the root ball. It is very important to remove any thick downward growing roots also as you want to encourage lateral growing roots as much as possible.
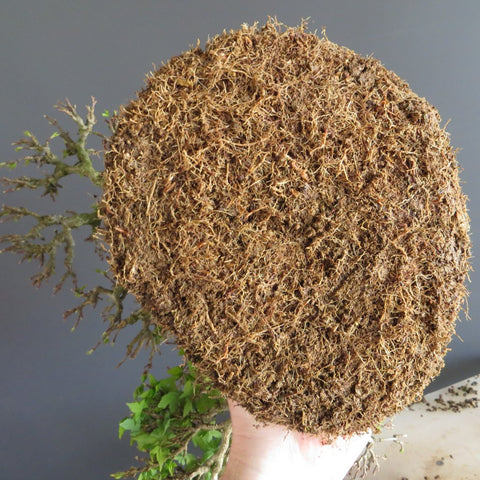
Image Caption. Trim the roots after you have gently combed them out. Eliminate any strong downward growing roots using a root cutter so the bottom of the root ball is level as depicted in the image.
Using the pick push gently into the root ball to loosen it. Start from the edge of the root ball and work your way closer to the trunk. Never forcefully jab the pick into the root ball as you may pierce a root. This step is very important because as the root ball becomes denser upon each repot the area next to the trunk will become more and more solid, preventing water penetration as well as oxygen. Slowly the roots in this area will die and only roots in the more free draining are will remain - which is no good as then all the healthy roots are at the extent of the root ball with the inner area being devoid of roots.
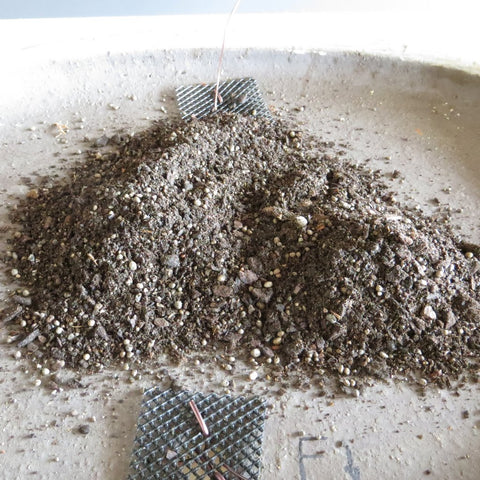
Image Caption. After completing this pruning the roots throw some growing medium into your pot to create a slight mound in the middle.
Now is a great time to do some root grafts if your roots or "nebari" needs improvement (which it almost always does). I always use the occasion of repotting to improve the roots at the same time as its the only time when they are exposed like this.
As this is a Trident Maple, they tend to like a more water retentive mix, and with an old tree like this where you don't want a lot of growth a wet mix will slow growth down. So you will notice that the particles are rather on the fine side. If this were a juniper or pine for instance I would not want any of those fines as this will impede drainage. If using an akadama and pumice mix I would recommend a 2:1 ratio for a deciduous tree. If its a small tree such as a shohin then it would be best to use exclusively akadama in the fine particle size. For conifers a standard mix would be 1:1.
Place the tree onto the mounded growing medium and gently move backwards and forwards to make sure there are no gaps underneath the root ball. Contrary to what I was taught, it is not a good idea to position the tree towards the back of the container as this leads to a weaker root zone in this area and will lead to a stronger front. In tray or forest type containers when potting a windswept or other style, the tree is often potted to one side so as to promote or enhance movement.
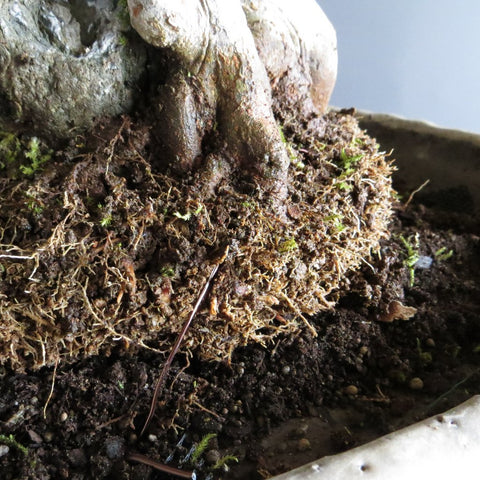
Image Caption. Secure your tree into the pot using the wire which you prepared earlier.
Its a good idea to stand back repeatedly to check the position and angle of the tree and make small adjustments before wiring the tree into the pot. (Working on a level surface is also important. So check your surface if necessary with a spirit level)
I cannot stress enough the importance of wiring the tree into the pot. When the tree has just been repotted it will begin issuing tender new roots. If the tree is disturbed by the wind or other force, there is a chance these very fragile roots will simply break. By then the tree might have exhausted its reserves and it will either be set back seriously or even worse, it may die. If the tree has a reasonably large canopy already, the first winds will simply pop it out the pot. Unless you notice this in time the roots may have dried out completely by the time you are able to get them covered and moistened again.
The final planting height should also be such that the base of the tree is slightly above the rim of the pot, but never below it. Bear in mind also that the whole planting is likely to sink a little once watered and given time to settle. Throw more growing medium into the container and gently work it into the root ball and around it using a blunt implement such as a chopstick. Keep adding more growing medium until you have filled the pot.
If using a tub with water you can now submerge the tree into it. However if you are using LECA, Groperl or other lightweight mediums you will not be able to do this, you will need to use an overhead spray. Water softly until water runs clear out the drainage holes.
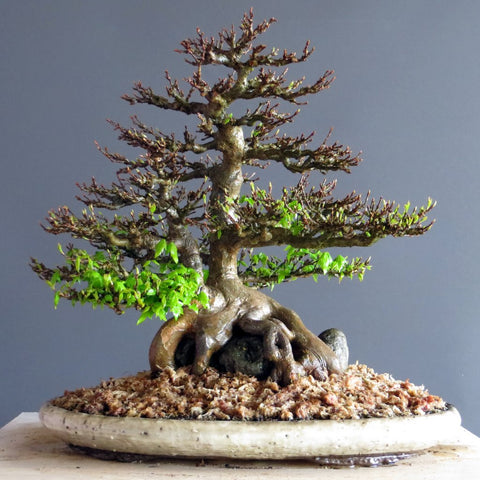
Image Caption. The example maple repotted into an old Japanese Shuho pot. The surface is covered in New Zealand sphagnum moss which will keep the new surface roots in the shallow pot from drying out in summer.
Aftercare of recently potted trees should also be considered. It is advisable not to place the tree into direct sun just yet. Dappled shade is best for the first couple weeks, moving the tree into increasingly more sunlight as the weeks pass. You will notice new growth on the tree and then over a few weeks you can move into more sun.
Possibly more important than sheltering the tree from too much sun is protecting it from wind, which can rapidly dry the tree and the fresh and weak spring leaves out as there are insufficient roots to transport water lost through evaporation fast enough.
When the tree begins showing signs of growth you can begin applying light doses of fertilizer. If using BonsaiBoost you can begin with one bag or so, depending on the size of the tree and increase this gradually.
12 Responses


Leave a comment
Comments will be approved before showing up.

Vaughn
September 29, 2017
Great article Terry. Thanks very much.