Your Cart is Empty


How to hide large scars quickly
When creating bonsai trees, scars are almost inevitable. Whenever possible it is best to make these scars to the back of the tree so they cannot be seen. If they are visible from the front, encouraging them to heal over is of course a strategy but sometimes this can be rather challenging for the following reasons:
- The cut is particularly large.
- The species of tree has trouble forming callous over the cut.
This post presents a simple solution that address both of these but can only be used on species which forms a heavily plated or coarse bark.
The subject
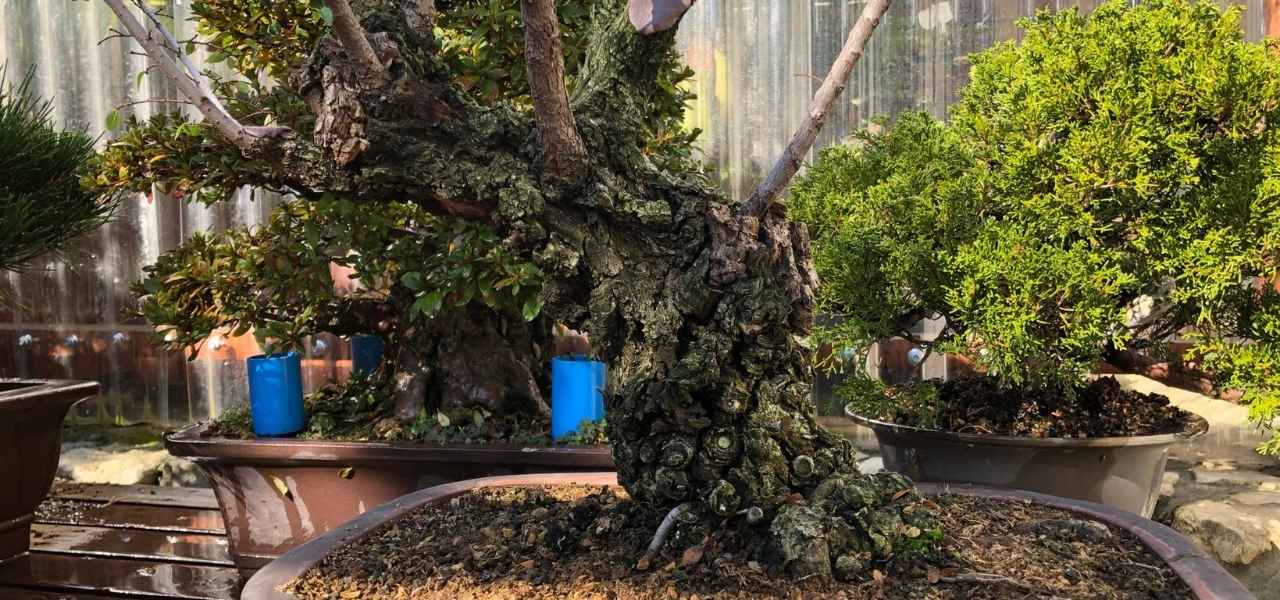
For demonstration purposes I will use a Cork bark elm I purchased from Stone Lantern Bonsai in Joostenberg a couple years ago. Originally field grown by Stephen le Roux, he typically leaves multiple branches in order for the person who buys this stock to be able to choose which to cut and which to keep. This does however mean that you will create some large cuts when removing some of these unwanted limbs.
The problem
The drawback with this species and other species which produces thick bark such as the Acacia, is that when a large cut is made it is either never going to properly heal over and take on the characteristic cork bark surrounding the cut, or it will at the very least take a very long time.
Large, visible scars like this are not pleasing to the eye; not while the tree is in training and of course completely unacceptable for a tree on display.

The Solution
There is a really simple solution; hide it.
Lets be clear, this is not first prize. That would be for the scar to heal completely naturally. However what we are planning on doing will not hinder callousing and perhaps one day our "patch job" can be removed or will fall off and we find we don't need it any more.
The Process
Quite simply, we will use pieces of bark from the same species, although not necessarily collected from the same tree to conceal the scar below.
Step 1

Before starting, it is a good idea to ensure the cut has been properly prepared and sealed with a good, waterproof sealer such as Top Jin Paste, so that you have a sound surface onto which to attach your pieces of bark, but also so that your tree can continue healing naturally, behind the concealment we are going to fabricate.
Step 2

You should then collect some suitable pieces of bark, ideally more than what you think you will need so you have plenty of choice. A variety of sizes is great. Precise colour is not critical as it will age to the same as the surrounding bark as it is exposed to the same elements it is.
Step 3

You then can decide what to use as your adhesive. I used an epoxy putty which hardens like stone for this application but in the past on an Acacia I performed the same operation on, I used a bonsai cut sealer. The sealer has the added advantage that the colour is a little more camouflaged and it is flexible. You could probably use superglue too, but this has no gap filling properties so I think you might find the bark pieces will fall off easier.

Step 4
Try to remove any loose debris like dust or sand from the rear of the bark piece you plan on attaching, as well as from the surface you plan on attaching it to.
Step 5

Play around with different pieces of bark, placing them at different angles but you should mimic the direction of lay of the natural bark on the tree.
Step 6

Apply some of your adhesive to the back surface of the bark, and if necessary, to the scar. Attach the bark firmly but carefully so as not to damage the bark plates. Add further pieces of bark so that the entire scar is covered.
Step 7

Repeat the process until all scars you have on the tree are concealed. You can now allow the adhesive to dry completely after which you can treat the tree as normal. In time the colour of the bark will blend perfectly with the surrounding bark and you will actually forget the concealment is there.
Simple and fast. Now you can go back to designing your tree and not worry about scars distracting the viewer.
Leave a comment
Comments will be approved before showing up.
