


Orchids


My first Acacia bonsai tree
Overview
I was looking over my posts recently for ideas of what I could write about for a new post and it occurred to me that I have never shared with you the progression of my very first Acacia. The only post on Acacia that I have previously written was of a customer's tree and how I restyled it (You can read that here). Progressions are always fun as they remind the reader that all bonsai had a beginning, often a very humble one. Describing the process which the artist followed provides very valuable insights and sometimes the reader can learn something new which they can then in turn apply to a tree they are currently styling.
Background
There are many acacia subspecies available in South Africa and in fact across the world. The genus is so readily available that it could easily be the most grown as a bonsai.
I am actually meant to refer to this species now as Senegalia and not Acacia due to some crazy fandanglry by the Australians at the 17th International Botanical Congress, held in Melbourne in 2011. However as I am sure more of us know these trees as Acacia I will for the purposes of this article refer to them as such.
There are indeed many qualities about them which make them very suited to new and experienced growers alike. Here are a few which come to mind:
- Easy and quick to grow from seed. (You can buy seeds here)
- Forms rough textured bark quickly.
- Naturally has small leaves.
- Easy to wire - if you don't mind thorns, or cut them off first.
- Does not have a very strong root system so frequent potting not really necessary.
- Iconic tree in the South African landscape so will provide that "Wow!" factor for anyone's collection.
This particular tree was purchased as a large bag tree from a retail nursery in Cape Town which was at the time near my place of work. I still remember clearly arriving one day with a saw, first paying for the tree and then proceeding to saw the trunk to almost a stump, right in front of the staff, mouths agape!
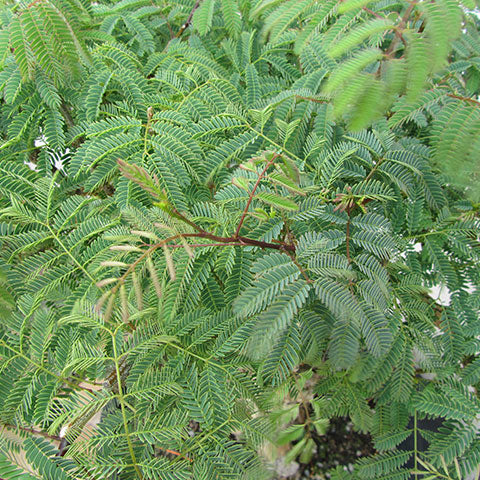
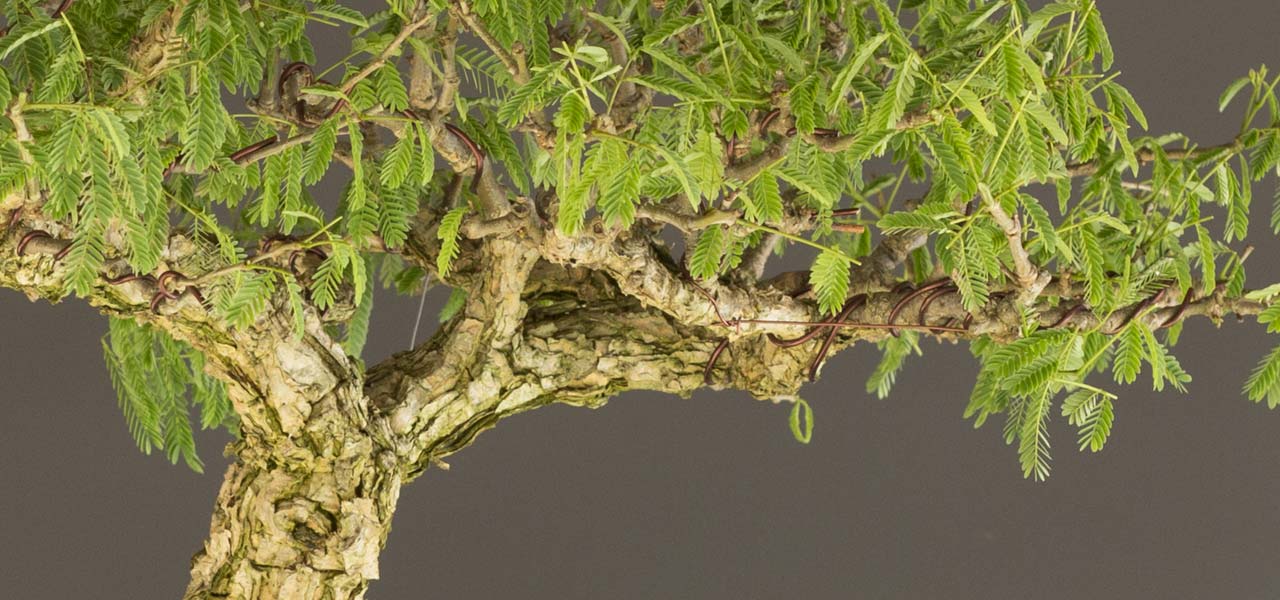
Image caption. The small leaves of the Acacia species.
It is difficult to estimate the age of the tree as I did not grow it myself from seed so I can only guess. I purchased it in a 25L (perhaps larger) bag in 2005 I believe. At that time it was perhaps 2.5 - 3m tall. It probably was no more than 10 years old; 13 years have passed so it could be around 23 years old perhaps a little older. Age however is of little concern to me to be honest, what is more important is how old it appears. The appearance of a mature tree leaves us with a much more lingering emotion of awe than a young one.
The design
There are several styles suited to the Acacia and there are some which are not. It is always good to understand the natural growing habits of the species you are working with when determining how you wish to style it as working with the tree rather than against it is a much easier task than the latter.
Having met the wonderful man before he sadly passed away, Charles Ceronio, and read his book, "Bonsai Styles of the World," I was keen to attempt styling this tree in what he terms; "African Styles." More specifically I was keen on the "Pierneef Style." Charles, in his book describes this style as being made up of superb trees with semi circular crowns which appear much like that of an open umbrella. He furthermore states that within the Pierneef Style you might have informal, slanting, twin trunk and many other, more classically styled trees. Lastly he writes that the Pierneef concept was developed specifically with the Acacia thorn tree in mind, although of course you may use other species to suggest the same shape. (In my opinion every bonsai grower should have this book as it is a valuable resource of information of not only African styles but most if not all the international styles too.)
Having thus considered the raw material I had, I decided to try creating an informal Pierneef. I did not grow up surrounded with wild trees in this style, although we as a family made annual trips to the then Transvaal (Gauteng today) and sometimes the Kruger National Park. So much of the reference material I used was from books and photographs.
Creating the tree
As I mentioned earlier, I purchased the tree, as many of us do, from a retail nursery. I was attracted to the thickness of the trunk and to the coarse bark. The roots, as is often the case with this species, were not great and I had to decide then whether it was something I could or could not live with as it would be too late to remedy them. If you are growing acacia from seed, I would strongly suggest that the taproot be removed as soon as possible and any feeder roots be carefully arranged so as to promote more pleasing surface roots when the tree is older.
A quick comment about buying raw material. Please think before you buy. When someone asks me to help them styling a stock tree they bought, most often my first question to them is why they bought it. Generally they don't know. If you cannot see a future in the tree at the nursery don't simply buy it because it was the only one, it was cheap, someone told you to buy it or because it will now complete your collection of that species. It must talk to you.
The process of cutting the trunk left a fairly sizeable scar. After some years of developing the tree, the callous had begun to roll over the scar but this was happening far too slowly. So, I came up with a rather sneaky solution! Occasionally some of the bark will drop from the tree, or you can break some off (Don't worry, it will quickly form again). I saved the pieces, then using adhesive I glued these pieces of bark over the scar. It is now completely invisible and the tree is clearly improved. If you morally object to this, tough. And in the words of Lionel Theron of Bishopsford Bonsai; "Look away."

Image caption. The main trunk chop left a large scar which after several years had not healed much.
After cutting the trunk I needed to develop a new trunkline which gently tapered from the stump. After the initial chop was made, many shoots developed in that area and I selected the strongest one. It was allowed to grow for several seasons, uncut, in order to thicken. When I was content that the new continuation of the trunk was thick enough I cut that back too, setting the tree up for the main branch formation.
Charles describes the bones or framework of trees in the Pierneef style as normally forking into two, three or five main branches but with three being the recommended number. I created mine from two branches and in retrospect I wish I had used three as it would have been much easier to create depth in the canopy.
Initially I used a plastic tub to develop the tree, although were I to repeat this exercise I would have made a wooden crate for it (Watch this video I made on how to make a simple wooden crate). Never be in too much of a rush to get your tree into a bonsai container. Once a tree is potted into a small container the growth is dramatically reduced and if you are still in the initial stages of styling the tree ie. creating a thicker trunk, developing your main branches, promoting growth to heal scars and such, then you will be doing yourself a disservice by placing it into a restrictive container too early.
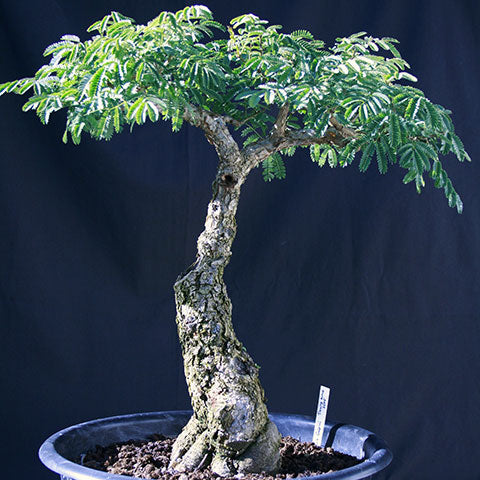
Image caption. The tree as it appeared in 2008.
Branch styling is not unlike that of most other deciduous trees; the main branch would divide into secondary branches which in turn subdivide into tertiary and finally the twiggy growth where the leaves are to be found. However, compare the styling of these branches to those of the classical broom style and you will find that the Pierneef style has a more zigzag appearance with larger branch angles where the broom style has very much more acute branch angles, like that of a tight V shape.
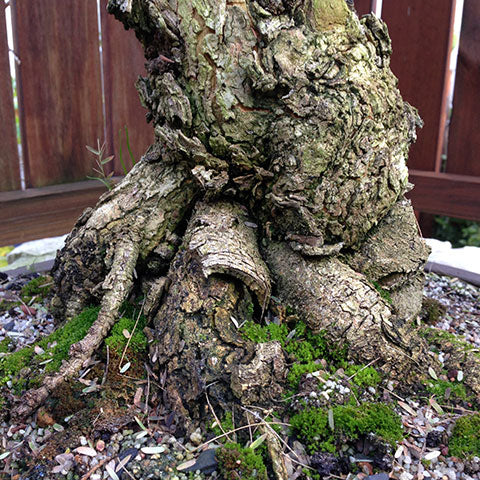
Image caption. The fairly ugly surface roots of the tree.
Tree Care
From my limited experience I can share the following tips on growing this species as a bonsai tree:
Sun exposure
Unlike in nature, acacia bonsai do not appreciate full sun for the entire day. You will find they will close their leaves fairly quickly when they've had enough. So I grow mine under a little shade cloth.
Water requirements
They are not heavy drinkers, ha ha. I find the growing medium does not dry out with this species as quick as it does with others. This means they are not losing as much moisture through their leaves as some species. Adjust your watering accordingly as they do not like wet feet and you will likely cause the roots to rot if you over-water them. As always, use a fine spray so as to disturb the surface of your growing media as little as possible. (My imported Japanese watering can is ideal for this, or the hose attachment. See them here.)
Defoliation
If you want to encourage fine twigs and slightly smaller leaves then you can defoliate this species the same as you would others. To defoliate you cut the stalk off, not the individual leaflets. Whether you cut it near the base of the stalk or further along does not matter as in no time the tree will drop whatever remains. I cut as close to the first leaflets as possible with the thinking that the sap in the stalk will recede, going back into the tree and will only help to produce new, healthy foliage. Using a fine, trimming scissors makes the task of defoliation much easier. If you have many of these trees then using a spring loaded scissors would save your hand.
Pruning
When pruning I do not cut all the way to the bud which I want to develop into a branch. Instead I leave a fairly sizeable stub which dies back. Once the new branch has developed a fair ways you can clean up these stubs. Once again I think this allowing the cut to die back might have something to do with the energy needed and available for the dormant bud you're trying to activate. You may find that if you cut right back to the dormant bud, the branch will die back further than that point.
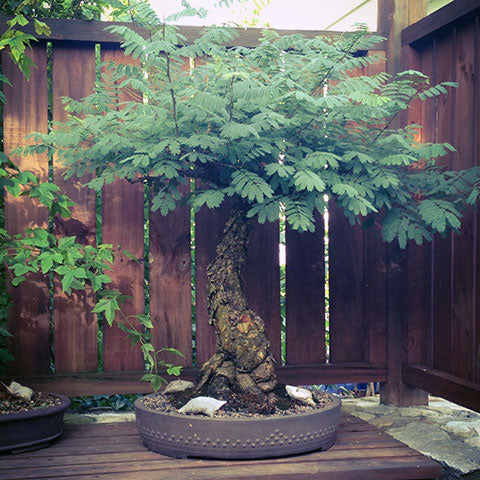
Image caption. When developing a tree always allow branches to grow beyond the outline of the tree before cutting back. It allows the tree to build up strength and once cut you will be rewarded by back-budding and a more ramified tree in the long term.
Depending on the size of the cut needed I will either saw the branch first or use a root cutter, leaving a stub as described above. When it comes time to removing the stub then you can use a concave branch cutter, knob cutter or if the area is quite tight you can use a narrow branch cutter.
Sealing cuts
As with all trees that come to mind now, I seal all branch cuts made. This is both to reduce the risk of the tree getting infected and also to help reduce the amount of dieback.
When making large trunk chops, as I did, a good sealer is especially important as the wounded and thus exposed area of live tissue is great. However in my experience large cuts such as these do not readily heal over, but there are techniques for dealing with large scars. My "cover-up" being just one of them.
Smaller cuts, marker pen size (smaller and larger) heal easily and sealing them with the correct sealer will aid the callous formation. I especially like the Japanese cut paste as the viscosity and elongated and pointed applicator makes it very easy to apply.
Whenever cuts are made, callous is formed as a result of sapflow. Sap is required along the length of the branch or trunk. So it stands to reason that if there is no elongation of the live wood there will be no callous formation. This is yet another reason why putting a developing tree into a small container too early is rather counter-productive, as growth is reduced and therefore scars heal slower - if at all.
Wiring
I would not recommend the use of copper wire as the flaky bark of these trees could easily be rubbed off with copper, unless you take precautions to protect it first. My preference when working on these trees is to use anodized aluminium. Branches set relatively quickly into position, but once again, there must be growth in order for this to take place. I will usually defoliate the tree in late spring and then wire at the same time. Doing both tasks simultaneously makes the wiring much easier as you don't have leaves constantly getting in the way. Furthermore the initial spring push is passed and so wire can remain on the portions of the tree it is applied to for longer without biting in.
If you overlook some wire and it does bite in, due to the fact that this tree readily forms coarse bark on older wood it is likely that most wire bite will be hidden by the bark in time.

Image caption. This photo was taken of a different tree but the same technique of wire stays can be used on Acacia too.
If you need to alter the angle or shape of thicker branches I have found that it is easier to use wire stays instead of trying to apply very thick aluminium wire and then bending it. As the stay is not in direct contact with the live wood it can remain there for much longer. Just make sure you wire the anchor points fairly loosely so there is room for the wood to expand in, or you will need to remove the stay and wire and redo it.
Fertilizing
My acacia gets organic fertilizer the same as the rest of my trees. I use Bonsai Boost, 4 or 5 sachet on this tree and replace the sachets monthly. When I spray with my monthly preventative treatment of Plantcare and SK ECO Oil I also combine either Seagro or Sea Secret in the same mix and foliar feed. Be careful of feeding with fertilizers which are very high in nitrogen and which release their nitrogen very quickly. This will give rise to very long internodes (the distance between two buds on a branch) and will make achieving a highly ramified tree rather challenging.
As always, Autumn is a very important time for feeding. This is as these nutrients are stored by the tree and aid the spring growth. Feeding in spring actually may result or give rise to excessively long internodes which you will most likely need to remove if you want to create a ramified tree. This means wasted energy and time in the development of your tree. Read more about the Art of Fertilizing
I don't use chemical fertilizers on any of my trees. That said, there is a place for them and they can be of great use, especially during the early development phases of the tree. The All-for-1 pellet system is very easy to use and fits neatly into our Japanese, imported fertilizer baskets. However you need to practice caution as it is rather easy to burn the roots of a bonsai by applying too much chemical fertilizer. This is not the case with organic fertilizers.
Pest Resistance
I cannot remember ever having a pest on this tree. This is good news for the new bonsai artist. However, when in the past I used a more organically rich growing medium I would find white grubs in the mix when the tree was repotted. Plantcare will take care of these however, you don't want them eating the roots.
Container Selection
Due to the weak root system (in a container) it is better to use a deeper container for this species. You can use glazed or unglazed containers however my personal preference is unglazed as I believe it enhances the story of the tree better with the earthy tones of the clay. However a container in a glaze colour complementary to the leaves might be more lively and less serene.
Because of the rounded shape of the canopy I would stay away from a rectangular container. Round and oval containers would compliment the canopy best and are the most commonly used shapes from what I have seen of other artists too.
Read this interesting, in-depth article on container selection which I have written.
Conclusion
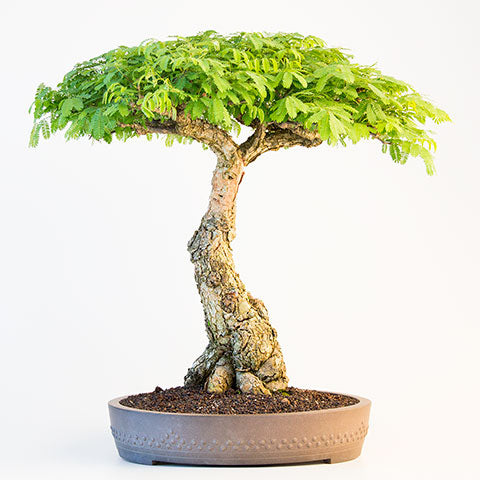
Image caption. This photo was taken in 2016 and represents the realization of what I had in mind for it.
There are many great resources available with more information on this really great species, one of them being the great local site plantzafrica.com. The above information is based on my personal experiences and as I do not profess to be an Acacia expert you may differ with me or have other experiences. If so you are welcome to leave a message in the comments section below.
Gallery
I'd love to feature other artists trees here. If you have an award winning Acacia bonsai in the Pierneef Style please send me a recent photograph, preferably with a plain background so I can feature it in this gallery. You can email the photo to info(at)bonsaitree.co.za
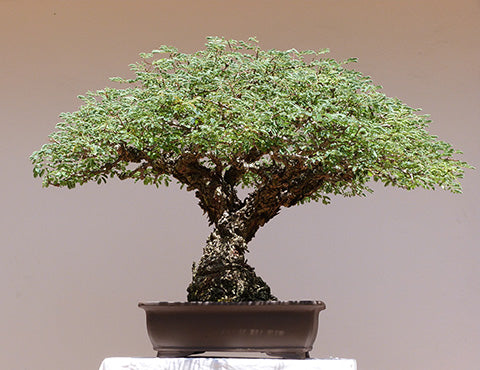
Image caption. A stunning Acacia in the Pierneef Style by Freddie Bisschoff.
Leave a comment
Comments will be approved before showing up.
