Your Cart is Empty


How to dig bonsai material
Growing your own material for use as bonsai can be extremely rewarding. I've written a number of articles on the subject of field growing and if you have not yet read them I would encourage you to do so now, before continuing with this article. Alternatively you might like to view some videos I have done on the topic on my YouTube channel.
This post is applicable to readers who have either developed some material which is now ready for collection, or those who have identified a tree growing in a neighbor's garden or elsewhere that they wish to collect.
It is also important to note that the following content is relevant only to deciduous trees.
Timing
Seasonally the best time to collect will be around the same time you would usually repot that species and generally for deciduous trees this is early Spring. Due to global warming, or whatever you wish to blame the shifting seasons on, I prefer to look at what the tree is doing rather than base my actions on a calendar. Therefore if you notice buds swelling this is a good indication the tree is ready to be dug.
Aside from the when in terms of season; you also need to determine whether the tree is ready to be dug in respect to its development. Field growing a tree is the best way to rapidly develop trunk girth and taper. Once lifted and planted into a containerized environment this development dramatically slows down. Therefore it stands to reason you should only dig the tree from the ground when you are satisfied it meets your objectives in this respect. If not, let it continue to grow for another season and check again.
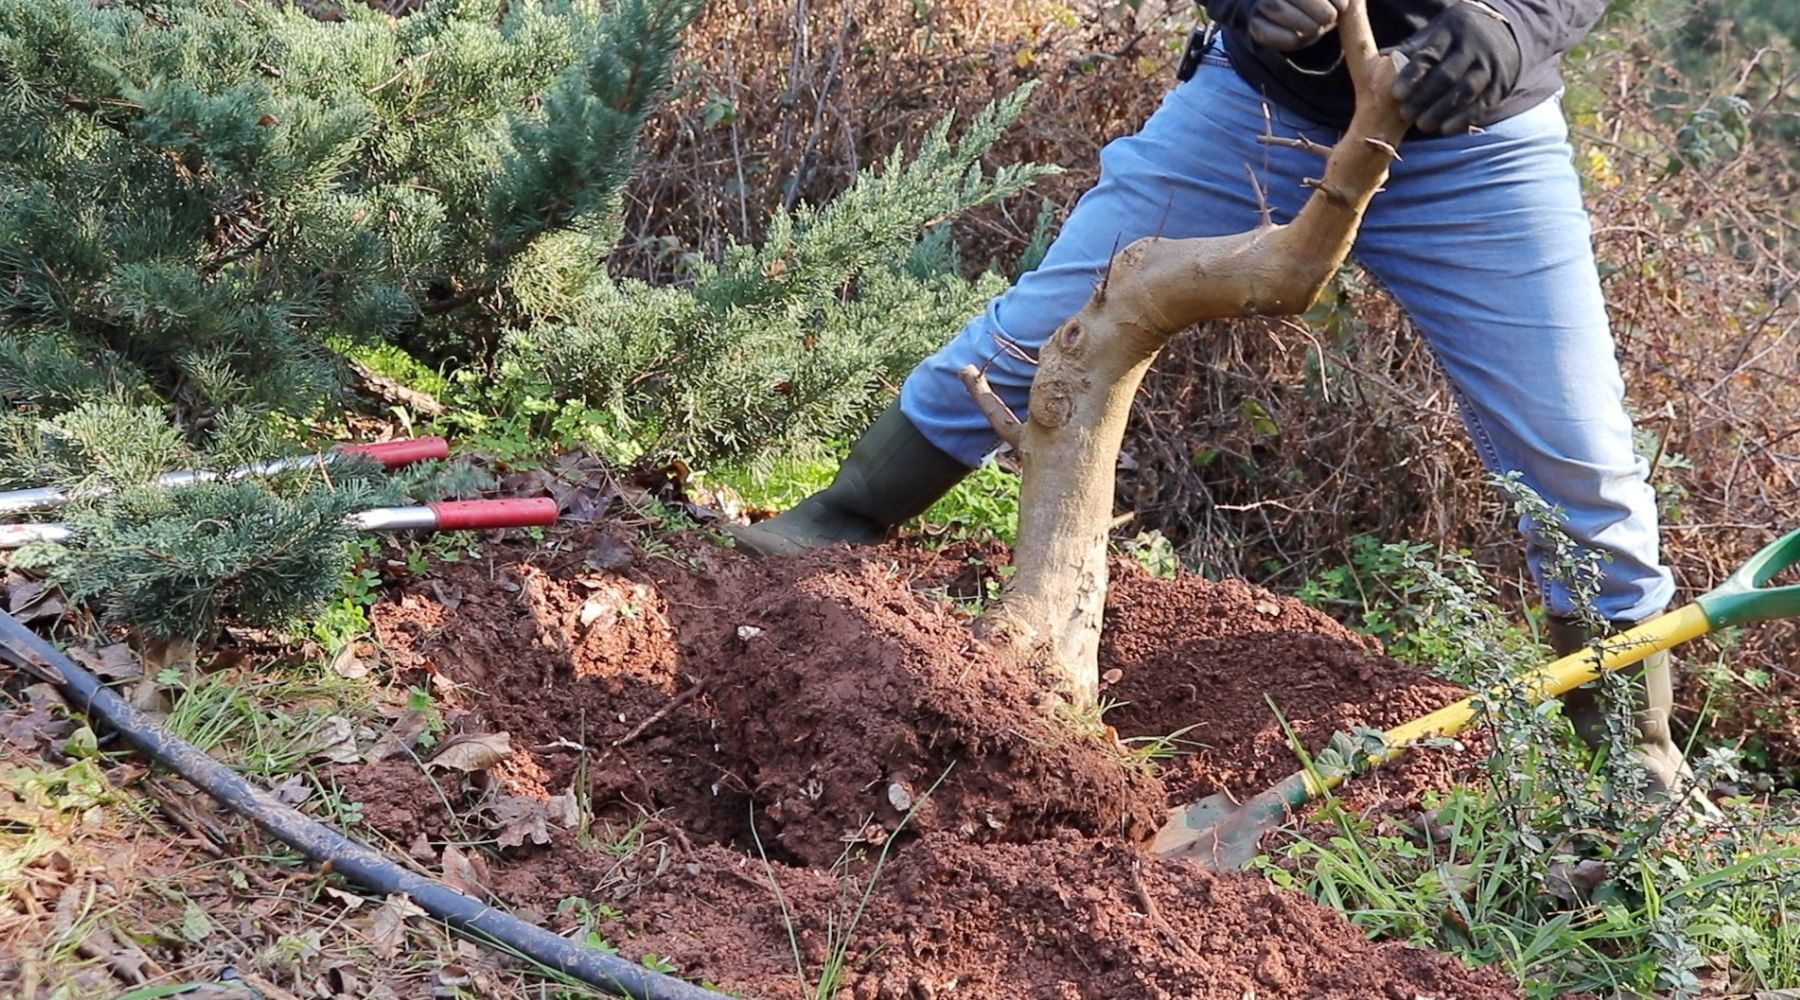
How to dig it
Some basic tools will be required for the task, and they include a spade and a lopper. If the ground is very hard then a pick would help too.
Start by digging a narrow trench around the tree. The trench should be far enough away from the base of the tree that you don't damage any roots immediately adjacent to the trunk. Bear in mind that cutting the roots in the field will be done quite coarsely and you will want to repeat this step when the tree is back at your workshop using sharp tools, so allow a little more length to the roots when cutting in the field knowing you will further reduce them later.

After digging the trench use your spade to dig an undercut below the tree root ball. When you encounter roots either sever them with the spade or preferably with the lopper, which will do a much cleaner job of the cut.
By now you should be able to lift the tree from the hole. As it is unlikely there will be many feeder or fine roots attached I usually try to knock off most of the field soil so there is less mess at home. If its a long drive home or the weather is warm and dry consider wrapping the root ball with a wet towel or use some other means to keep them moist till you get there.
Preparing the roots
I like to use a pressure washer to remove all the field soil. It is unnecessary to keep any field soil on deciduous trees and in fact keeping this soil in place is likely to be detrimental to the development of new roots once the tree is containerized.

After thoroughly cleaning the roots, soak the tree for at least 24hrs in a container filled with a solution of water and dissolved Disprin (which contains Salicylic acid). This treatment helps to saturate the tree with water and to deal with the stress of the collection procedure.
Working the roots
After soaking, use root cutters to recut the roots. If you have particularly large roots to cut then a sabre saw could be very handy too.

Wherever possible cut the roots so the cut faces down; not up and not flat. Cut any downward growing roots as well as these present a challenge for planting trees in shallower containers. You can apply rooting hormone if you wish, I usually don't in the case of Chinese maples and other easy to root species but it can only be a positive measure, certainly for less vigorous rooters.

The development container
Size
Don't make the mistake thinking that a large container will lead to enhanced development. In fact just the opposite is true. As the tree has little root system at this time, until such time as it has had an opportunity to recover and grow new roots the challenge will be to balance the amount of water you provide and the amount of oxygen in the growing media. As the growing medium will remain wet for much longer now oxygen is reduced and the growth of new roots is retarded.
Rather use a container only slightly larger than the actual size of the tree and its roots for the next two years. After that you can pot it up if you wish to accelerate growth and need for root for the roots to develop in.
Material
If you have a suitably sized unglazed ceramic container then you can use that. Ideally use a ceramic container specifically produced for developing bonsai trees, as it has been fired at a temperature which allows more rapid water evaporation.
Should you not have a suitable clay container then the best substitute is wood as it allows you to quickly fabricate a perfectly sized box to suit the tree. The thermal qualities and other important characteristics of wood are also conducive to developing trees in. Don't be paranoid about the type of wood, use whatever you have as the box only needs to last a couple years at most.
Plastic tubs are used by some. I do not recommend them as they are usually not designed to be exposed to the sun 24/7, certainly not the South African sun, they become brittle, fall apart in no time and end up on the rubbish dump. They flex too easily so any movement of the tree results in disturbance in the root ball, and there is no temperature buffering between the cold of night and heat of the day.
Growing medium
I do not wish to be prescriptive in this area as depending on where you are in the world you may or may not have access to certain components. Personally I like to use a growing medium with a high percentage of pumice (hyuga) with some akadama added for a bit of water retention. If you cannot get pumice you might consider hydroballs or LECA (fired clay granules normally used in hydroponics), crushed stone, or lava stone. Essentially you want a material which will not hold too much water and will not compact.
The particle size of the growing medium is also important. Generally I would say the larger the tree, the larger the particle size. For most trees the typical enthusiast will encounter, a 4 - 6mm particle should be just fine.
Planting your tree
With your container prepared with drainage mesh and tie down wires, and your growing medium mixed and on hand you are now ready to plant your tree.
Mound growing medium in the container and rest the tree on it. Check the levels and move the tree to settle it. Ensure the tree is in the center of the container to allow even space for roots develop all around the tree. Additionally the base of the tree should be level with the rim of the container, not above it like it were perched on an island. This makes watering easier.

Secure the tree with the wire tie downs using a pair of pliers and fill the container with the remainder of your media "chop sticking" it into the voids as you go.
Move the planting outside and water thoroughly to wash all dust from the system.
Aftercare
Keep the planting in a shaded environment protected from the wind. Monitor your watering and only water when the media is beginning to dry out, not before. There is no need to fertilize immediately. When leaves have developed you can lightly foliar feed. I like to use Kelpak monthly during this first year as it contains auxin and cytokinins being an extract of kelp (seaweed) which helps the plant acclimatize to the container environment and stimulates root and foliar development.
Allow your tree to develop for at least one full growing season, but preferably two, before repotting the tree into a ceramic container for further development as a bonsai.
Video
Leave a comment
Comments will be approved before showing up.
