Your Cart is Empty


Two Needle Pines from Seed: Early Years
The following article follows from a video which I did with Mark Polson about growing pines from seed. I extracted the key points from the video, which you can watch at the end of the article and embellished on the content. You can also read this article which will provide more detail on the earliest stages of development.
Choice of container
The type and size of container you choose to develop your pines in has a major influence on the resulting growth you get. Below are the most used frequently containers you will most likely select from:
- plastic pot
- colander
- clay containers
Plastic pots
Advantages
They are the cheapest option, easy to find, in fact you most likely have several on hand around the garden. Available in many different sizes, you need to use a size which is appropriate to the age of the tree and not be tempted into thinking that a large container will result in faster growth as in reality you are more likely to overwater your pines which will in fact retard the growth and possibly lead to fungal problems in the root system.

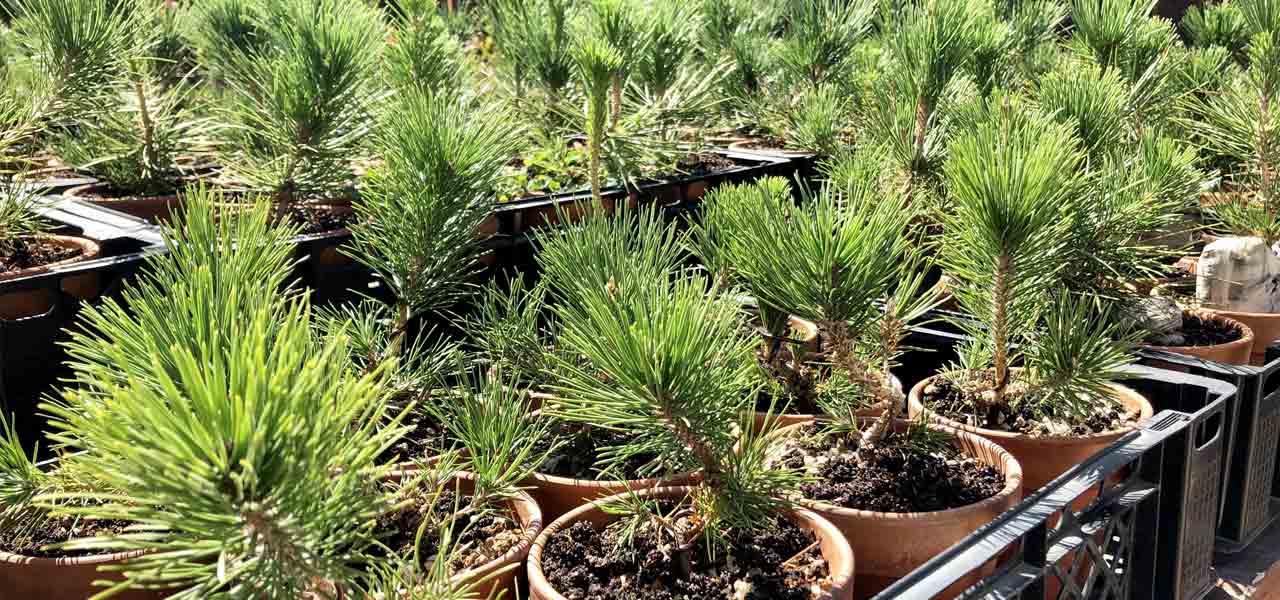
Healthy young pines in plastic containers
Disadvantages
Be sure to use plastic containers which have plenty of drainage holes at the bottom, as you want excess water to drain rapidly. Plastic does not allow moisture to evaporate through the walls so your watering and growing medium needs to bear this in mind. Roots can circle the container which means that attention needs to be paid to pruning the roots carefully when repotting to achieve a pleasing nebari in later years. Plastic containers are usually deep when in fact what is more desirable for bonsai cultivation are shallow, broader containers.
Colanders
Advantages
Growing pines in colanders seems to be the most popular method in the West and is based on a technique developed in Japan by a pine enthusiast some 30 odd years ago. It is said that this method can lead to greatly accelerated growth and in turn trunk thickening, essentially speeding up development of pines. It is claimed that as roots reach the perimeter of the colander and are exposed to air, the roots stop developing, and more roots are issued from the base of the tree. This is said to greatly increase the number of roots on the tree which increase its ability to absorb nutrients.
Disadvantages
Colanders do not last awfully long as they were not intended to be exposed to the sun, least of all the South African sun. After a season or two, they will need to be replaced due to the UV degradation of the plastic. However, when the pines are small enough, the colanders we offer which were originally developed for the hydroponics sector are adequate and more robust. You will need to locate increasingly larger colanders from plastics retailers as the trees develop and although the cost of these will be more than plastic pots, they are cheaper than clay containers although they will not last as long.
Clay containers
Advantages
Good quality fired and unglazed clay containers have been the container of choice for many years and remains the most used from my observation. It has good thermal characteristics and water can evaporate through the side walls of the containers. Unfortunately, once again the challenge is finding containers wider than they are deep, the most appropriate we have been able to source locally are commonly referred to as azalea pots. Available in a wide range of sizes these containers can last indefinitely and would become rapidly inoculated with mycorrhizae spores rapidly which will benefit pines planted into them in future.
Disadvantages
These containers are likely the most expensive of the three options but given they will last an exceptionally long time and could be recycled to develop many more trees over the years they do offer good investment. They are however more fragile than the other options too and can break if dropped or knocked over by the wind.
Creating Exposed Root Style pines
Working with a rooted seedling you gather the roots and carefully place them into a cylindrical means of containment such as a piece of pipe then barely inserted into more conventional growing medium in a second container below.

Young pines being developed for exposed root style in 80mm drainage pipe.
The choice of growing medium in the cylinder should be incredibly fast draining allowing plenty of oxygen flow around the root zone. Examples include stone or pumice particles of roughly 8 – 10mm in size. This will encourage the roots to rapidly develop downwards and into the more water retentive mix below, it will also allow more frequent watering and if using solid organic fertilizer will further accelerate development.
I should add that to initially assist and protect plant growth immediately after repotting, you should top dress with some water retentive media or very coarsely grated sphagnum moss.

This image illustrates nicely how to layer various grades of growing media within the cylinder when developing exposed root and cascade style pines.
Allow the tree to develop for a few seasons after which you can remove the tree from the cylinder exposing the roots. The roots, as they snake their way through the large particles of media into the lower container may produce some interesting bends, however if you are not happy with the result you can wire the roots as you would branches.

A young tree being trained in the exposed root style
You could also produce cascade pines using this method however instead of using such coarse material in the cylinder, you will use finer media as you will eventually need to reduce the root ball in order to fit it into the final bonsai container.
Root treatment
One of the methods of treating the roots when the tree is still at the earliest stages of development is to treat it like a cutting. This method produces roots that emerge at the same point along the trunk and radiate outwards. Regardless whether you intend growing small or large pine bonsai this method is the best way in which to achieve the most pleasing nebari. Aside from enhancing the appearance of the roots, this shortening of the stem also results in growth closer to the soil level; growth which can be used as sacrificial branches to thicken the trunk and is particularly useful when growing mame or shohin sized pines. The cutting process is described in greater detail in a previous article which you can read here.
A mature specimen Japanese black pine with good nebari.
Growing Mediums
One of the requirements your growing medium should comply with is the ability to provide sufficient water retention that frequency of watering is sustainable for you. In other words, although a very coarse mix might produce superior growth if you need to water three times a day to provide sufficient moisture but you are away at work all day, then that is not a sustainable medium for you. However, the extreme opposite being for instance a medium that consists of a high degree of water retentive and compacting organic material will retard growth and will produce root rot related problems. Somewhere in between is where you need to find the sweet spot for you.
In the video Mark mentions that he favours a mix which consists more or less of equal parts Akadama, pumice and our Professional Mix (80% Leca / 20% Peat) which he has found to provide his plants with excellent drainage. The Akadama and small quantity of peat provides sufficient water retention for his needs and he values the CEC value of the akadama which means his fertilizing regime can be more effective as nutrients are released over an extended period (as opposed to rapidly or as a “glut” of nutrients which pass through the medium unutilized).
Pines are not thirsty plants, certainly not when compared with deciduous species such as maples. This is in part at least due to their leaves being needles which by design transpired dramatically less. They can also tolerate much drier conditions and detest wet feet, thus growing media should make provision for this. Probably the most used mix for pines and in fact conifers in general would be Akadama, Pumice and crushed Lava stone in equal parts with a small amount of agricultural carbon added (known as the “Boon mix” by many).
Position
Pines love full sun. The more sun you can give these plants the better. If you live in an area which receives a lot of wind, which just so happens to be the case of both Mark and myself, you can expect less fungal related issues with them too as the wind helps to keep trees dry. If you do not live in such an area it is advisable to make an effort to only water the soil and not wet the needles when watering. As you are likely to wet the needles to some extent anyway, it is advisable to rather water earlier in the day to allow sufficient time for the needles to dry before the day ends.

Some of the authors pines in full sun, exposed to the wind.
An added benefit of wind is that it causes the plants to transpire more, which means you need to water more often (meaning you can apply more fertilizer) but it also means that these nutrients are being transported throughout the tree more rapidly too.
Wiring
How and when you apply and remove wire from a pine is an important step in its development.
All conifers have a springy nature so they have the tendency to return to their pre-wired state when wire is removed. The more you allow wire to bite in, the less this is likely to happen as the biting in is caused by the tree putting on more wood which if growing in that position should help the tree to remain so when the styling aid of wire is removed.

Wire bite like this produces a thicker trunk is less time and creates interest too
Wire bite is usually something to be avoided however it can be utilized very effectively to assist in the rapid thickening of a pine trunk, and usually Japanese black pines and thick trunks are synonymous. To make the most of this phenomenon it is best to ensure the tree has wire on starting in early Autumn as this is when this vascular tissue is developed by the plant. You will notice this in action as the tree appears to swallow up the wire. Its advisable to allow this to continue to a point where the surrounding tissue has thickened to around half the thickness of the wire. At this point you can still remove the wire from the plant without much damage. Should you lift some of the bark sealing it immediately with an appropriate liquid sealer will limit any damage.

Wait until the wire has bitten in this deep before beginning to remove it
It therefore stands to reason that you should use the thickest wire you can manage to apply to the tree without damaging it as this will allow the most thickening ie a very thin wire will be swallowed up very quickly necessitating multiple wire removals and applications in a single season. For this purpose, I find aluminium wire to be best as the trunk is still very flexible and as I can use a 3 or even 4mm strand on a young pine without damaging the bark. Should you need to reapply wire to a tree which shows signs of wire bite, try not to insert the wire along the same grooves, preferably next to them, however do not alter the direction of the wiring as you already altered the flow of sap to a degree when wire bite occurred the first time.

Adventitious bud formation aided by wire bite.
Another spin off benefit which I am not sure I entirely understand yet is the proliferation of buds which form because of wire biting in. I have observed this happening on all my Japanese red and black pines which all underwent the cutting treatment I described earlier. These buds are particularly useful for creating structure on shohin pines and for sacrificial use to thicken the trunk at its base. I believe these buds are as a result of auxins or cytokinins being concentrated by the wire bite in the plant tissue of these areas on very healthy plants.

Bends in the trunk should be exaggerated as they will mellow with time.
It is especially important to place drastic bends in pines which are to be grown to a maximum of shohin size from a young age. These bends might look exaggerated and unnatural at first but as the trunk thickens, they will smooth out more and more. If your bends are not sharp enough in the beginning the trunk will appear relatively shapeless. Should you wish to develop a larger tree then wiring at a young age, other than perhaps to accelerate the thickening of the trunk is not necessary. In such cases you can change the planting angle of the tree to introduce that all important first angle change from the soil level instead.
Pruning and Needle plucking
Pruning
Constantly pruning a pine is simply going to retard development. Much of the techniques presented and discussed on the internet are for more developed or mature trees, not so much for developing trees. In these early stages of development the focus is not on needle size reduction or on fine ramification. Your efforts should be directed towards:
- Developing good surface rooting (nebari)
- Developing a trunk with sufficient girth for the size of the tree (Of course bunjin style is the exception here)
To achieve the first objective every occasion when you are repotting, which at this young age is most likely every 2 years, then you need to spend time arranging the roots.

Two pines being developed in two ways; on the left the trunk was not pruned and will be allowed to thicken the trunk, on the right the trunk was pruned which encouraged both more branches lower down which can be used as sacrifices but it also resulted in multiple shoots developing at the terminal.
To achieve the 2nd objective is far more complex, however once you understand the basics then you should not feel intimidated. In essence the more needles you have, the more sap flow. The more sap flow you have the more thickening that will occur. Sure there are certain techniques such as wire bite which can contribute dramatically to thickening however sacrifice branching is the main technique used.
Sacrifice branching not only refers to branches which are developed long, adding to the girth of the trunk below it, but will eventually be removed. It also refers in fact to the trunk or leader, which is allowed to grow uncut and for several seasons until it is reduced and then finally removed altogether.

The strong growth to the right of the vertical shoot is still being used to develop the trunk, but ultimately will be removed and the shoot will replace its role.
Decandling is not a technique appropriate for this early phase of development. This comes later, however when the tree moves into the next phase of development you will begin to use the younger shoots close to the trunk to develop structural branches with. Initially these too will be allowed to grow until there is a pleasing taper in thickness from the trunk to primary branch thickness. This branch is then shortened and the process of developing secondary and tertiary branches begin.
Needle plucking
This is a technique which if you have done any prior reading regarding the development of pine as bonsai you will have read a lot about. Needle plucking during the more advanced, refinement stages of development of a pine is mainly used:
- To balance the tree’s energy producing more evenly distributed growth.
- Needle plucking is also important for allowing light into the canopy to keep small inner shoots alive and to encourage the development of adventitious buds (which develop on relatively young wood on healthy trees).

Pines must be needle plucked occasionally at this stage to allow sunlight to enter the canopy of needles and strengthen the inner buds.
During these early stages of development needle plucking is mainly used to achieve the 2nd goal. With all the sacrifice branches you are likely to have on the tree, the needle mass will shade out small inner buds. However, these buds are of paramount importance to the future development of the tree as it is with these buds that you will develop the final network of branches and the trunk line too in fact. So only needles which need to be removed to accomplish the goal of allowing sunlight to these inner areas should be removed, but no more than this. Remember, the more needles you have the stronger the trees growth will be.
Fertilizing
If you expect your pines to reward you with explosive growth then you need to provide an appropriate amount of fertilizer which in this case is a lot, especially in the case of the colander method.
Organic fertilizers are recommended, and you can use solid or solid and liquid organic fertilizers. Liquid fertilizers only are not ideal as the nutrients are too quickly leached from the soil due to the frequency of watering.

When developing pines be liberal will the organic fertilizer if you expect good growth.
The key difference between solid and liquid is that solid fertilizers release nutrients over an extended period of time. It could be said that liquid fertilizers are a faster method to introduce nutrients to a plant however when using a very open structured, fast draining medium much of these nutrients will pass through the container which is also why using a medium which has a good CEC value will be of benefit as it will withhold a greater amount of nutrients.
Video
Leave a comment
Comments will be approved before showing up.
