Your Cart is Empty
spend R1000. 2kg or less. free shipping.
Menu
spend R1000. 2kg or less. free shipping.
bonsai
gardening


Orchids


Maintenance and training of bonsai trees
3 min read
The following blog, which I intend to add to as the weeks pass, is based on a very good article which originally appeared in Bonsai Today #21 and is from where I have drawn inspiration. In the original article there are 100 suggestions altogether! As I am not sure where I will end up with it, for now I have not given a number but I would like to add a few points each week.
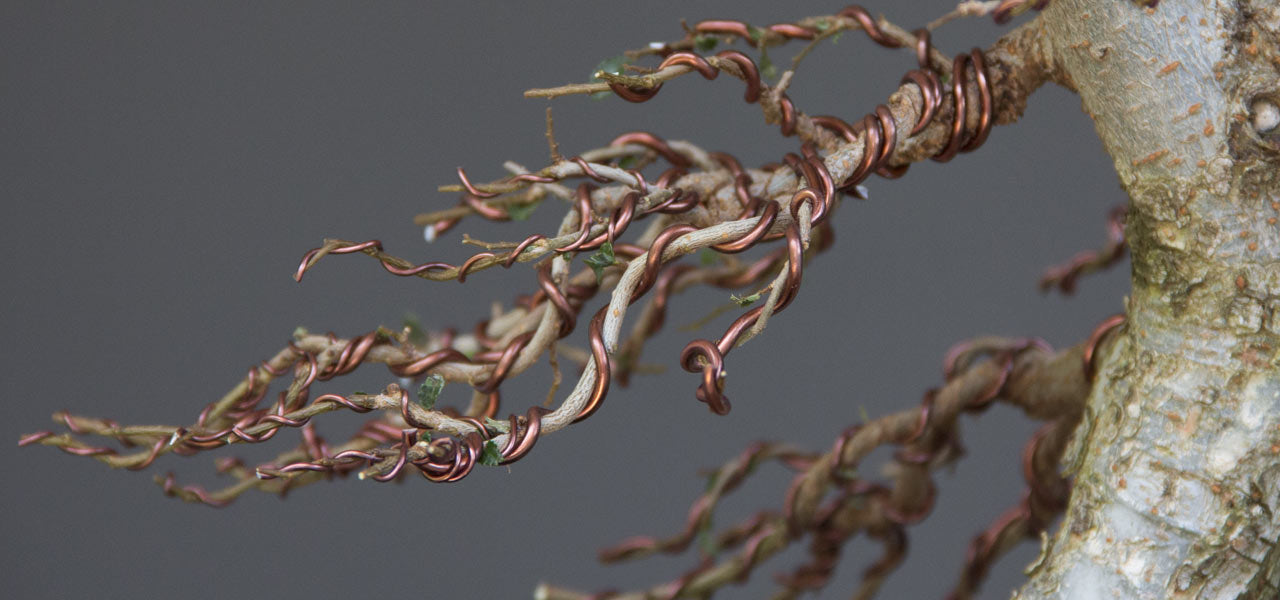
The first few tips will focus on wiring. This happens to be my usual criticism of many wired trees I see. Mastering the skill of wiring eludes me, but it is a technique which every bonsai artist should aspire to master and to that end "practice makes perfect."
#1 Don't wire too tightly or too loosely.
When wiring you must appreciate that you are wrapping a relatively inflexible strand of material around an expanding, living core. If you wire too tightly you will need to remove the wire much sooner than the amount of time required for the branch to set in that position if you wish to prevent the wire from marking the branch or trunk.
In contrast, if you play it too safe and wire too loosely then there is insufficient contact between the surface of the wire and the portion of the plant being bent. At best when you release the portion of the tree you are styling the wire will not be able to hold it in position and it will slowly {or quickly} move back to its original position. Worst case scenario is that you bend the branch repeatedly or "over-bend" it because it is reverting back to the original position, and it snaps.
The solution is to anchor your wire well when you begin wiring and then to firmly grasp the section already wired, moving your thumb along as you make each coil. If you wire "in the air" as some people call it, then the coils will dig into the bark, damaging it and the wire will be too tight.
#2 Always wire two branches at a time.
OK, well there might be the exception to this but you will generally need to wire two branches at a time when wiring the main branches of a tree. Wiring two branches at a time makes it very much easier to anchor your wire and thus provide much needed support when you begin bending the wired sections. In an ideal scenario, you will be able to make at least one and half turns or coils around the trunk with the wire before moving onto the 2nd branch.
#3 Wire in the same direction the branch will be twisted.
Yes, in case you did not know this already you can bend branches vertically and horizontally using wire but sometimes you have a situation where twisting a branch enables you to better position the finer branches for use in creating a foliage pad.
If you wire opposite to the direction you intend to twist, the wire will loosen and you may experience the problems described in #1.
#4 Lowering a branch; wire from above. Lifting a branch; wire from below.
When styling a tree a main branch is often bent down, perhaps to increase the appearance of age in the tree. Sometimes a branch must be lifted.
It is important how the wire flows onto these sections as wiring incorrectly will render the less effective.
#5 Guy wires must be tightened slowly
Guy wires are a very useful technique utilizing wire and a branch jack to adjust the position of a trunk or thick branch which would require heavy gauge wire otherwise. After securing your guy wire at both ends a loop is formed. Insert a small stick or piece of thick wire and twist. Continuing to twist will cause the loop to shorten. Continue to twist until your desired position is reached, listening for cracks in the wood. Sometimes if a large bend is being created resting for some minutes, hours or even days {experience is key here} before continuing can allow the wood fibers to adjust to their new position.
#6 Dealing with rotting wounds
Sometimes when you remove a large branch, do a trunk chop or other similar action the wound takes too long to heal and the wood begins to rot. This problem will only get progressively worse and callous will never form over rotting wood. In order to solve this problem you need to remove the rotting wood, fill with with a filler of sorts and then to once again activate the surrounding callous to encourage it to heal over entirely.
Leave a comment
Comments will be approved before showing up.
Recent Articles
- Enthusiasts Top Wiring Tips July 17, 2023
- Top fertilizing tips March 28, 2023
- Top watering tips February 13, 2023
- Creating Japanese Maple forests October 24, 2022
- How to dig bonsai material August 15, 2022
- How I style bonsai and you can too April 30, 2022
- Swamp Cypress Bonsai Styling July 03, 2021
- How to hide large scars quickly June 14, 2021
- 14 Tips for Field Growing Bonsai May 31, 2021
- Aquaria: An Introduction January 06, 2021

FREE SAMPLE GIVEAWAY!
We are giving away samples of our new product, SuperBoost fertilizer pellets.
A unique organic blend of Blood meal, Bone meal, Canola meal, Fish meal, Fish hydrolysate. Macro, micro and trace minerals. Plant natural stimulating hormones, enzymes and amino acids.