Your Cart is Empty


5 Wiring Tips for your bonsai trees
Tip#1. Select the appropriate wire
There are two kinds of wire which are suitable for use on bonsai and those are anodized aluminium and annealed copper. Galvanized, telephone and electrical wire is unsuitable. Stainless steel wire is also useful but this is generally reserved for hardcore bends and as stays only, not to coil around a trunk or branch.
Anodized Aluminium Wire
Shiny aluminium wire is anodized in either black or brown to camouflage the wire to some extent so that it does not appear too unsightly when applied to your trees. The anodizing process does not fundamentally change the properties of the aluminium however. Aluminium wire is very soft and is very forgiving i.e. if you make a mistake when you apply the wire it’s not too much of a problem to remove it and re-apply it.
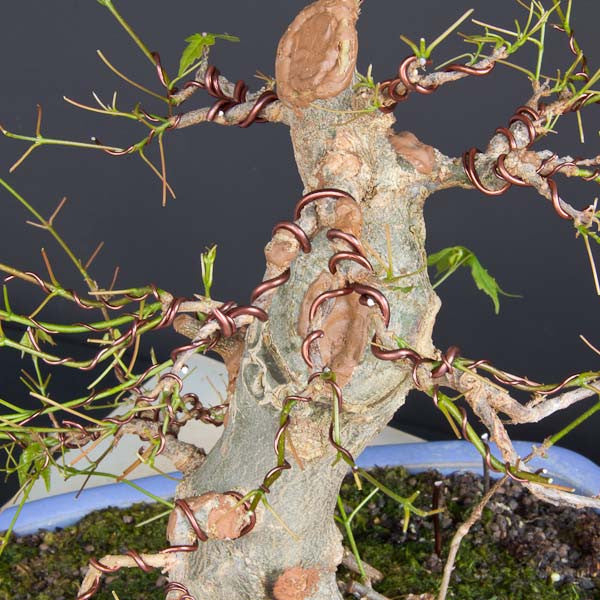
Image caption. Wire deciduous and other thin barked species with softer, aluminium wire.
As it is soft it is the preferred wire for trees which have a thin bark such as olives, maples and elms as it will not damage the bark. The flip side of this advantage is that it does not have a strong hold and sometimes a bend which you put into the branch will try to return to its original position.
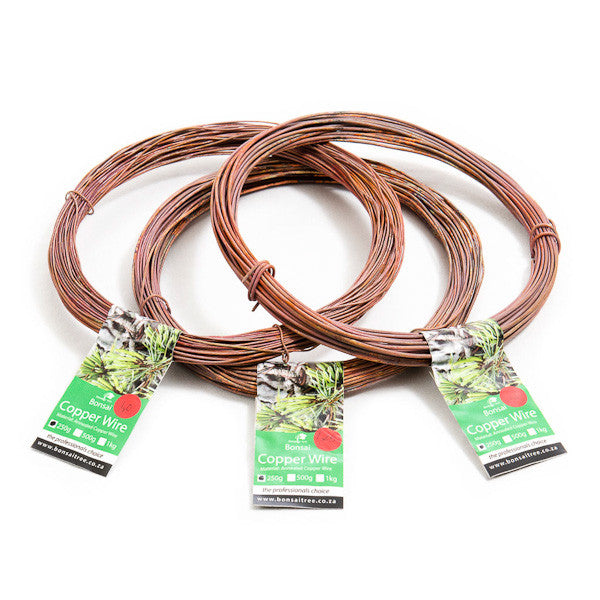
Annealed Copper Wire
For copper wire to be used on bonsai it must first go through an annealing process, you cannot go to your local electrical shop and by earthing wire and use it just like that; it’s far too hard. Annealing involves heating the copper up to a temperature which causes it to soften. Many DIY methods are out there but they generally do not result in copper wire which is evenly annealed, and recycled copper wire is often used which is largely unsuitable as it has flat spots or kinks in it which may damage the branch to which is it applied.
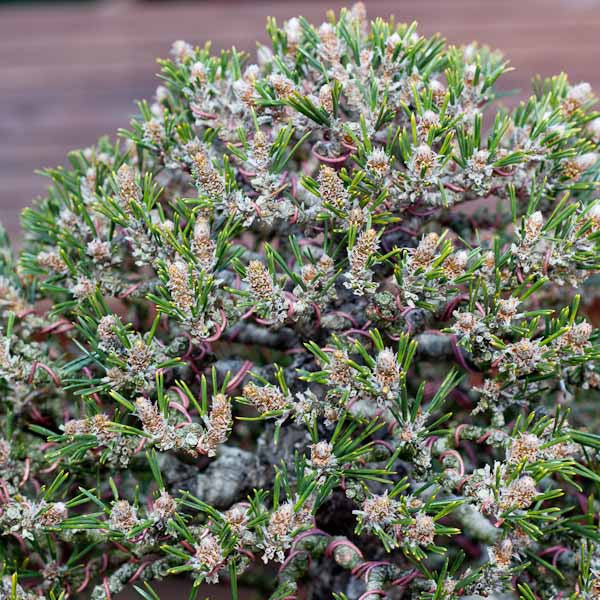
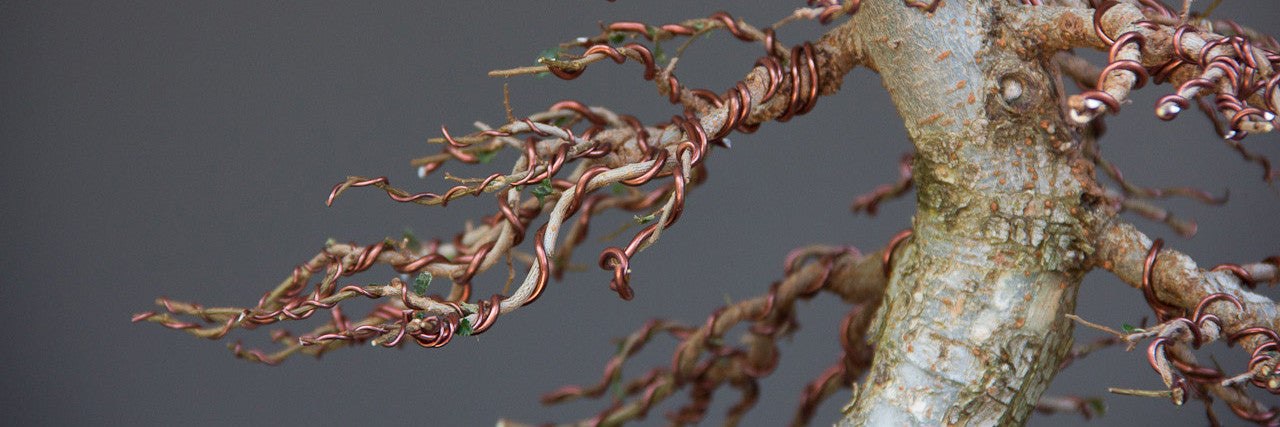
Image caption. Wire conifers such as pines and junipers; and other thicker barked species with copper wire.
Copper is much stronger than aluminium and work hardens, meaning that once bent it will retain that position well. It is therefore rather unforgiving as it cannot be bent repeatedly without stiffening dramatically. It is also not possible to straighten copper wire, it may only be used once. It is however the wire of choice for any serious enthusiast as it is unsurpassed in its hold and the bends that it will allow you to achieve in your trees. Another benefit is that you can use much less of it to achieve the same hold, so your trees don't look like they will fail a metal detector test.
If you are wiring deciduous trees use aluminium wire; if you are wiring evergreens such as pines, junipers and cedars use copper wire.
Tip#2. Select the correct thickness of wire
Anodized Aluminium Wire
As aluminium wire is rather soft and thus its hold somewhat limited, the easiest way to check how thick a wire should be is simply to take a length of wire; hold it in your hand with a section of say a couple centimeters unsupported. Press the unsupported section against the branch which you intend wiring, if the wire bends then it is too thin but if the branch bends then the wire is ok. However, the wire should not be thicker than the growth being bent. Normally the wire has roughly the same to about 2/3rd's the girth of the branch.

If you use wire which is too thin, you may find that you bend the branch the way you want only for it to over a couple hours try to go back to its original shape.
Annealed Copper Wire
As written in the previous correspondence, copper is much stronger than aluminium and work hardens, as it is bent. This means you can use much thinner wire. Very generally speaking you can use wire which is roughly half the thickness of aluminium you would normally have used.
Laziness may be rewarded with broken branches
Too often do I see trees with branches which have been wired from the base of a branch all the way to the tip with the same wire. You are asking for trouble if you do this. Rather wire the branch starting from the trunk until the first fork in the branch, after which make one or two turns after the fork and terminate the wire. Then use the appropriate thickness for this next section of branch.
Wiring trunks
When trying to bend a thick trunk, you will normally not be able to do so with wire alone. Here you will need to protect the bark with raffiafirst, then apply thick wire. Use a branch jack and a system of wire stays and metal rebar to put the bends in which you want.
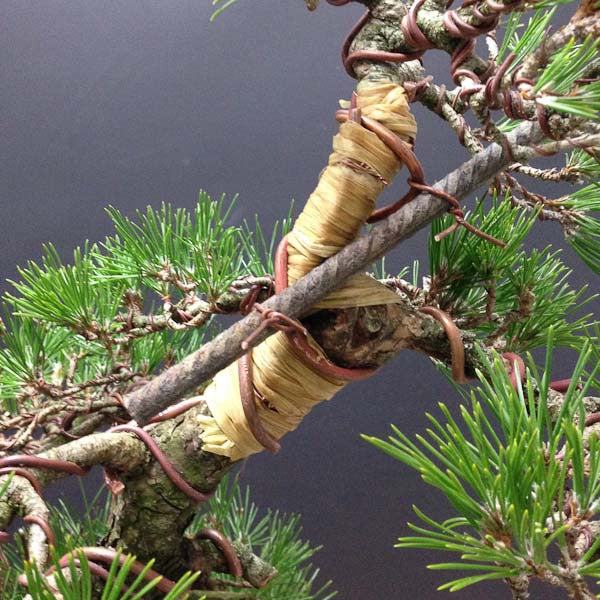
Image caption. For heavier bending protect the bark with raffia (and also to help prevent splitting of the trunk) and use rebar and a branch jack.
Broadly speaking, with aluminium the wire should be around 2/3rd's to the same thickness of the branch being bent. Copper stiffens rapidly so you can use much thinner gauge wire when using copper, roughly half of what you would have used in aluminium. Never try to take a shortcut and use the same wire from trunk to tip, rather reduce the wire gauge as the branch gets thinner.
Tip# 3. Why and how to anchor wire
Why anchor wire?
When you wire a branch, the process involves wrapping wire at a certain angle around that branch. However, as you apply the wire, if it is not secured properly it can move, essentially it can twist around the branch you are wiring. As the wire moves it can and usually does tear off the bark, particularly so in the case of species which have thin bark such as olives. To prevent this from happening you need to anchor the wire.
How do we anchor wire?
When wiring a branch so many situations can arise which require different methods of anchoring. Here are a few:
Wiring a trunk
Anchor the wire by inserting a reasonable length of it into the growing medium. Its important that this wire is close to the base of the trunk, with no gaps, and then coiled at least twice around the trunk, or continued up along the trunk-line.
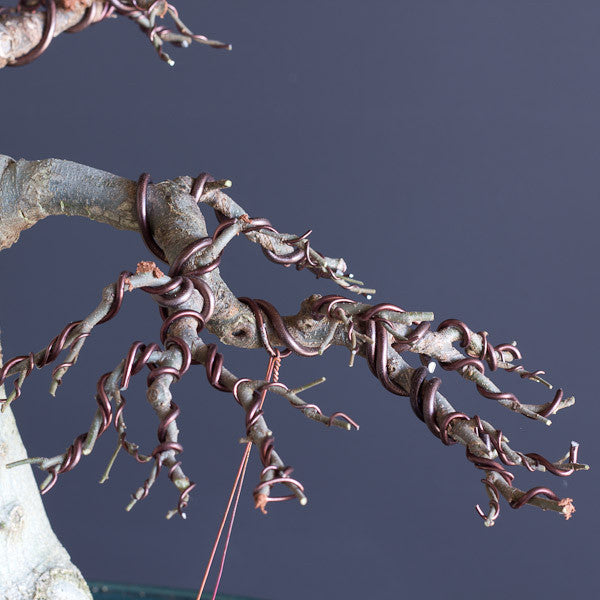
Image caption. Wiring requires you to think about the curves you want to put into the sections you want to bend, where the wire needs to be, how it must be anchored and more otherwise you end up enveloping the branches with wire.
Wiring a branch
When you need to change the shape of a branch you start wiring from the trunk, onto the branch. The wire should therefore be anchored to the trunk. You can either wire two branches at the same time, which is my preferred method or just from the trunk to the branch.
- Branch - trunk - branch: Ensure the branches are not directly opposite one another, or they will see-saw when you bend them, and that you can coil the wire at least twice around the trunk before moving onto the branch with the wire.
- Trunk - branch: Create at least two coils around the trunk before moving onto the branch.

Image caption. In more advanced trees you rarely need to change the angle of the branches again, unless of course the tree is restyled.
Wiring at a branch fork
Wire should loop over the fork and then wrap around each individual branch if you want to bend the branches up. If you want to bend them down, then the loop should be placed below the fork. This is to ensure that the loop serves to support the bend or the wire will simply push away from the fork when bent.
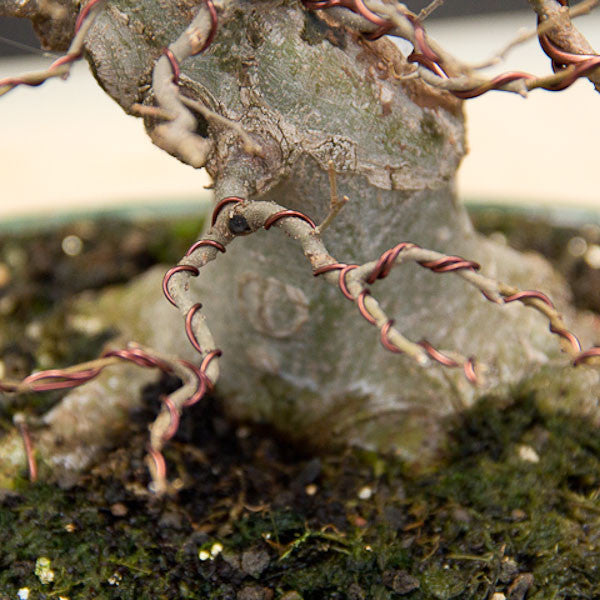
Image caption. An example of wiring two branches from the fork. Very simple and very effective once you get the hang of it.
Continuation of wiring a branch
Sometimes if you are wiring an entire branch but cannot use the same thickness of wire along the full length, as discussed in the previous tip, you need to anchor the thinner wire along the length. The easiest way to do this is to wire a branch on the one end of the wire and continue wiring the main line of the branch with the other end.
Wire should always be anchored or you risk damaging the bark at the very least or ring barking it and losing the entire branch. There are different methods of anchoring wire, depending on what you are wiring. Know and understand which method to use when, and above all practice makes perfect!
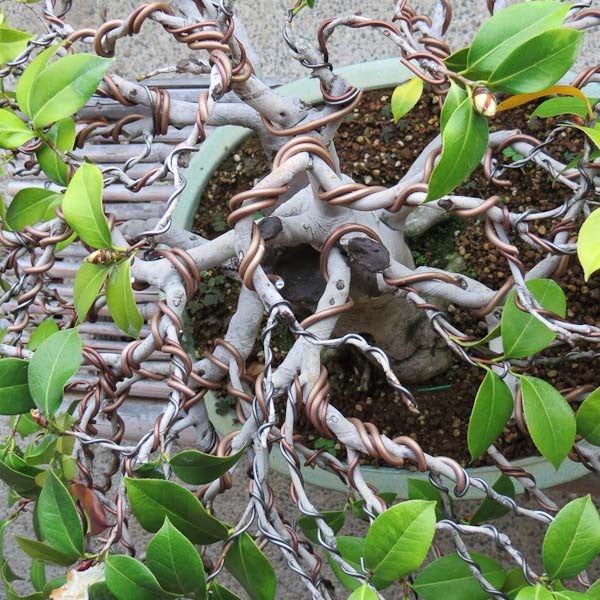
Image caption. Wiring requires patience and planning. The bark of trees such as this Camelia can easily be damaged by wire which has not been anchored securely.
Tip# 4. Spacing and gaps
Getting the spacing right
You will notice in many books on bonsai, in the section on wiring that they have these neat 45 degree angles between the branch and the wire loop. In my opinion this angle is not entirely functional, and I do not believe I am alone in stating this.
I have found 30 - 35 degrees are more widely used. I have also found that it is completely unnecessary to put these even these '‘lose’' angles in at all unless you plan on putting tight bends into the branch. Very often in reality you only need very gentle curves and so the wire angle can be even less as it is all that is needed to hold the gentle shape you have bent the branch into.
What I would like to emphasize is that you should consider the angle; use the right angle for the bends you want to do and keep the angle consistent.
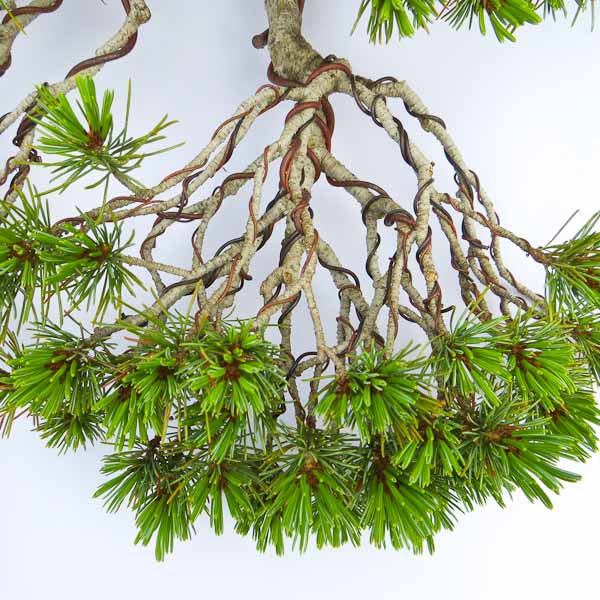
Image caption. Notice the gentle curves which have been used here, the wire is only there to put very gentle bends into the branch and for support. Tighter bends would be required if more compact bends were needed.
The importance of avoiding gaps
When you apply wire, it is good technique to hold the branch firmly between your thumb and forefinger as your other hand wraps the wire. You should always keep the wire pressing firmly against the branch with your thumb or you will have gaps.
Gaps are essentially areas where there is no contact between the wire and the branch. When you bend the branch and you bend at such a point you need to 'overbend' the branch for it to remain in more or less the position you want, however this places the branch at severe risk of snapping - SO NO GAPS!
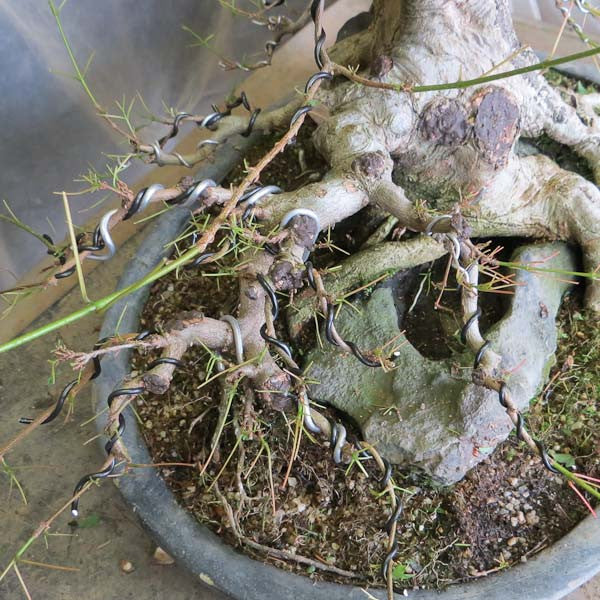
Image caption. When applying thick wire, it is often difficult to do so without leaving any gaps. For this reason, sometimes it’s better to use 2 thinner wires rather than a single, thick wire. I also often use my jin pliers to help when I am using thicker wire.
I rarely, if ever use a 45-degree angle as many books will tell you to do, I find the angle is too steep. You can easily use a 30 - 35-degree angle and even less when you only wish to put gentle curves into the branches. Gaps represent great danger of branches snapping so try always to ensure wire presses up against the branch - not so tight that it bites in though.
Tip# 5. Wire bite and removing wire
Wire bite
When you apply wire, and bend the wired branch you are essentially creating small breaks in the branch and as it heals it retains the position. This is precisely what happens when you break a leg or an arm and the doctor puts a cast on it. Co-incidentally this is also why sometimes you will lose a branch after wiring - it’s usually a result of you being indecisive and bending the branch multiple times and the resulting breaks being too much for the plant to heal, it’s also why you should not wire in winter.
Anyway, back to wire bite. If you wire in early spring before your deciduous trees begin pushing new growth you better watch out or wire bite will occur within a couple weeks. It happens when the branch thickens to accommodate additional sap-flow but cannot do this where the branch is in contact with the wire you put onto it, so it fattens or swells between the wire. In very bad cases it will swallow the wire.
In some species, such as pines you can use wire bite to speed up the thickening of a branch. In junipers, you can use wire bite to help establish a new and interesting sap-flow and then afterwards remove the tissue between to create Shari.
However, in most cases you want to avoid severe wire bite, a little is nothing to worry about and is actually preferable in my opinion, as removing wire too early will simply mean you will need to wire again as the branch most likely will not hold its position. On thin barked trees, such as Japanese maples, Olives, Azalea and others you want to avoid wire bite like the plague. With thin barked trees, it takes them many, many years to 'shed' the scars of wire bite.
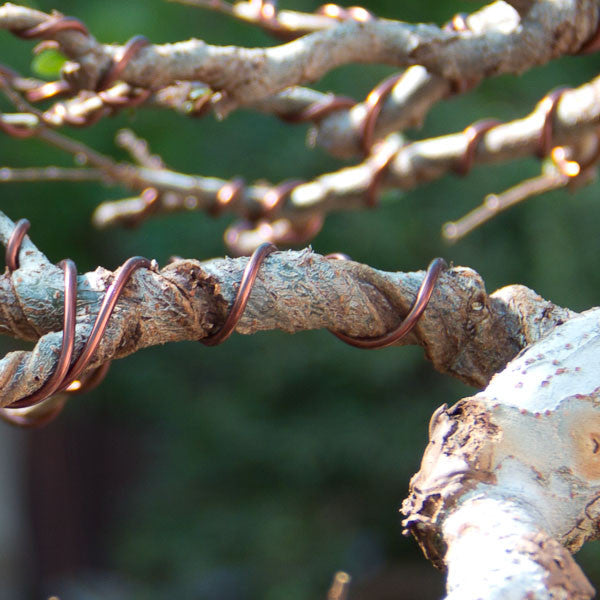
Image caption. A good example of wire bite, on a Chinese elm. I'm not worried about it though as the branch still needs to fatten and the tree is far from being finished. If it has not healed properly by the time the tree has matured then a grafting knife can be used to carve away the ridges, which can then be sealed.
Removing wire
Now I know we all like to save a little money but is saving 10cm of aluminium wire at the risk of losing a branch really worth it when a roll of probably 20m or more will only cost you R55.00??? Yet despite the risk I see a lot of people trying to save wire by unwinding it and then spending an afternoon attempting to straighten it.
Wire which has bitten in should carefully be unwound with jin pliers or I guess you could use a long nose pliers. Unwind until the first opportunity where you can cut it. Wire which has not bitten in can be cut straight off. To do this you will need to use a wire cutter specifically designed and made for bonsai. It is very different to DIY pliers as it:
- has a stubby nose which prevents you from damaging the branch when you cut the wire.
- there is sufficient metal at the cutting edge to enable you to easily and safely cut even thick aluminium and copper wire without the tip breaking off.
- the pivot point is very close to the cutting edge which means you can perform many successive cuts with ease and without tiring (this is important when you are removing wire from a large tree!)
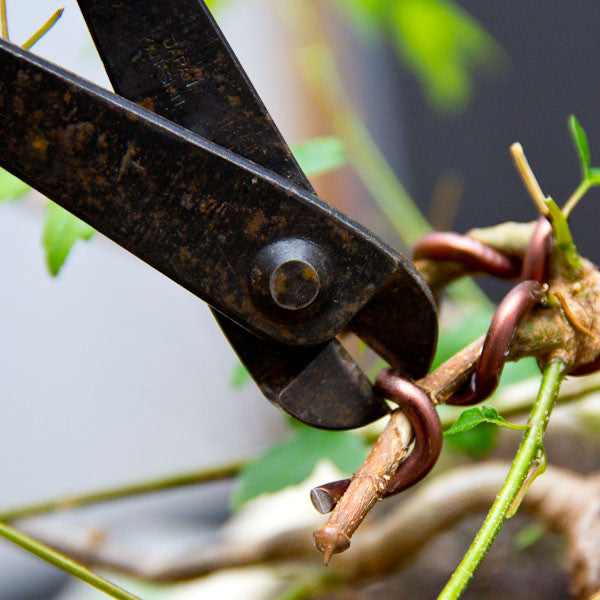
Image caption. The stubby nose of the bonsai wire cutter makes it easy to cut wire from a branch without damaging it. The pivot point which is close to the cutting edge makes cutting even thick wire effortless.
Wire bite can be useful in some species but in thin barked species you want to avoid it as far as possible. If you wire in early spring be very vigilant, or wire in late spring after your first defoliation. When removing wire, which has bitten in, do so carefully with purpose made pliers and then cut. The safest way to remove wire is to cut it from the tree as unwinding it places the branch at risk.
Leave a comment
Comments will be approved before showing up.
