Your Cart is Empty


Using a wooden board to improve roots
Seeing as deciduous trees are being repotted about now I thought this post would be timely. I'd like to share with you a very simple way of improving the roots of a tree using a wooden board. Its not a new technique and perhaps you are already using it, in which case I hope you will share with other readers in the comments below, but if you are not aware of this technique then you might find it useful.
So just like any technique used on bonsai we need to ask why, when and how?
When this technique is useful?
- After you have removed a layering from the parent plant, this technique is most useful. In this blog it was used on a Chinese maple which I had layered.
- You could also use it with a younger tree of a few years old, before the roots have become too hard. Roots which are forced to grow horizontally will increase the trunk flare at the base.
- In previous blogs I used a ceramic tile for field growing trees. If you don't have access to a garden and are using large containers instead then you can also use a wooden board to accomplish the same objectives.
Why you should consider using this technique?
What are the objectives to using this board you might ask. Well there are a couple and they are pretty obvious; I'm sure you already have some ideas, but let me list a couple I can think of:
- Roots on bonsai should ideally all emerge from the trunk at the same level and radiate outwards so they appear to give the tree stability as they clasp the ground. Roots at different levels can look unnatural and unless you are styling your tree in the "Neagari" style you need to try hide this defect. Using a wooden board creates a flat surface onto which you can fasten the roots to force them to grow flat, those which don't conform may need to be removed.
- When you layer a tree you have the ideal opportunity to manipulate the angle where the roots emerge from the trunk. Most often, in trees other than those which are layered or grown from cuttings, the angle is fairly sharply down. Using a board, while the new roots are still young, you can force the roots to grow very horizontally.
- When you are using a large container instead of a growing bed and tile to grow on your trees so you can create nice fat trunks, using a board in the pot achieves similar results as a tile does in the ground. The tile forces the roots to grow horizontally so it makes lifting the tree easier but more importantly it forces the roots to develop horizontally and not vertically down. This helps you to create a nice trunk flare at the base and also improves the general taper of the trunk in this area.
When is the best time to use this technique?
Now, in spring when you are repotting. Performing this kind of work at other times of the year will be a little risky as you are exposing the roots to a large extent.
In this example I have used a Chinese maple which I previously layered. As the roots are still tender, but not brittle, now is the ideal time to perform this operation.
You don't need much;
- a suitable container in plastic or ceramic
- wire
- board either wooden or plastic
- screws in brass or stainless steel
- a rake
- some growing medium.

Image caption. The tree before attaching the board
Remove most of the soil from the root ball to enable you to splay the roots out. It is best to comb the roots out gently with a rake to ensure they are not tangled and that they all radiate from the trunk outwards.
Roughly measure out the size board you will need. Essentially you want to create a flat base close to the trunk forcing the roots into a horizontal position and to grow over the edges of the board and then down into the pot. It stands to reason that the board cannot be bigger than the pot you intend to plant it into. However you don't want the board to be too small or it will defeat the purpose.
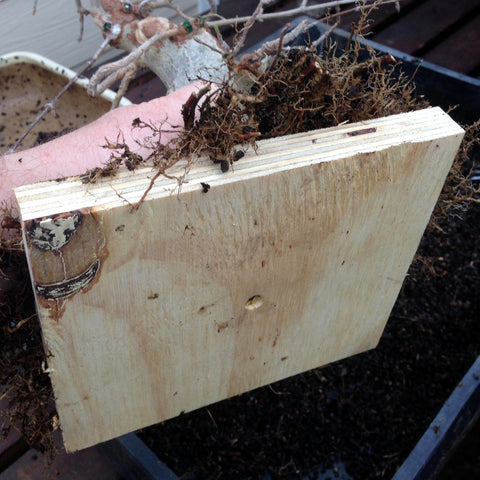
Image caption. The wooden board attached to the base of the tree.
The preceding image shows the cut board fastened to the base of the tree. As this was a layered tree I have a nice, flat surface onto which I can screw the board i.e. the sawn trunk. If you're using a tree which was not layered that's not a problem, just screw the board into any rigid part of the tree. If you need to you can even use stones or other suitable "spacers" to change the angle of the board.
The thickness and type of the board you use is not that important. I have used a standard shutter ply, not the marine type. You don't need to use board this thick either but it is what I had on hand. Any board is going to rot, unless of course you use plastic such as PVC instead of a wooden board.
Its not that important what type of screw you use. However as the screw is going to be kept moist for at least a season or more, you don't want it to rust and disintegrate which will make it rather difficult to unscrew. So perhaps a stainless steel or brass screw is advisable.
You might be asking if it is necessary to drill drainage holes into the board to allow water to drain away. I don't think it's necessary as the water will drain, assisted by gravity around the sides and through the pot drainage holes. (Be sure to use drainage mesh over the drainage holes to prevent loss of your growing medium) However if you are using a very thin board and it creates troughs then perhaps drainage holes are not such a bad idea, or the water will simply puddle there.
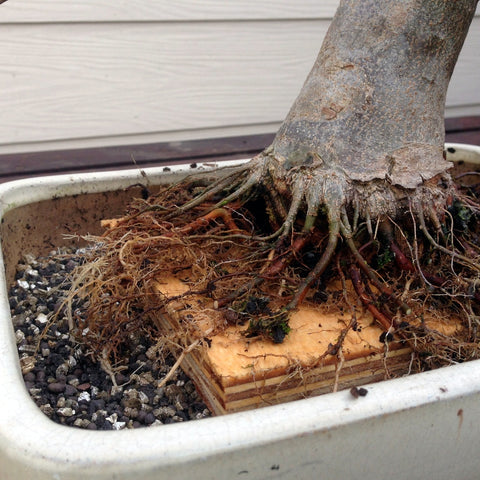
Image caption. Fitting the tree and attached board into the pot
Place some of your chosen growing medium into the pot. It should ideally be fast draining and not too water retentive, so something like the Professional mix. There should be sufficient medium to allow for sufficient root growth below the board. Make sure it's slightly mounded in the center so when you place the board on top you can depress it slightly ensuring there are no air pockets under the board (Roots don't grow in air pockets).
The board should also not extend all the way to the walls of the pot. There should be sufficient space to allow roots to grow around the edge of the board and into the medium below.
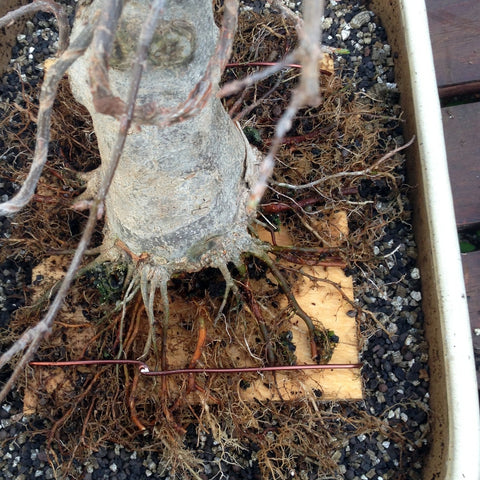
Image caption. Securing the board and tree into the pot.
As always, secure your tree into the bonsai pot with wire. The reason for this is really quite simple; with a strong wind the tree might simply be whipped out and thrown onto the ground.
At this point it's also a good idea to arrange the roots. What this means is to shift the roots so they radiate outward from the trunk in all directions, as evenly as possible.
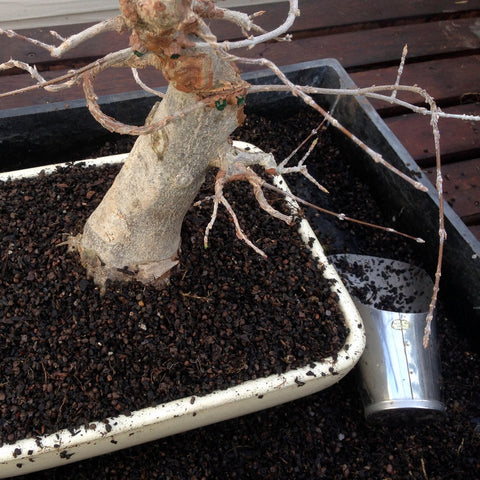
Image caption. The completed planting with board.
Fill the remaining space within the pot with your growing medium. Water in well and treat the planting as you would any other recently repotted tree. You can read more about repotting in this blog post I wrote on the subject of repotting.
Use an organic fertilizer such as BonsaiBoost and place the sachet's close to the edge of the container. This will encourage the roots to develop outwards to reach the nutrients.
There is no particular time limit on how long you can use the board. When you need to repot again, and the board has served its purpose you can then remove it.
Leave a comment
Comments will be approved before showing up.
