


Orchids


Foundation work on a Chinese Maple shohin bonsai tree
The tree featured in this blog is a little project I've had going for a few years now. Originally formed from several individual maples, tightly fastened together and then field grown for a couple years, the individual trees have now fused and are indistinguishable. What is left is a compact little tree, ideal for development as a shohin.
When I removed the then leader, the stub which remained did not produce any buds. So I approach grafted a new leader to it. That was done during the previous growing season.
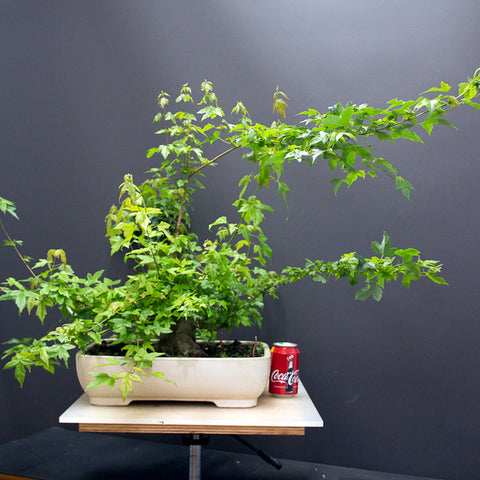
Image caption. Healthy Chinese maple before we begin work on it.
This work picks up now, after the first defoliation of the season, now at the second. The tree is healthy having been fed plenty of BonsaiBoost. The plan therefore is to:
- defoliate once again
- take a look at how the tree has developed since spring
- remove wire where it is biting in
- remove any unnecessary growth
- wire new growth.
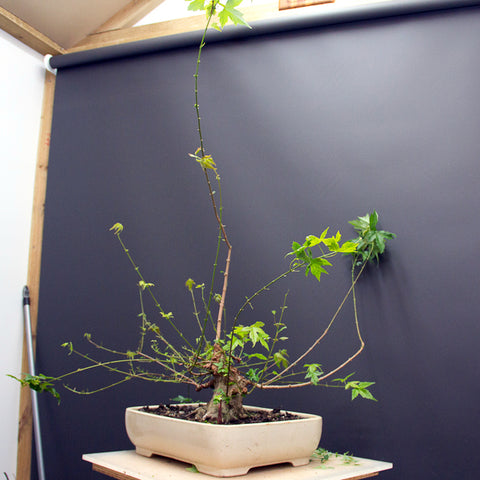
Image caption. After defoliation the tree is revealed.
Once a tree's structure is revealed by removing the leaves it is much easier to see what work needs to be done. There are many forms of defoliation; complete (as I have done), partial and 'spot' defoliation. When you need to remove many leaves using the right tool makes it easier and quicker. If you have many deciduous trees in your collection then a defoliating shears or scissors is definitely a wise investment.
You can see the long branches which have been used as sacrifice branches. Such branches are very useful for:
- thickening the portion of trunk below them.
- thickening the base of the branch, which when pruned creates pleasing taper leading into the branches which develop from them.
- assists in healing cut scars below them as they promote sap flow, which of course is required for cambium development.
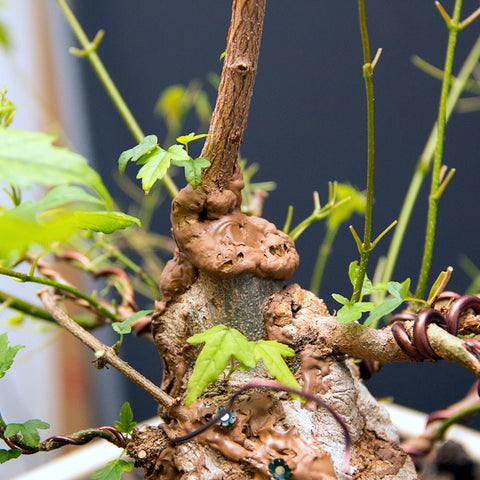
Image caption. Rapid healing of some previous cuts.
The image shows the backside of the graft which I did last season. It has well and truly fused with the trunk and the donor tree was separated in spring of this season. The stub of the old leader still remained and was reduced using a knob cutter.
The excessive scar tissue which has developed is as a result of the sealer which I use. It may be better to has used something like the Kiyonal sealer at this time of the season as sap flow is still very high. The cut paste for deciduous trees would also have worked very well.
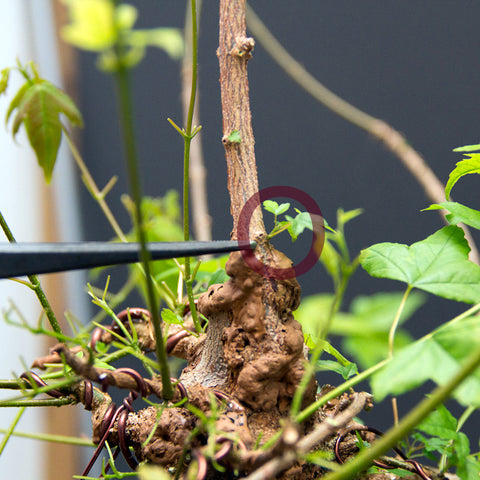
Image caption. The bud representing the future apex or trunkline.
This view of the tree is sort of from the front side but the focus of the image is the small bud with the overlaid circle. This bud was part of the graft and will be used as the future continuation of the trunkline. The graft, for now will be used to assist healing of the scar behind it, shown in the previous image. Once this has been completed, or close to, it will be removed. This would also have given this bud some time to develop prior to the graft being dramatically shortened.
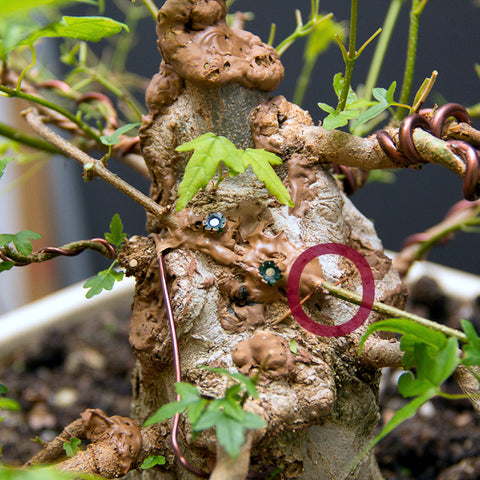
Image caption. Approach grafted branch, future useful bud
Grafts are not only used as a means to place buds or branches in parts of the tree where these are lacking, they are also used to assist in healing over scars. This approach graft should accomplish two of these benefits at the same time. There are some scars, hidden by the sealer, which could use with a little more help in healing. However I also need a branch to develop in this area which is sorely lacking in them.
Please note that when the graft was placed the buds I intend to use for future development were placed close to the trunk, as shown in the circle. This is very important. Take a look at the length of the internode after those 2 buds. It is way too long to be of any use. Of course to reduce your risk you should also try to use branches which have several buds with short internodal distance between them.
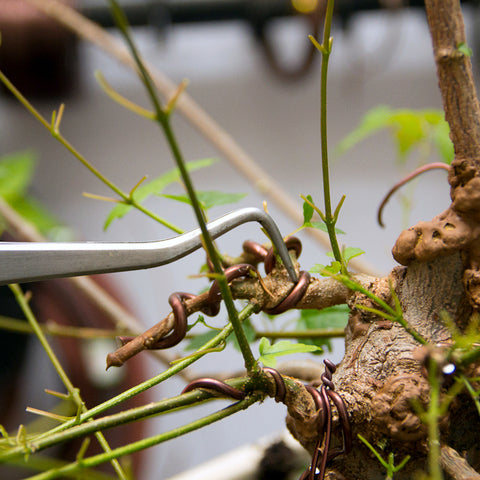
Image caption. Wire bite
Wire bite is something which is commonplace on young, energetic maples such as this one. The point of the tweezers show just how much this tree has developed since its last defoliation, a month or so ago. Tree health is paramount if you wish to work on them often and achieve your ambitions with them in the shortest amount of time possible.
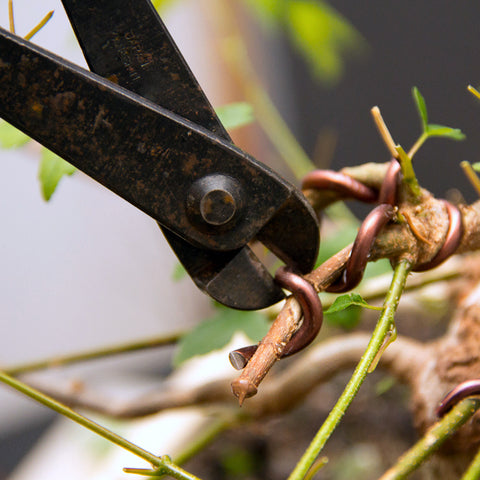
Image caption. Removing thicker wire by cutting.
The best way in which to remove wire is to cut it off. Although this is aluminium wire and therefore rather soft, you will need to cut it off with a wire cutter. You cannot use a side cutter or other such tools bought from your local hardware. The tips of such tools do not have the strength and in my observations do not close completely which means the wire is not properly severed in the cutting action and so the user is required to cut repeatedly and at each cut damage the branch below it.
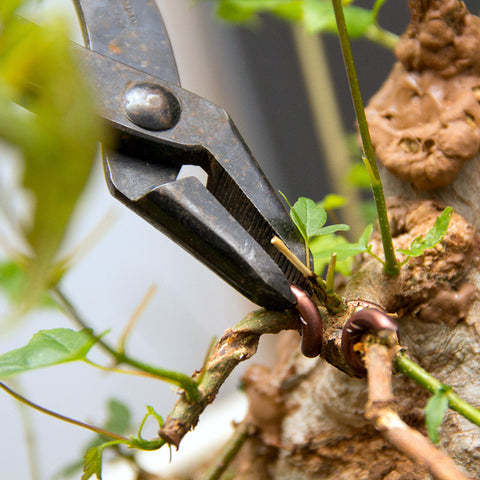
Image caption. Removing wire which has bitten in.
Where the wire has too deeply bitten you will need to unwind it. As this is fairly thick aluminium wire and a short length you will not be able to do so with your fingers and you will need to use a pliers for this job.
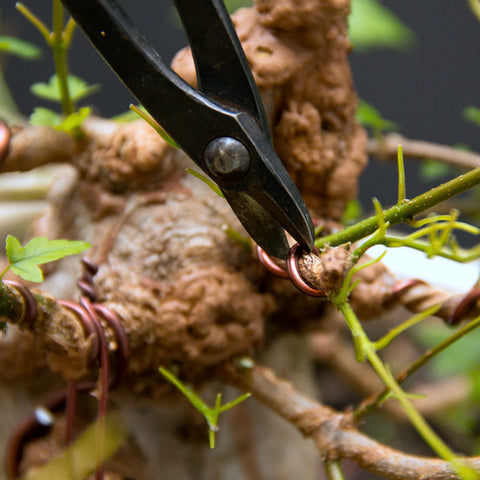
Image caption. Cutting thinner wire
I use my scissors type wire cutter ALL the time. It is one of the most useful tools in my box. For aluminium wire around 3mm and thinner it makes removing wire from trees much easier and quicker.
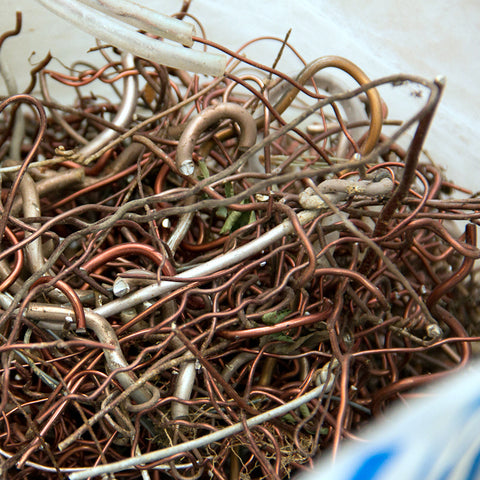
Image caption. Collected aluminium wire
Please be environmentally conscious and collect the wire which you remove. I separate copper from aluminium and keep them in separate containers. When I have accumulated enough I take the bags to the local recyclers.
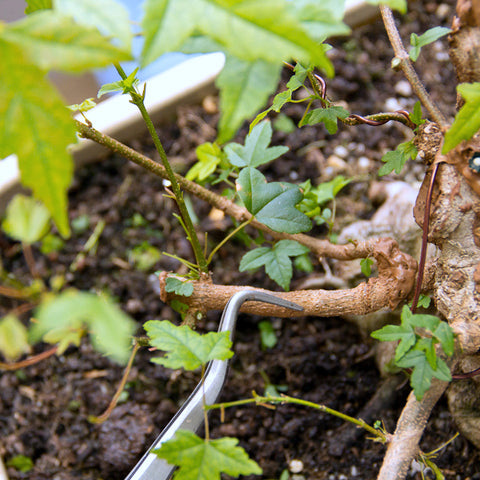
Image caption. Too long an internode in the first branch.
In assessing the tree and the future silhouette, I decided the fork in this branch is too far away from the trunk. It will have to be removed and hopefully some dormant buds will develop further along. It is a bit of a setback I agree, however not doing what is necessary at this stage will simply make the setback that much greater if it is done a year or two from now.
Deciduous bonsai development requires planning and a vision towards which you are working
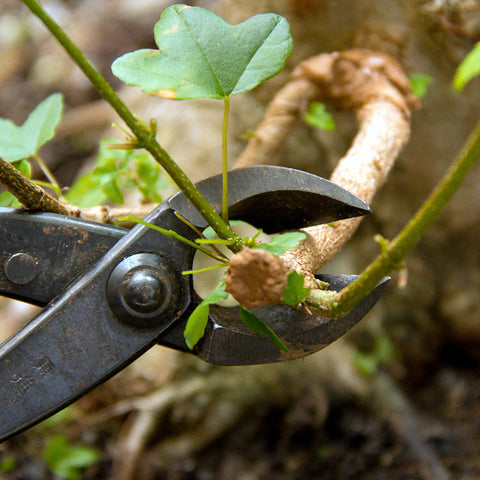
Image caption. Proper use of a branch cutter
A branch cutter is used to remove such growth and the best way to use them is to use the 'backside' of the tool if possible, as depicted in the image above. One should never cut a branch thicker than roughly 1/3 to 1/2 the length of the cutting blade or you risk damaging the tool. If you don't have the correct size branch cutter the best is then to saw the branch off and then reduce the knob using a branch cutter, knob cutter or a root cutter.
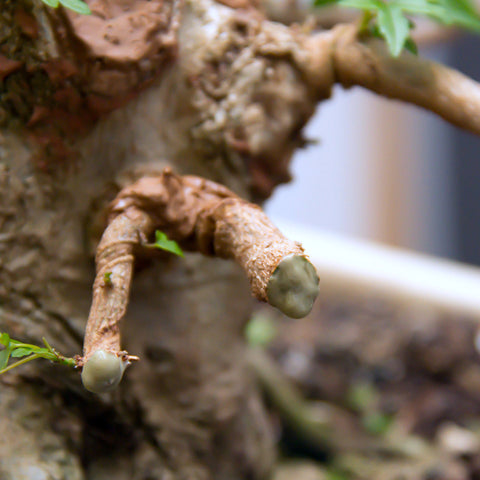
Image caption. Resulting cuts, sealed.
The branches reduced and sealed. The branch on the left has buds near the tip already so thats great. Hopefully there are some dormant buds on the right side branch also.
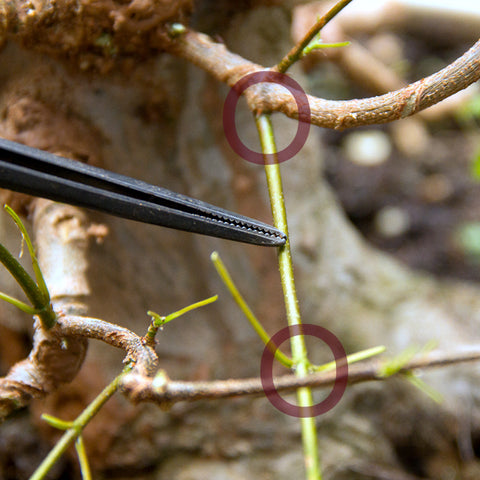
Image caption. Too long an internode.
The branch indicated by the tweezers has a terribly long internode, but it was my intention to use this branch in the future. However the long internode makes this impossible as nothing will develop between the two sets of buds. The only recourse is to cut back to the main branch and out from this point 2 new buds will develop. Hopefully these will be more usable.
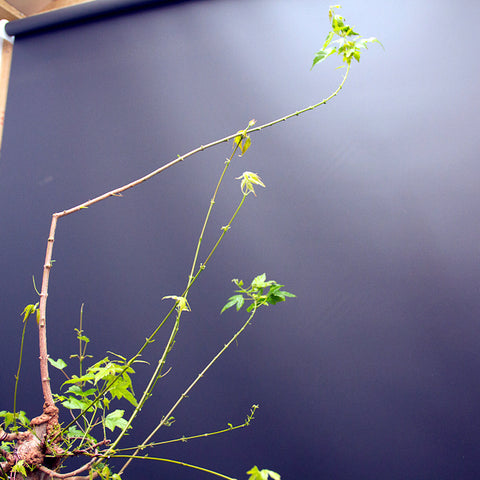
Image caption. Leader left to continue developing
Some of the sacrifice branches were left to allow them to fulfill their purpose for a little longer. Perhaps in autumn these can be removed.
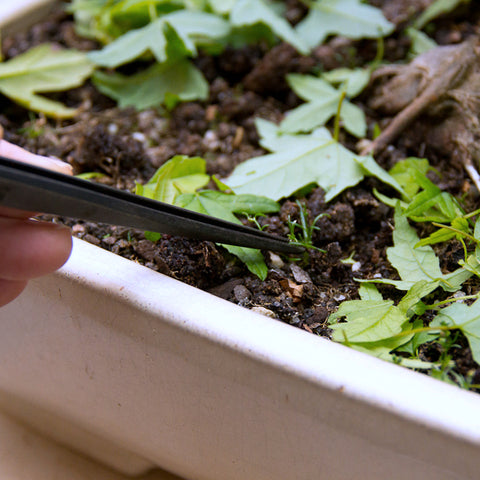
Image caption. Using tweezers to remove weeds and other debris
After working on the tree you should use the opportunity while the tree is on your working table, to remove any weeds and other debris which may be laying in the pot. There are many tweezers suitable for the task. The combination ones offer a sort of two in one tool as the other end is often a rake which can be used during repotting but also to break apart the surface around the tree where fertilizer might have caked, which reduces water penetration and gaseous exchange.

Image caption. Good trunk flaring as a result of good field growing technique
The purpose of this image is to show you the importance of technique when field growing or developing trunks such as this. While this tree was being developed in the ground it was planted onto a tile. The tile forces the roots to grow outwards and thus created a very attractive trunk flare. It also makes the tree a lot easier to remove when you dig it up! For more information about developing trees in the ground you may like to read my blog post of the topic.
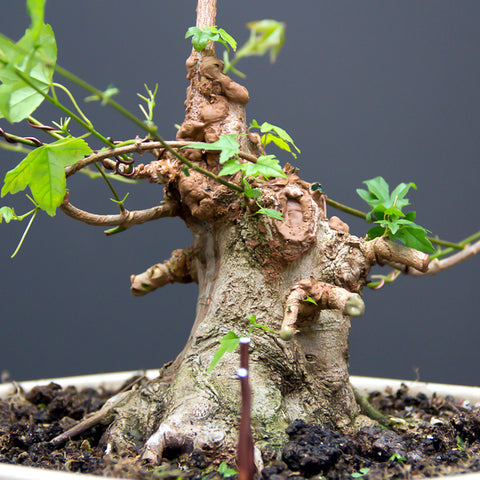
Image caption. The tree after completion of work
This is the final photo of this session on this tree. Hopefully in autumn when I work on the tree for the final time of this season, I will be able to remove the sacrifice branches and that the small bud in the apex would have developed sufficiently to allow me to remove the graft. We can also check on the approach graft done in spring, it should have fused by then.
The tree can now be placed under a bit of shade cloth to ensure the new and tender leaves don't get damaged by the summer heat. I will also continue with feeding to ensure the tree regains vigor after this work.
Although a Chinese maple was used in this bog, all the above techniques could be used on any deciduous species.
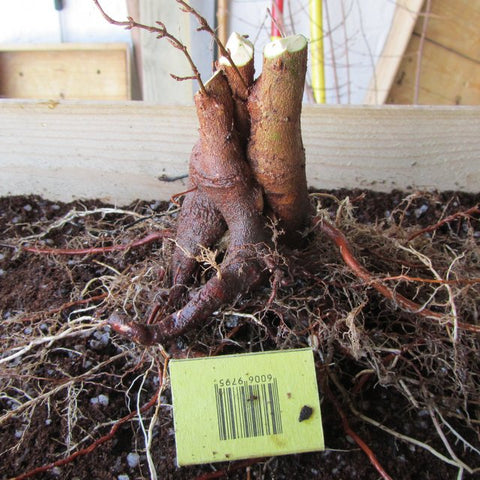
Image caption. This is the beginning of this tree, September 2010.
2 Responses

Leave a comment
Comments will be approved before showing up.

Anonymous
December 22, 2015
Thanks Hans, I am sure you can graft the bougainvillea. The Pride of India might be a little more difficult as it does not have a thick bark and in my experience wounds take quite a time to heal, so the graft if successful is likely to be visible for some time. If you look at the products link above you will see there is a section for Grafting supplies. A knife, sealer and parafilm grafting tape is all you need.