Your Cart is Empty


Developing branches and ramification in deciduous trees
Introduction
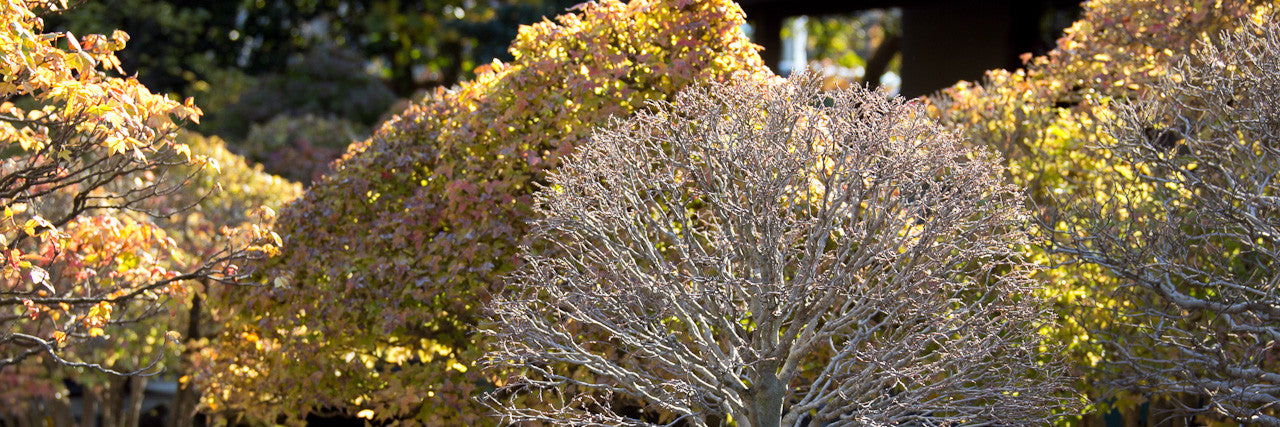
One of the most attractive qualities of deciduous bonsai, when sensitively styled, is the light and delicate appearance within the visual mass of the canopy. When hidden by a full canopy of leaves this beauty is lost to the viewer, but it's in winter that structure which required many years of pinching, defoliating and wiring is finally revealed. The end result is not mere coincidence but rather the deliberate result of applying the appropriate techniques at the right time and dedication through the years required for refinement.
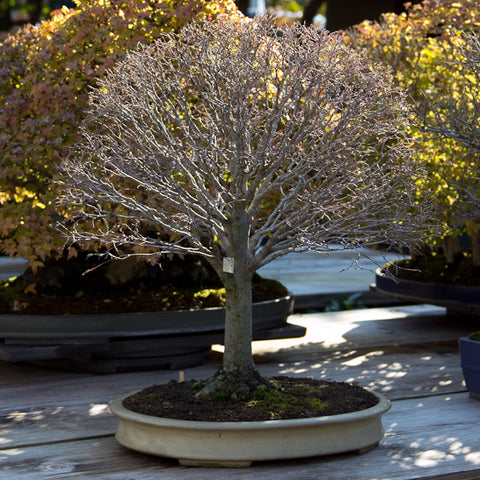
Image caption. The exquisite fine branching, or ramification, of a Japanese zelkova in winter.
Stage 1
In the first stage of development the trunk is developed using field growing techniques, a subject which you can read more about in a previous post of mine. It is important to mention that branches are generally not developed on trees while they are being field grown as they tend to be too coarse, however it is possible to begin the main branches in the field, provided you have sufficient control over their development.
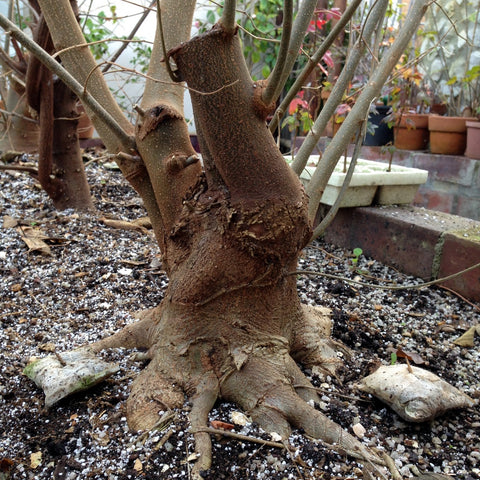
Image caption. Field growing is the first and vital step towards achieving impressive deciduous bonsai.
Stage 2
The second stage is development of the branches. Its best to begin with too many, removing them later when they begin to pose problems, rather than the opposite. That is to say too few branches and having to graft new ones on or having a tree with an overwhelming majority of negative space between the branches with too few branches occupying positive space.
I have found all too often, that the first task people perform when they begin working on a tree is to remove all branches which do not confirm to some imaginary rule book which some misguided person, although with good intentions, handed down to them.
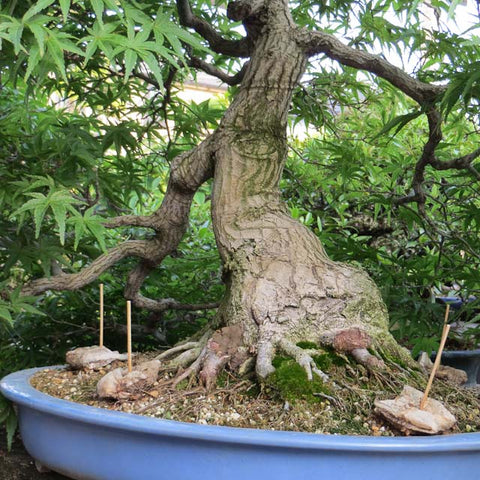
Image caption. Branches should 'hang' near the base of the tree and then angle towards the vertical as they reach the apical area - this echoes the manner in which mature or aged trees naturally grow.
The goal
At first the goal is to achieve branches which are angled slightly down to horizontal and angling upwards as you move along the trunk to the apex. If in doubt study trees growing in nature and you will see what I mean. Each branch dividing repeatedly and increasing number as they near the outline of the canopy.
Of course the girth of each tapering branch must be in proportion to the trunk, relative to the other branches and to it's order among them as you move up, along the trunk.
Method
To achieve the desired girth, branches are wired into position in late spring or early summer, spaced apart so they eventually fill the canopy with fine twigs. Branches are allowed to grow unchecked for the rest of the season, the wire being left on for the remainder of the growing period and during dormancy so the branches can set in their new positions. If wire were applied in spring and the branches are especially strong you will need to watch out for wire bite and remove the wire before it is enveloped by the cambium. With trident maples and other fast healing species, wire bite is not a major problem during this stage of development as it will heal over, however evidence of wire bite on other species such as Japanese maples either takes much longer to disappear or never does if very severe.
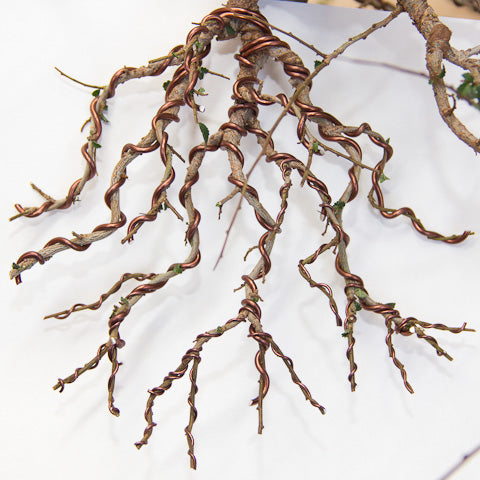
Image caption. Allow wire to remain on the tree until just before the spring push, or you will experience wire bite. This is an elm branch which I wired after first defoliating the tree.
Remove wire just before the spring push on younger trees. Removing wire during winter can be risky as any breaks will result in sap bleeding from these breaks in spring. Developed trees grow slower so leaving the wire on during spring might be ok.
Allow all growth to develop until late spring when the new leaves have hardened off and have a leather like feel. If the tree developed well in spring and is strong then you may go ahead and defoliate. Not only does this make it easier to remove wire it also helps to balance the energy of the tree by allowing light to penetrate to the inner areas of the tree. It is important not to pinch growth at this time as allowing it to continue growing will not only further aid in thickening but will also promote healing of any wire bite.
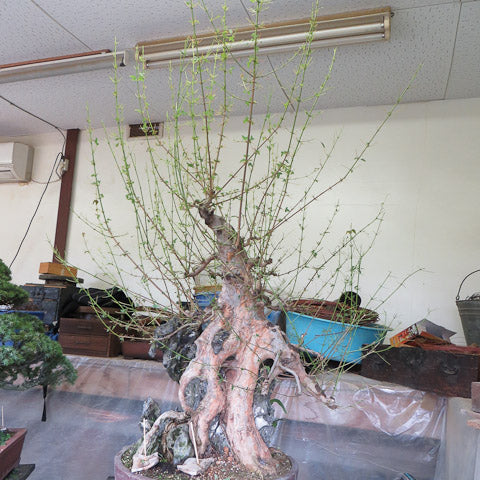
Image caption. Sacrifice branches are not only useful to developing branch structure but also for healing over of old scars.
When the branch is thick enough it is cut back to a dormant set of buds. (I cannot overstate the importance of not being in too much of a rush at this stage as cutting the branches too soon will retard their development and the appropriate girth may never be achieved, so be patient and grow the branch until it is thick enough at its base and then cut it. Not before) This would be done in late spring when sap flow is strongest and is most likely to produce many new buds.
The new shoots which develop from these cuts are then allowed to develop until late summer when the tree is defoliated again, if strong enough to do so, and then wired. The process of developing girth is now repeated as described above until there is a gentle transition between the main branch and these secondary branches. At times it will be clear that the tree favors a particular branch and pushes more energy into that one, so go with the flow and use that branch and eliminate the weaker ones.
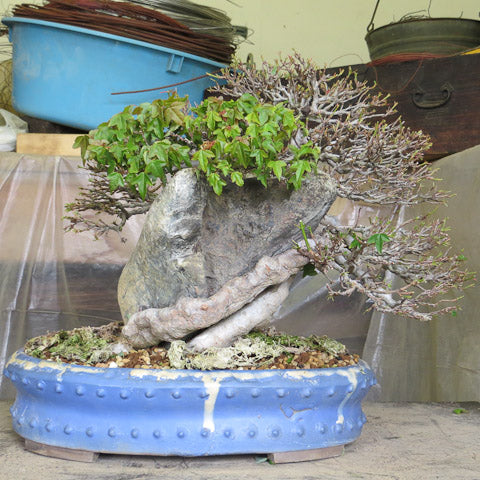
Image caption. A developed Trident maple after partial defoliation. This is the rear view of the tree and the back branch has not been defoliated to allow it to grow stronger.
Stage 3
The goal
As one nears the projected outline of the canopy your efforts should then be aimed at restraining growth on the tree. You want to avoid excessively thick branches with long internodes. This is achieved in part through defoliation (Read more about defoliation here), either partial or full, in other words removing all leaves or a percentage.
Method
You may also now begin to select the weaker shoots and remove the strong shoots. Shoots which have a long internode are cut back to 1 set of internodes and those which have short internodes could be cut back to 2 sets. Wiring is used conservatively on the fine twigs, clip and grow is gentler, although every now and then wire might need to be applied to branches which have shifted out of position.
At this time it is also important to consider watering and soil mix demands of the tree as well as fertilizing regime. Initially when developing the primary branch structure a drier mix is required in order to promote rapid development of the root system, a result of the lack of water and the roots quest for it as well as the high oxygen exchange which is supplied by the fast draining medium. Such a mix would be our Professional Mix with added LECA.
The nearer the tree gets to maturity, the wetter the soil should be kept, although of course not waterlogged. This reduces the need for the roots to ramify and the availability of oxygen and thus retards growth. Maples in development, for instance are repotted more frequently (every 2 years) promoting rapid root development and therefore woody growth. A mature maple is allowed to remain in its pot for some years, the roots eventually filling the pot and reducing drainage (oxygen exchange). Your growing medium might therefore be made up of finer particles.
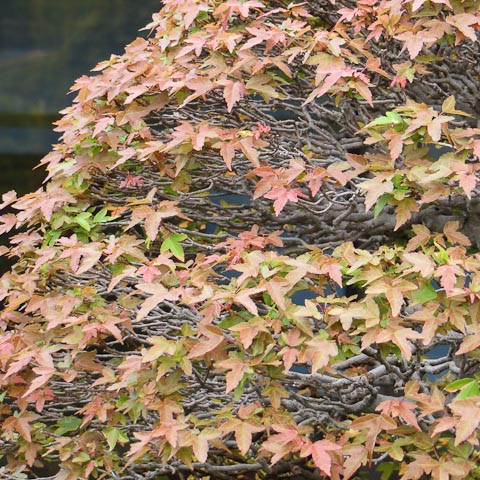
Image caption. Dense ramification such as this is not achieved by chance. It is the result of great technique, good fertilizing regime and skilled watering of the ideal growing medium.
When in development it is advisable to feed generously with fertilizer to ensure as rapid growth as possible. A mature tree should be given sufficient fertilizer to maintain health but no more. BonsaiBoost is unique in the sense that it is a continuous source of slow release fertilizer and is suited for young and mature trees alike as it does not lead to excessively long internodal distances and is a well balanced fertilizer for flowering and non-flowering species alike.
2 Responses

Leave a comment
Comments will be approved before showing up.

Dean
June 29, 2022
Thanks this is sound, little info on the net describing the 2 phases… Development and then refinement, this will benefit anyone on their journey to have a respectfull bonsai. Please if you could do an article on shortening internodal lentgh on the trunk itself in die development phase and if long internodal length in trunk takes away from the overall quality.