Your Cart is Empty


Layering a Hackberry, Part 2
As spring has arrived and new leaves were developing, I thought it would be a good time to check on this layering which I did the previous spring. Of course I had peeked a few months into the previous summer to see if there were any new roots, but I now needed to see just how well they had developed.
Removing the drainage mesh
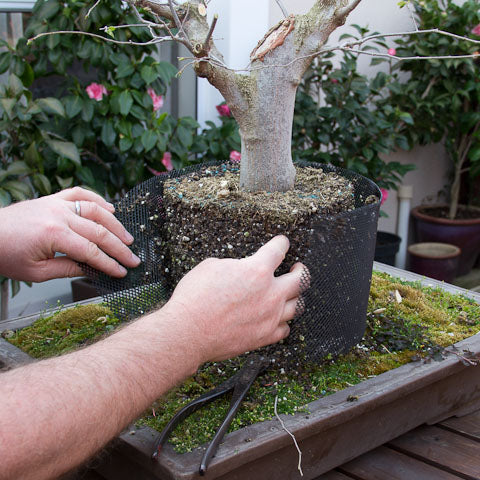
Image caption. As I used drainage mesh, the same mesh as I use to cover the drainage holes of my pot it was easy to remove - just cut the few wire staples and it's free.
The idea I had with using drainage mesh instead of a solid material like a pot or plastic sheeting is based on the amazing British (I think it is anyway) invention of air pots. Essentially it is a plastic pot with many holes in the side walls. As the roots near the wall of the pot they stop growing, unlike solid material where the roots would just begin circling the pot. What happens then is amazing, the plant will simply begin issuing more roots from the trunk. So for layering I believe this concept is excellent as it results in masses of roots instead of a couple roots which just become terribly long and entangled. I even have mesh cut especially for applications like this, you can purchase it here.
Raking the roots
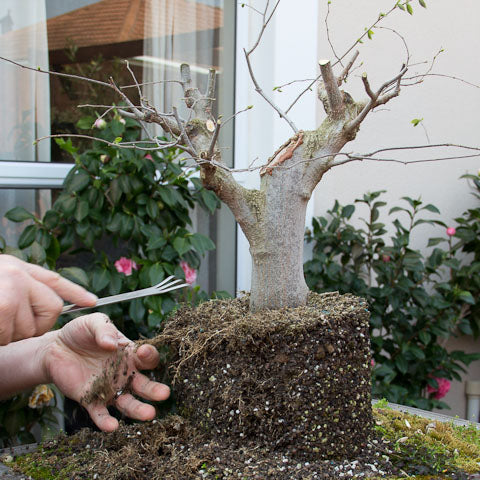
Image caption. The roots have developed well and now need to be raked out a little.
Although you might separate a layered tree after only a couple months, I prefer to allow the roots to develop a little longer as when they are very young they are even more brittle than they are now. So by working on my layerings the following spring I find that I have given the roots a little more time to mature and harden making them less fragile.
Nevertheless it is best to work carefully when raking them out and if possible, use a rake with 2 prongs or 3 and pull the rake towards you with a gentle action. If you feel resistance try to see if you can untangle the root with your hand rather than pulling harder and snapping the root.
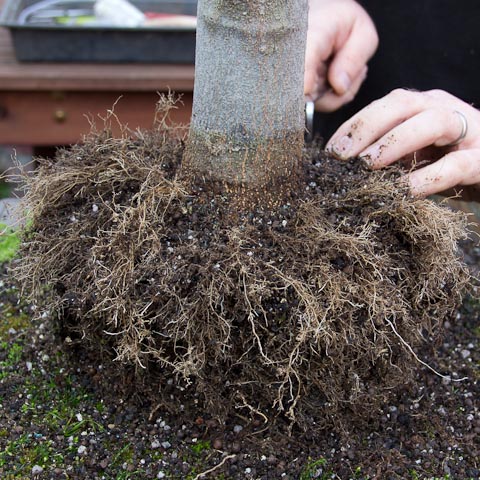
Image caption. You can see the quantity of fine roots resulting from the rooting medium which I used as well as the drainage mesh which retained it.
You will recall from the first part of this series, that I used my Professional Mix as a rooting medium. The ratio of LECA to Peat is just right to provide excellent drainage thereby encouraging an exchange of oxygen which produces healthy roots. The peat provides the moisture retention needed, although I would still consider putting some mulch on the surface, although I guess it depends on how much soil you throw in, above the line where you have ring barked the tree and how often you are able to water.
Keeping the roots moist
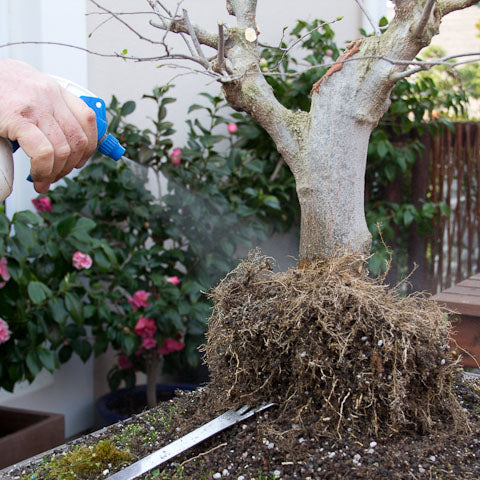
Image caption. Keep the roots moist while you're working.
A dry root is a dead root. Simple. In your excitement, do not forget to mist the roots of your layering frequently to ensure the fine roots do not dry out. It also therefore stands to reason that you are better off working in the shade when you do this kind of work, definitely not in the sun. You can use anything which has a fine mist like spray.
The plastic skirt
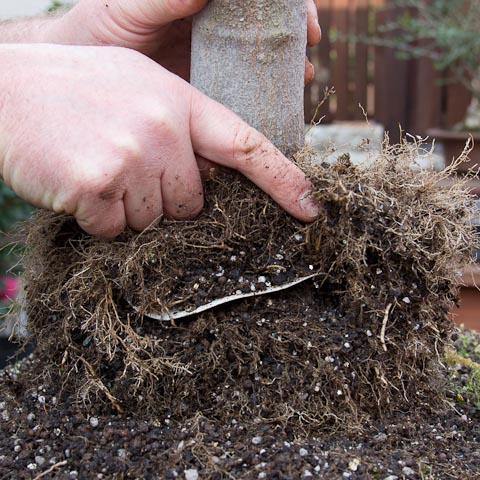
Image caption. The plastic skirt which I used when I started the layering
The plastic skirt which I made seems to have worked well. The roots pushed out from the trunk horizontally and then fell over the edges of skirt. This also made it easier for me to cut the layering as it was very easy to lift the roots away from the old trunk.
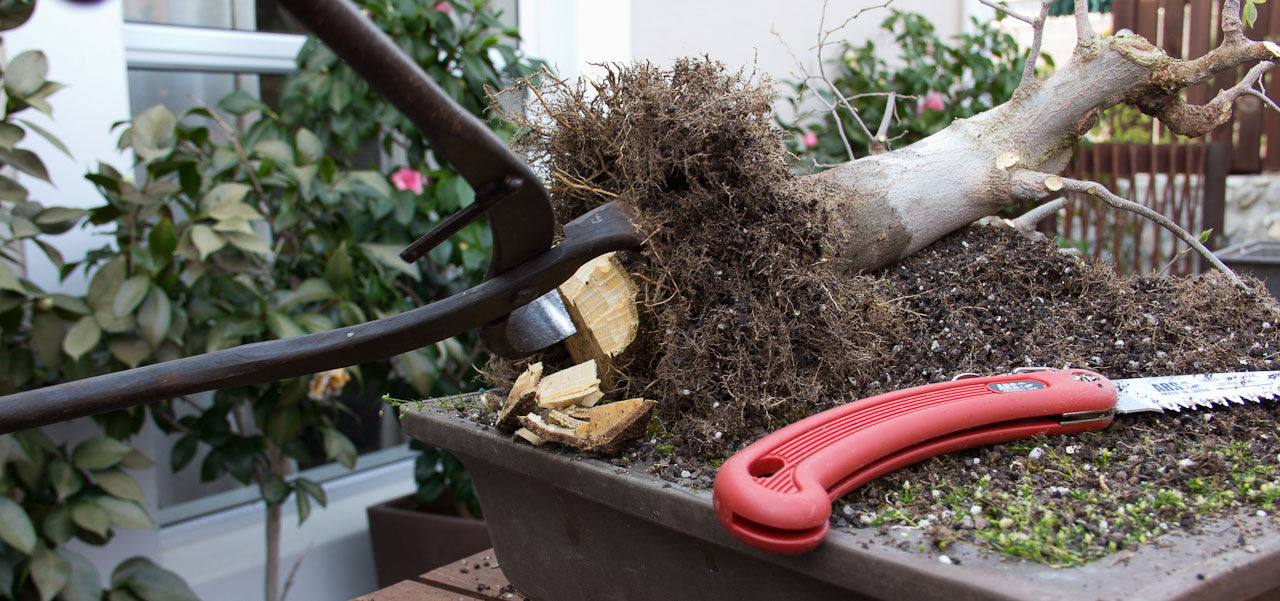
Severing the layering
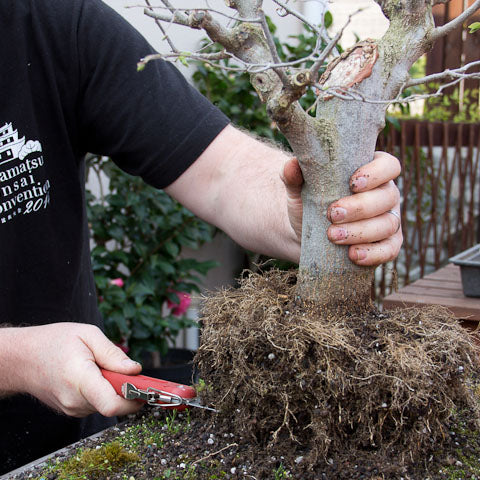
Image caption. Use a large toothed rip saw to make the cut
If your layer was a success and you have a good even distribution of roots, and therefore you don't need to repeat the exercise, then you can go ahead and cut the layering from the mother plant.
I really like the ARS medium toothed rip saw. It does not clog and is super sharp. A couple of pulls was all it took to cut right through this trunk. It also has a really neat and vital safety function; a clasp ensures that the blade is opened fully and remains open until you are finished using the saw.
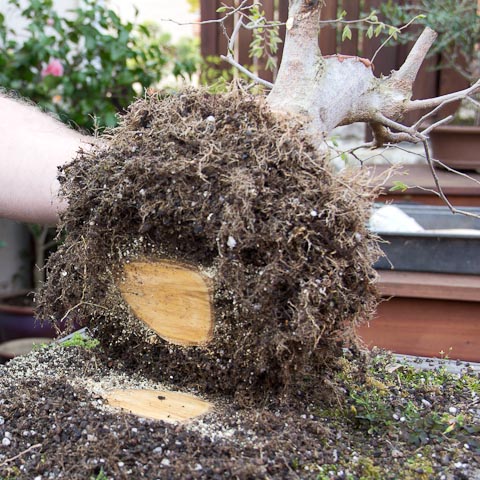
Image caption. The layering now separated from the donor tree.
Reducing the stump
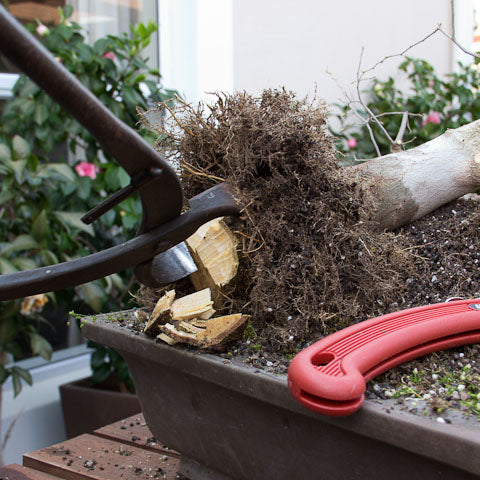
Image caption. Using a root cutter to reduce the stump under the layering
It is important to reduce the stump which remains under the roots on the layering to practically nothing. This wood is essentially a waste of space in a bonsai pot and so should be minimized. As it is so easy to rip through roots when sawing, it is best to saw a little ways away from the roots and then reduce the stump afterwards.
I like using a root cutter for this task. Of course the bigger the better as you can remove more wood at a time. Please don't use tools such as branch cutters for this purpose. Their blades were never designed for the task and you are very likely to break your tools. If you don't have a root cutter and are not able to purchase one then I guess you can try using a mallet and chisel, although the knocking might damage some of the roots.
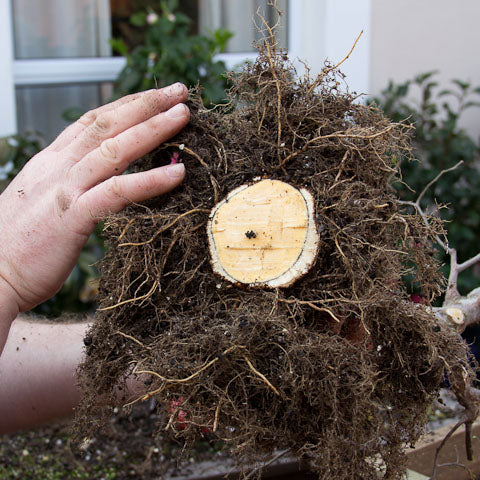
Image caption. You can see that I have shortened the stump to just under the roots.
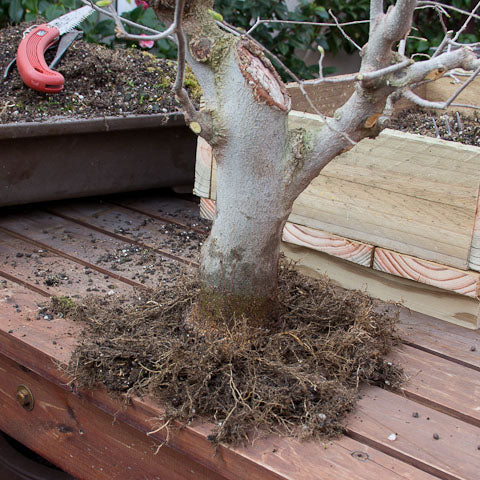
Image caption. It's good if your layering can stand upright, unsupported
The planting box
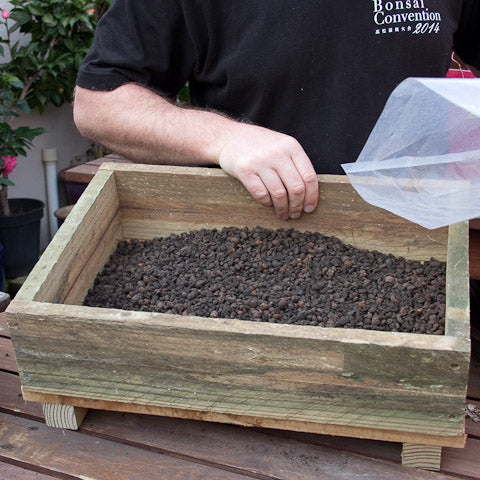
Image caption. The prepared planting box
I have prepared a wooden planting box for the layered tree. It will provide the space which will be needed initially to get the tree off to a very good and strong start.
When you construct your wooden box, ensure there are gaps between the bottom wooden strips of a few millimeters or so to allow water to rapidly drain. This means you will not need to use drainage mesh either. It also provides great slots through which you can insert wire for anchoring the tree.
At the bottom of your planting box you can use a layer of coarse material as a drainage layer. I have used a coarse grade of LECA called Rootzone. Some people use stone, and although this will work as well it makes the planting much heavier.
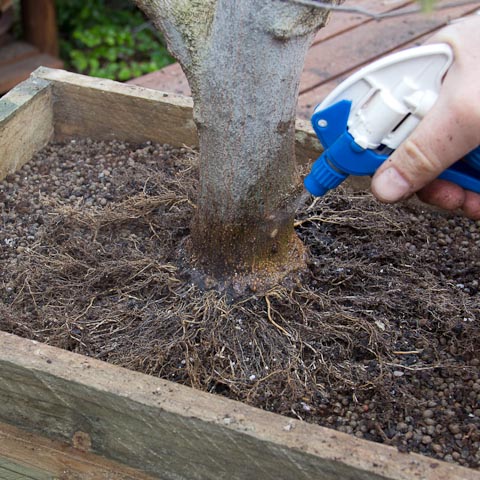
Image caption. Wetting the roots again
All this activity takes some time so it's good to pause, get your spray bottle and wet the roots again.
Arranging the roots
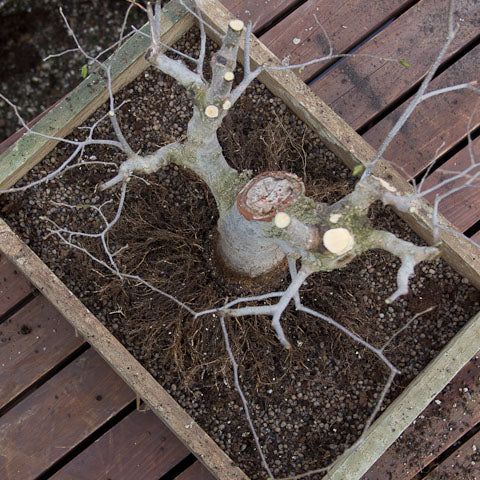
Image caption. A bird's eye view.
Arrange the roots of the layered tree so they spread outwards. There should be no roots crossing over one another, or as they develop they will become unsightly. Its also advisable to place the trunk on a bit of a mound so that the roots are not perfectly flat, but rather flow into the soil at a very gentle slope.
Anchoring the tree
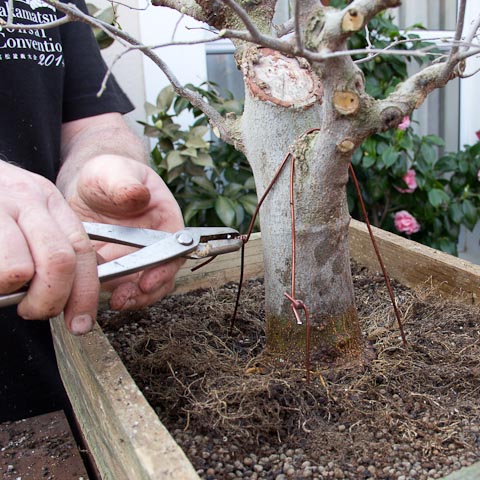
Image caption. Anchoring the tree with wire to prevent movement.
Anchoring a tree like this where you have a fairly substantial trunk with very immature roots it very important. Without wire to keep it from moving in the wind, or if bumped to keep it from toppling over, the trees survival is being risked.
Use aluminium wireof no thinner than 2 or 3mm to secure the tree. Of course it will not be possible to wire over some thicker roots as there are none, so you will need to anchor onto a couple branches or if necessary screw in a couple small screws into the trunk and use those to wire over (once removed, the holes made by the screws will quickly heal over).
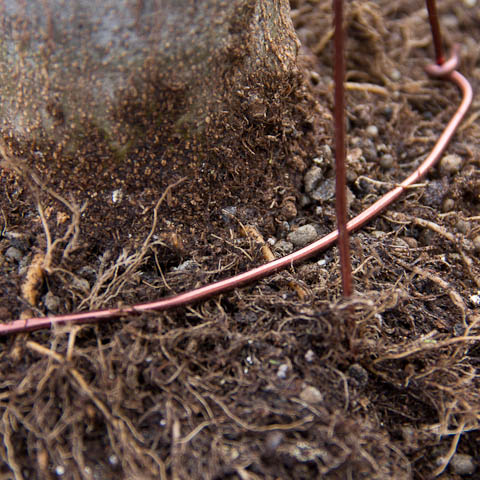
Image caption. Using wire to press roots down
If you have some thicker roots which are rising up a little too much and need to be lowered, you can use wire to push them down into the soil. If the root ball were thicker, as is the case of more developed bonsai you would normally be able to make a little wire staple and push that into the root ball, forcing these stubborn roots down. However in this case we can't do that so make a plan and fasten a ring of wire onto the wire anchors and then bend it down so it pushes against the roots.
Watering and general care
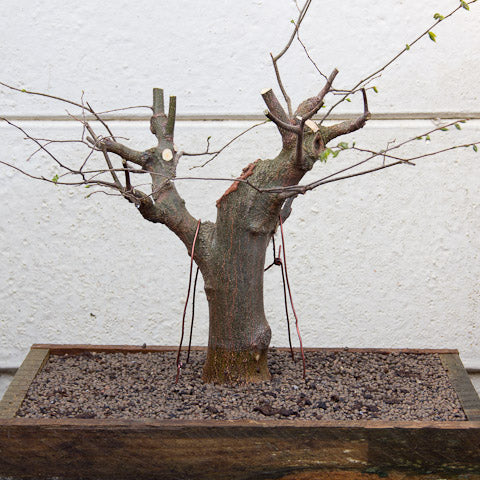
Image caption. The final step
The rest of the wooden box is filled with growing medium, in my case I used Professional Mix again as it has a good ratio of 70:30 Leca/Peat which will ensure that I get really good fibrous root development and masses of foliage growth for the next few years. Water your planting well with a fine spray until the water runs from the wooden box, and is clear. The demand for watering will not be that great yet, probably only a little watering every few days, as there is little moisture loss. However as the tree develops more and more greenery you will need to adjust your watering accordingly.
I will start fertilizing in a couple weeks or so when there is good foliage growth. As usual, I will use BonsaiBoost, about 4 bags placed evenly around the tree, as I find it provides all the nutrients needed by the tree to develop healthy growth which does not exhibit signs of excessive nitrogen or nutrient deficiencies for that matter. Alternatively you can try other solid fertilizers but I would not really recommend liquid types as they will not be absorbed quickly enough by this rapidly draining growing medium and will simply go to waste.
Keep the tree out of the direct, afternoon sun and rather expose it to morning sun only or perhaps dappled shade all day. When you see the spring growth has hardened off and the tree looks healthy you can expose it to higher light levels if the species you are working with requires it. Protecting it as much as possible from the vibrations caused by wind is strongly advised.
5 Responses


Leave a comment
Comments will be approved before showing up.

Terry
March 20, 2017
Hello Bent and thank you for your comments. I will not pretend to answer your question from a position of experience as I simply do not know for certain, however I am pretty sure that if you do it at the right time (when the spring leaves have hardened off a bit), make a broad enough collar and remove EVERY trace of the cambium you should have a good chance of success. Perhaps try it on one or two trees which you don’t mind experimenting on first. Use a rooting hormone also as this will improve chances of success too. Good luck!