Your Cart is Empty


Development of an English Elm Bonsai
Introduction
I purchased this tree, a small rooted cutting in a bag, from the late Rudi Adam around 2006 and continue to develop it till today. I'd like to share with you the process that I used to achieve the tree it has become. In order to do this I have decided to split up its development into the three basic stages I take most of my bonsai trees through:
- Field growing
- Development
- Refinement
Until recently I believed this tree was a Chinese elm, the species often used in the past for street planting. However, I was working on it at a show a few years ago and Freddie Bisschoff, well respected for his top class elms, advised me that it was in fact an English elm.
Stage 1 - Field Growing
It is an irrefutable fact that if you want to fatten the trunk of a tree which you intend using to create a bonsai from, field growing is the best method. Although not all trees need to have fat trunks with dramatic taper, you may wish to develop a more feminine tree for example, however I have yet to come across a tree which I have grown which in my opinion did not benefit from at least a few years in the ground. Bear in mind also that once you have potted your tree into a small bonsai pot, you will not see any significant trunk thickening taking place from that point onward. I am sure you have heard it before, but let me re-iterate; don't be in too much of a rush to get your trees into a bonsai container.
I have written about the subject of field growing in some detail in previous blog posts, so if you are not sure what I am referring to then please do take a moment to familiarize yourself with the concept.

Image caption. Raised growing beds made from brick. Raised beds are far easier to work in than flat on the ground. I had a special mix of media made up to fill them with and the growth of the trees I developed in them was very satisfactory.
In 2010 I built raised, brick growing beds in my back garden and it was in these growing beds that this tree saw the final years of its time in the ground. {Since then I have removed all the trees, moved them to a nearby farm and have built more benches where these raised beds were}

Image caption. This is the earliest image I have of this tree unfortunately. In 2010 you can see that the trunk is already fairly substantial having already been developed for a few years from the original rooted cutting.
Before this {and another elm, a variegated leaf variety} I had never developed an elm in the field before and it always helps to know the characteristics of the species when doing this work. For example it would be beneficial to know just how thick you can allow a sacrifice branch to develop before the resulting scar will not heal over properly anymore. Its also good to know just how drastically you can cut the roots and when the best time is to do such major root pruning. There really is no substitute for personal experience and the best advice I can give you is that you should try it yourself and in the process your confidence will grow.

Image caption. The tree in a pot, 2012.
After a couple more years in the ground I finally decided to remove it from the growing beds and put it into a container. Knowing when the best time is to do this, and I don't mean the month of the year, comes down to experience. However to write in a very general fashion I'd say you need to consider the following and based on your answers you may or may not decide to move the tree to a pot. You will also note that you are almost exclusively going to consider the trunk only as branches come later, usually also as you remove all branches grown in the field anyway:
- Is the trunk think enough to achieve the style or mental image of the tree you had in your imagination? Yes, then lift it. No? Keep growing it for a few more years.
- Is there sufficient taper? You will not be able to correct this easily once potted. If its not enough then use sacrifice branches low down on the trunk or perform a trunk chop and continue to develop the trunk from there.
- Enough movement? Bending the trunk of a deciduous tree, without causing a lot of scars, is not that easy. Movement is usually created with repeated trunk chops and at each occasion changing the direction the trunk is growing in. It may already be too late to put movement into the trunk, but if you have long and strong sections then I'd recommend further development in the field after a trunk chop.
- All major scars healed? In my experience, if a scar remains on the tree larger than say the diameter of a broom stick handle and you put it into a pot, you are going to wait a long time for it to heal over. It may never heal over.
Stage 2 - Development
In the first stage, the goal was solely to give us a good foundation for a future bonsai tree. Considerations which were important then were the trunk and the roots. However, in this 2nd stage of the trees life as a bonsai these considerations might change, and in fact they do. Instead of trunk thickening we now consider branch placement. The nebari we achieved in the first stage will now be further developed through various techniques.

Image caption. By the time the tree gets to Stage 2 the foundation for a good nebari should be fairly advanced.
The container
Probably the most visual difference between the 1 and 2nd stages is that the tree is no longer grown in the ground or perhaps an over-sized container; the container is now a little closer to the final size the tree will ultimately be refined and possibly exhibited in.
If you have a suitable ceramic container then use it but if not, then you can make yourself a wooden box. Alternatively, you can use a plastic tub, tray or similar vessel.
What I'd like to stress about the container for this 2nd stage is not so much the material but the size. It must be smaller than what was used in the 1st stage but it must not be so small as to restrict growth too much. You want controlled growth yes, but as we now need to develop the basic branch structure you will be using certain techniques to achieve this and they require a little more pot volume.
Growing Medium
I have already written much on this topic and you can see previous posts here. However, the main role for the growing medium in this stage will be that it drains of course to avoid root rot issues but also to provide aeration for the roots which you want to develop. Bear in mind that when you dig the tree from the ground you most likely will remove most of the roots and probably all the finer roots, so you need to encourage these to grow back again as soon as possible.
Branch Structure
As your trunk determines the style or possible styles you can consider for the tree this decision has already been made for you to a large extent i.e. the trunk is already shaped in a certain way and changing it now will not be easy and most likely will put you back into stage 1. For my elm I had decided that it would be fairly upright and that I wanted it to appear rather mature, so the bottom branches would need to sag. With these decisions made I could determine roughly where the first branch should be and its angle based on the height of the trunk.
At this early stage it is best to grow as many branches as you can so that you can eliminate them later. I made many mistakes before by removing all the branches which did not fit the visual image I had in mind for the tree right in the beginning, only to find that the tree did not really want to grow some of the branches I had kept. So now I try to keep as many as I can and then remove them later if they start becoming a problem; for instance, starting to create reverse taper or becoming too crowded.

Image caption. Your tree will still not look like much but be patient. At this stage much of the initial branch structure work is completed.
Using the technique of sacrifice branches, you will now develop the basic branch structure of the tree. The process involves growing the branches as long as necessary until the jump or transition from the girth of the trunk to that of the branch or branches is pleasing. It’s hard to define what is pleasing but it needs to make horticultural and aesthetic sense. Horticultural; meaning that you cannot expect sufficient sap to be able to support a highly ramified branch if its only pencil thickness. Aesthetic; meaning that a very thin branch growing from a very fat trunk will appear wrong. Finally, don’t rush this step or you will regret it in the future as once you start building ramification should your branch not be thick enough to correct will mean eliminating any ramification developed to that point, so you would have wasted several years.

Image caption. Don't forget to view your tree from the top as well to ensure you are developing branches in all directions. Its very easy for a tree to become very 2 dimensional otherwise.
When growing sacrifice branches, it is best to eliminate all side growth and focus on directing the auxins (found in the growing tip which lead to branch extension) to a single growing tip. What happens as a result is that this branch becomes very long and in order for it to be supported it must fatten quickly. I am also convinced that when the wind blows it creates small cracks, much like what we do when we wire, as the plant heals these injuries it will also increase the girth.
As soon as the base is thick enough you can cut the branch back. How short you cut it is based on your future outline of the tree. By this I mean that if from the cut you can only afford for the tree to grow another couple centimeters then this will not be sufficient to create ramification in it’s a large tree. Perhaps to generalize very broadly cutting this branch back to a 1/3rd of the total, final length should be ok in most cases. However, the more time you take in creating the basic branch structure the better the overall result, so growing it on, cutting back, growing on, cutting back repeatedly will ultimately create a branch with a lot of interest as the branch changes direction every few centimeters. No herring bones welcome here!

Image caption. Be careful that you do not take trees from stage 1 through to stage 2 with scars which are too big, they are unlikely to heal easily.
Another benefit of sacrifice branches is that they can be used to help heal over old scars. This is especially the case if the branch is just above the scar. The intensified sap flow required by the branch will result in the callousing over of the scar. However, be careful that you do not expect too much in the way of healing as scars heal better when the tree can grow unrestricted in the ground. Things happen much slower in a container, if they happen at all. Read more about dealing with scars here.
Wiring
It is very important that the angle at which the branch emerges from the trunk be correct. A new shoot will most likely grow rather vertically, but you can correct this with wire, if you do not wait too long. Yes, there are techniques like wedging and others which you can sometimes use to change this angle at a later stage but why not try doing it the easy way and wire it before the wood lignifies (hardens off).
When wiring a branch don’t only wire that it has interesting curves when viewed from the top, it must also have character from the front. Also, if you have a fairly upright trunk like this elm of mine, I cannot have branches which have dramatic curves, visually you will be sending a very conflicting message and of course it will make no horticultural sense at all.

Image caption. Aluminium wire is best for deciduous trees. Make sure you wire in curves front to back and up and down.
Don’t worry too much about wire bite now, in fact I think a little wire bite can be a good thing as it can add some interest to the branch, so long as it does not get too bad. With species such as this elm which heal easily, wire bite even if rather severe can always be smoothed with a grafting knife and sealedand in a season or two you wont even notice it. However on something like a Japanese maple or even an olive, it may take many years to heal properly indeed. Removing the wire too early from a branch, before it has had sufficient time to set in position, will mean you will have to reapply the wire, wasting time and money.

Image caption. Four years after potting, this elm can now move into the 3rd and final stage of development, refinement.
Fertilizing
I should also mention something about fertilizing when discussing stage 2 as encouraging rampant growth with high nitrogen feeds will result in very long internodal distances. This refers to the distance between leaves along a branch, where you will also find the dormant buds. Normally, this extension is straight and without any taper. You might be able to create movement with wire however if one day you need to cut back or encourage budding back along this area, the branch can only bud back to where there is a dormant bud. Shop from our extensive range of popular fertilizers and read their reviews here.
Stage 3 – Refinement
If the previous two growth stages or phases of development which we discussed can be described as building a house from the foundations up, this final stage of refinement might be described as the furnishings. The previous phases may take some time, and so they should as a bad foundation is not something which you want to build a house on and neither a tree. If you got the first two stages right, then this is when you really get to reap the rewards. On the other hand, get them wrong and you might have wasted a few years and need to cut back to a trunk and start again – it wouldn’t be the first time that has happened to me and I am sure it will not be the last either. However, the journey is a lot of fun and there really is no substitute for experience, so going through the phases repeatedly, provided you learn from them and your mistakes, will ultimately see you creating a more superior tree than the previous attempts.

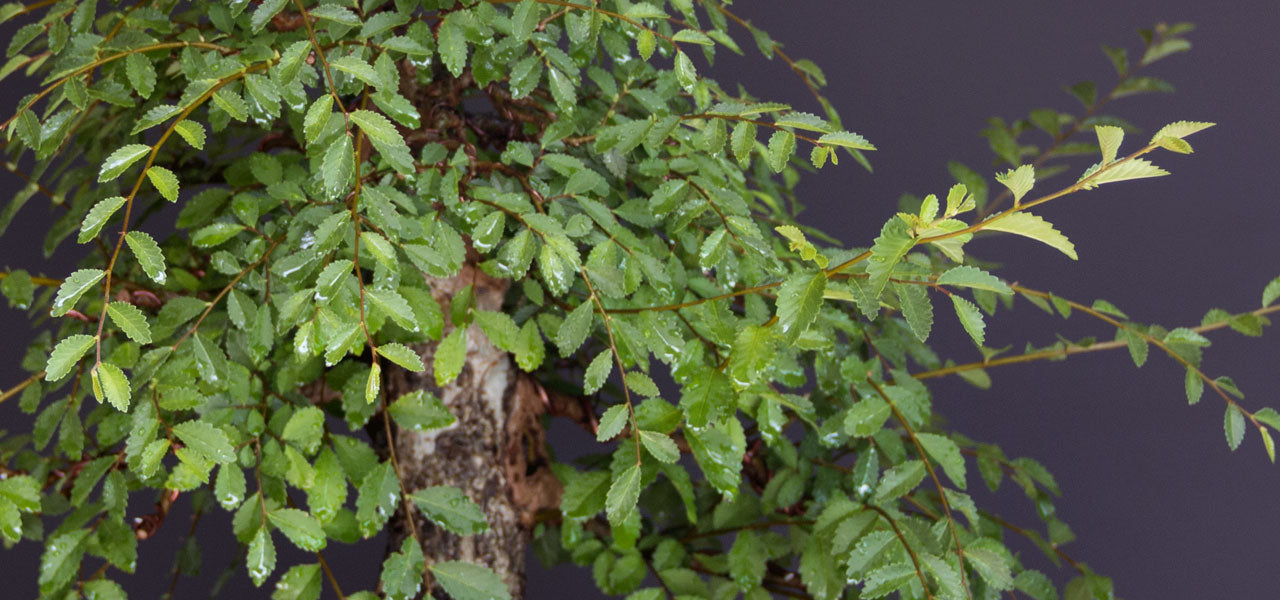
Image caption. Front view of the tree as it looks now 5 years after it was first potted, photo taken 01/03/2018. Over time the canopy will fill even further. There are some gaps in the canopy which perhaps could be plugged but there is a certain attraction to the play of negative and positive spaces, still I would like to increase the density. The rule zombies out there will notice that the bottom branches are pretty much bar branches, however cutting one away will not make the tree look better and I don't design trees to a set of rules. Something else you might have noticed, this elm is not trying to be a pine tree. The canopy is full, which is how deciduous trees grow.

Image caption. Left view. Be cautious of having your apex lean too far forward. In order for the sun to reach the bottom branches the canopy needs to extend far enough forward. I'd say this tree is either borderline or perhaps even too far forward.

Image caption. Back view. You will notice that in all these views a line could be drawn along the outline of the tree's canopy. In nature, trees often have these silhouettes as branches reach out to the sunlight, the branch below growing a little longer to reach it to, the branch below that one a little longer still.

Image caption. Right view. You will notice that the tree is planted pretty much in the center and in the middle of the pot. That "nonsense" about planting your tree towards the back of the container merely results in an underdeveloped root-ball in that area {leading to a reduced supply of nutrients to that portion of the tree} and also presents problems when changing pots.
The container
At this stage, your trunk should be developed, and any thickening now will be extremely slow if any at all, depending on the species. So, no more oversized containers. You are also not going to be making much use of sacrifice branches anymore, what you are after is controlled growth so that you can really focus on keeping internodes short and growth delicate. Your choice of container now will be much more aesthetic than previous as now you will want to show off your creation. Of course, the basic horticultural considerations still apply, such as don’t pot a water loving tree in too small a container unless you are prepared to commit to the demands of watering it. Be mindful also of how hot a very small container can become in the South African sun. Although there are measures one can take to reduce the heat, such as double potting the tree, you don’t want to cook the roots of your tree so just be aware of this.
As mentioned, the container you will most likely want to use will be selected because of some attribute which complements your tree. This might be a light deadwood feature, so a dark unglazed container might be chosen. You might want to enhance the brilliant green leaves so a nice contrasting blue will do well. Your tree might be rather formal in character so a rectangular pot with stepped feet and maybe panels will go well with that. If your tree is more informal such as a Japanese or Chinese maple for example you may choose an oval (Read more about selecting a container here). It is always the case that when you are looking for a container for a specific tree you can never find it; my solution to the problem is have a lot of containers to choose from!
Growing Medium
Some profess that your choice of growing media does not matter. Apparently, you can just about use anything and it wont matter. Well I would go so far as to say that these people just don’t have any trees in refinement. Up to this point the effects of less than ideal growing media would perhaps not have been as apparent to someone none the wiser as they would not have known that their tree was growing slowly or that there was very little rooting or some other problem.
In the refinement stage the growing medium really does matter. You need to keep your tree healthy to ward off sickness firstly, and secondly so that you can continue to work on it, however you don’t want the growth to be uncontrolled. With regards to root development, what you expect to achieve above the ground is what you need below the ground to support it. In other words, if you are using a very water retentive mix this will lead to few, fat, coiling roots. This sort of root system does not have the finer, feeder roots which are needed to support a highly ramified tree. It sounds wrong but in fact a mix which dries out quite a bit will lead to a finer network of roots than a wet mix. This is as a drier {sifted} mix will result in more oxygen exchange in the medium, as there wont be water filling up the spaces between particles, and also as the roots will be forced to produce a mass of roots to seek out water.

Image caption. Although with approach grafting, splitting roots and other techniques you can improve nebari but it is rather difficult at this stage to perform some of these techniques. Try doing the majority of this work at the earlier stages of development and then keep fine tuning in the more advanced phases.
Akadama has been the medium of choice for Japanese professionals for many decades. It is now used by many leading bonsai enthusiasts around the world. What makes it unique and unlike any other growing medium is that it is water retentive but drains very well. Moreover the particles of akadama break down over time. It is for this reason that some people are against its used, but what is great about this is that when you repot a tree and cut much of its roots off, you want the tree to quickly regenerate these roots. Akadama helps with this as it allows for a lot of oxygen in the mix while providing a moist environment, both these attributes are loved by roots and new roots will develop rapidly. However, over time; a few seasons, as the particles begin to break down and get smaller so do the gaps between them and the mix becomes more water retentive slowing growth down. This is precisely what you want in refinement. There is not another growing medium like it and quite honestly if you have never tried it for yourself you should.
Branch Structure
It is hard to control growth at this stage, because as I mentioned, when you allow strong growth to extend and then cut back the base of the growth thickens. Do this a few times and eventually you have a pretty thick branchlet and must cut the entire branch out and start again. Growth must be “weak.” Remember that you are trying to create a realistic miniature of a tree, so scale is an important factor. When you look at a tree’s branches, as they extend out from the trunk they get progressively thinner. At the edge of the canopy these branches are mere twigs. Your bonsai tree should echo the same.

Image caption. Trees are three dimensional objects. However you will be surprised to see how many trees are designed without giving that much though. A tree must grow towards the viewer and to the back, away from the viewer to give a feeling of depth and even perspective. The best way to check whether you are on the right track is to view your tree from the top. If you notice any areas of your tree which lack development focus on that.
As I mentioned earlier, till this point you were laying the foundation of your tree. At times it feels like you are not getting anywhere but don’t give up now as you are about to see the effect of “compound interest” in the bonsai sense. As you build the ramification of your tree that single branch will become two. Those two become four. Four becomes eight and well, you get the picture. This creates density in an almost sneaky way. I say sneaky because when you look again your tree has a dense canopy and you can stand back and really admire it.
Density brings its own challenges however. You need to keep all these little twigs happy or they will die on you, commonly known as dieback. One of the techniques which a lot of your time will be spent on is defoliation. Sometimes this will be partial and sometimes full defoliation. The effect of removing all the leaves is that it allows sunlight to penetrate right into the tree. This makes it possible for new buds to develop, which were they shaded out by a dense canopy of leaves would not be possible. However simply defoliating will not trigger back budding, you need to prune the tips of the branches. The reason for this is there are auxins in the growing tips of the branches. If you don’t cut the tips they will simply keep extending the branch tip, however cutting them causes these auxins to look for another spot to grow, so they will most often activate the dormant buds at the base of leaves along the branch. Sometimes though, if the tree is strong enough you will even get back budding on the trunk. These can be allowed to grow strongly and eventually become part of the foundation of your tree.
It is also at refinement stage that enthusiasts who created “herringbone” branches instead of primary, secondary and tertiary hit a problem. They simply run out of space to create fuller pads and end up with these little clouds of foliage which I liken unto something which resembles a poodle just returned from the parlour. It is anything but natural in its appearance however and looks very artificial to me. Different tree species create slightly different foliage pads according to their growing nature, go look at some trees in your garden for reference and you will see what I mean. Very often a problem I see on trees I am asked to adjudicate is that their branch angles are too close to 90 degrees. You will see that in most cases in nature these angles are far smaller, making the transition between primary and tertiary far gentler.
Wiring
Many of you will be relieved to know that wiring is considerably less at this stage. The growing method is much more clip and grow rather than growing out and wiring.
That said, eventually you might need to wire a branch down or change its position for some reason. Wiring at this stage is akin to a magical act though, unless you have very small hands.
As trees never stop growing, and even if you can keep growth to a minimum, your branches will eventually become coarse and you will need to re-make them. What this entails is cutting back the secondary or even primary branches and building the ramification from that point on. It is certainly true of bonsai that the “work is never done.”

Image caption. This scar has almost closed entirely now, although I should have completed this before this stage. Nevertheless, working with what I have, my intention over time is to remove the bulge the callousing created and seal with a good tree sealer each time I make a cut. Now that growth is much slower the resulting callousing should be far smoother.
Fertilizing
Most of the growing has been completed by now, you just need to feed your trees enough to keep them healthy. To do that you will want to avoid feeding at certain times where the additional nutrition will fuel uncontrolled growth. This means you should avoid fertilizing in spring, at least until the spring growth has hardened off. This might also apply to other periods of growth spurts, depending on the species and where you are situated.
The most important time to feed is in Autumn. This will allow your tree to gather and store the energy it will need for the spring push.
I find that the best fertilizers to use are organic. Stay away from those which have very high nitrogen levels. For example, I think that guano or chicken manure based fertilizers might not be the best choice as usually this nitrogen is released very quickly producing a growth spurt. I mainly use BonsaiBoost (main ingredient being canola meal similar to rapeseed or cottonseed meal) as it is a slow release source of nutrients. I supplement this with liquid fertilizer of Nitrosol, Seagro or Sea Secret, which I will either apply with a sprayer or with a watering can. The occasional treatment of Kelpak is also advisable as it is packed with auxins healthy for the tree, although it should not be seen as a fertilizer.
Summary
I hope you have enjoyed reading this post and that you have learnt something which you’d like to try out on your trees. No doubt there are many ways of developing deciduous trees, and the above is merely the method I am currently using. However, I am tweaking the process as I learn from my own experiences. And on that note, I would like to quote Albert Einstein who said the following; “The only source of knowledge is experience.”
Check out my YouTube channel for the latest on this tree!
10 Responses


Leave a comment
Comments will be approved before showing up.

John
March 12, 2018
I read your articles often. I just read this one again to refresh my mental knowledge base as I head into spring and examine branches. Thanks for thoroughly helpful coverage of the subject!