


Orchids


Repotting a Japanese Red Pine
A friend of mine asked me after receiving the newsletter about repotting a trident maple, if I could perhaps write something about repotting pines. As this is also a good time of the year to repot pines, I intended to do so with several which needed it. So lets jump right into it and follow along using the photographs my wife, Christelle, was kind enough to take for me.
The pine I would like to use for this blog is one which I imported from Japan in 2014. It was imported in May and originally comes from the Saitama prefecture.
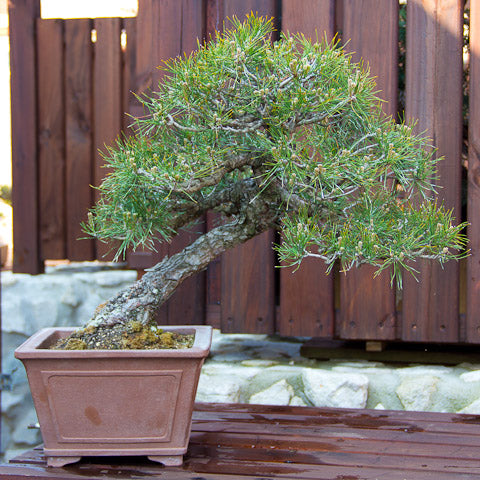
Image caption. Japanese red pines, are two needle pines but are less masculine in appearance than the more common black pine. their needles are thinner and softer than black pines although not as much as the white pine. Their growth is less dense than the black pine and thus they are almost always used in literati or more dynamic, open styles.
Unlike the black pines which thrive in the coastal climate in the Western Cape where I live, the red pine is a little less resilient and seems to take a little longer to adapt. In the month of december passed I plucked some of the old needles to allow more sunlight into the tree and fed it like crazy with BonsaiBoost for the entire growing season, in the hopes that the budding this spring would be stronger. And indeed it was, as you can see in the following photograph.
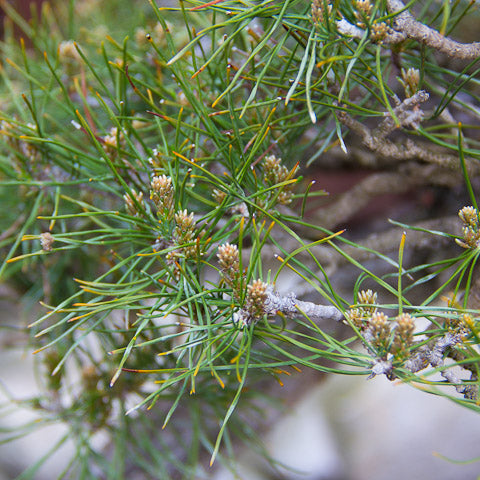
Image caption. Extending candles is always a welcome sign after winter and spells the end of the tree's dormancy and suitability for repotting.
This is also a good sign that the tree is now active and we can contemplate repotting. However you should still ask yourself if repotting is necessary.
It is unnecessary to repot pines as frequently as deciduous species
Here are a few scenarios when repotting should be done:
- The vigor of the tree is down and it has been several years (4-5) since you last repotted. Repotting a pine gives it a boost of energy. A weak pine is often due to the growing medium which is no longer allowing good oxygen exchange.
- Water does not drain from the container. This is likely as the growing medium, in this akadama, has broken down and essentially has become a solid ball of clay.
- Root rot is a disease which can infect pines by attacking their roots and it is caused by incorrect watering or growing medium which is too water retentive (or a combination of both). The visible damage root rot has is dieback of foliage, however when you inspect the roots you will find some of them rotted. This post is not about how to deal with root rot, but emergency repotting is part of the action which is needed.
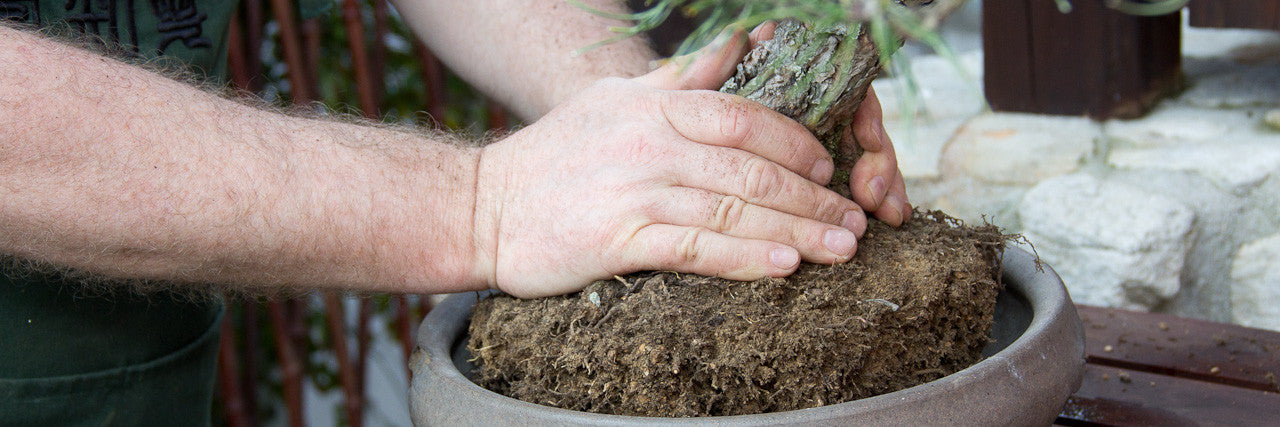
As the tree I am considering for a repot is not draining well I am concerned that the clay is withholding more water than it should and that oxygen deprivation is slowing the tree down. I first need to check whether the timing is good and the healthy, extending candles are a sure sign that it is an appropriate time to go ahead. However by checking the roots after removing the tree from the pot I will be able to make certain.
Image caption. Prior to repotting I have allowed the growing medium to dry out quite a bit.
Before repotting any species it is always a good idea to withhold water from it for a day or so, just so that it is on the dry side when you repot it. This enables you to remove the old soil easier and without too much damage to the roots. Please don't take this to the extreme and allow the tree to dry out completely, you just want it to be drier than usual. In pines this is quite dry!
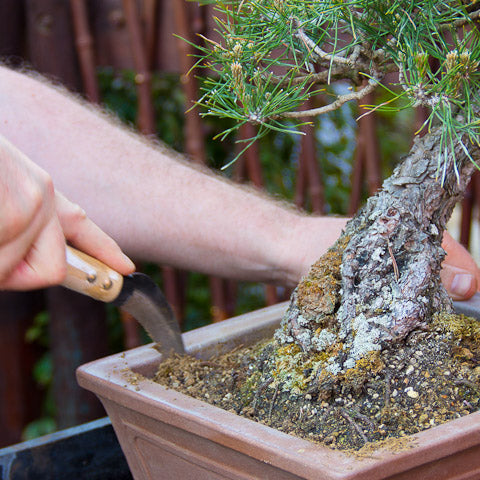
Image caption. A repotting sickle is very useful for removing a tree from a pot in which it has grown for several years. This is especially true for pots with an undercut and where roots grown into this space make it impossible to simply lift the tree from the pot.
Use a sickle to create a groove or gap between the wall of the pot and the root ball. Be careful that you do not chip the rim or lip of the pot, especially if it is an older pot. Work all sides of the pot and go progressively deeper with the sickle until it is possible to lift the tree from its old pot.
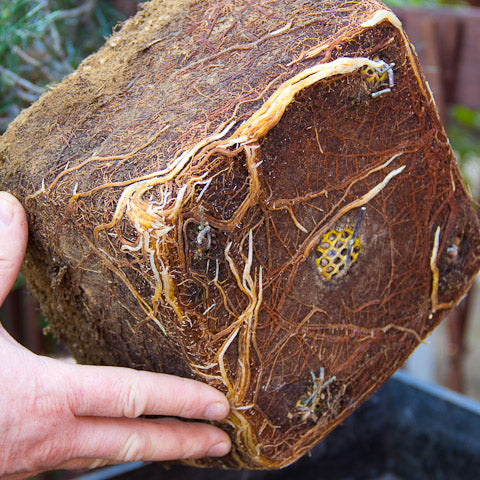
Image caption. These roots are healthy. They have white tips confirming that the tree is actively growing and that we are correct to want to repot it now.
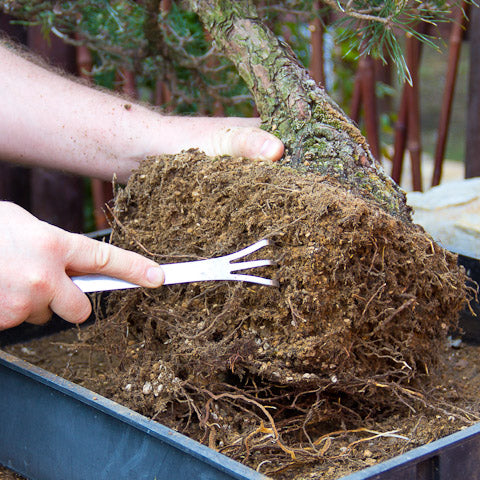
Image caption. Using a rake or a root hook begin to rake all the sides and bottom of the root ball. The aim here is to loosen the roots which have coiled around the root ball, and also to remove some of the old soil.

Image caption. Don't forget to rake the surface as well. This area often becomes completely solidified with old fertilizer, surface roots and more. This mat prevents water penetration and must be removed.

Image caption. An old screwdriver, which has been bluntened makes the perfect tool with which to pierce the dense mat which is the root ball. The aim of this action is to remove as much of the old soil as possible and open the root ball up so drainage is restored and oxygen can penetrate.

Image caption. Using a pair of sharp scissors for the purpose, trim the roots. How much root to remove comes with experience but it is safe to remove about 1/3rd of the roots.

Image caption. Repotting is generally a messy business and so it is a good idea to wear some old clothes and perhaps an apron to protect yourself from the worst. Some don't mind the mess, in fact they enjoy it!

Image caption. Thick roots should be cut using a root cutter. Scissors might not cut the root cleanly, especially the thicker roots and such cuts don't heal well, if at all.
Raking the rootball is an important step in the repotting process. Over time roots have developed in the container and as they have no place to go, they simply circle the pot time and time again. After a while they become thicker and thicker until they are eventually storage roots and no longer feeder roots. In a bonsai pot we want to encourage as many feeder roots as possible as it is these roots which absorb the nutrients and moisture needed to sustain the ramified canopies we desire so much. So these storage roots much be removed so that feeder roots can be stimulated.
Very importantly, when repotting one must make certain that there is water and air penetration into the area just below the trunk of the tree. If there is not nothing will grow there and all the active roots will only be at the tips of the old roots. So when you repot the tree will be seriously weakened. So it is important that you keep this zone alive so new roots are being issued in this area, making it possible for us to remove roots at the extents of the rootball.
After you have reduced the rootball you should check that it fits into pot which you have prepared for the tree to go into. This could be the same pot which it was in, or perhaps a pot you recently purchased which might be better suited to the tree. Selection of a pot should be done before you begin repotting as doing it when you have exposed the roots risks further stress to the tree. I had in fact already selected the pot which I wanted to use, earlier in the day but now just to make certain of my choice and for your benefit I will quickly show you what I considered (Take a look at these unglazed, good quality pots which you can choose from):

Image caption. Option 1. A fairly deep, ornate unglazed pot. Nice colour, good depth which will help the tree regain its vigor quickly. In the end I decided against it as I felt it was perhaps a little too ornate for this tree.

Image caption. Option 2. This is a very plain, round, light colored clay pot. Not a bad option although perhaps something a little less "perfectly shaped" might have been better. Something hand formed perhaps.

Image caption. Option 3. This is an old Yamaaki pot, with a wormwood finish which I was lucky enough to find on one of my trips. A rather unique pot which I purchased not having any particular tree in mind, or in fact whether I would ever have a tree worthy of putting into it. However I think this combination works very well indeed.

Image caption. Check if you can put your tree into your chosen pot and make sure it fits nicely allowing for some new growing medium to be used.

Image caption. Make the final cuts with your scissors and make sure the bottom is flat. The tree should be able to stand at the correct planting angle without you holding it. Of course this is not possible with some styles, such as this leaning trunk.

Image caption. Holes should be covered with drainage mesh to ensure the growing medium does not simply pour out the bottom.

Image caption. Pour growing medium into the container so that it forms a mound.
Once you have done the final trimming to the root ball, checked that the bottom surface is flat, prepared your pot and all the other steps shown above then you can go ahead and place some growing medium into your container. It is a good idea to slightly mound this medium so that when you place the tree on top of it there is little chance for cavities or gaps. It is also much easier to work with dry growing medium rather than wet. When dry it is much easier to work the medium into the cavities and also into root ball.
I have not make any comments relating to the mix you should use and as I don't really want this post to become longer than it already is I will be brief on the subject. Pines like fast draining mixes which are on the dry side. They are not too fussy about pH although neutral to slightly acidic would be better than alkaline. In Japan they use mostly a mix between akadama (+-20%) and coarse river stone (+-80%) however the mix you should use will depend on the stage of the trees development and also how often you can water. Adjust your water retentive component accordingly. For this tree I am using a little vermiculite, white peat (NOT COIR) and LECA. There is no soil in this mix, and in fact none of the mixes I use on my trees contain any soil. These individual ingredients can be purchased and combined to your preferred ratio, or you can purchase something like the Professional mix which has a ratio of 70% LECA, 20 % White/Black peat and 10% crushed stone. The latter is a good component to have in pine mixes as the roots of these trees like warm growing conditions and the stone helps, especially in larger containers, to conduct heat and also retain it after the sun has set. As this container is on the small side I did not deem in necessary to use any stone.

Image caption. Applying pressure and moving the tree backwards and forwards to make sure there are no empty pockets.
Place your tree on top of the mound of growing medium you placed into the pot and apply downward pressure while moving the tree backwards and forwards in the pot until the tree is at the correct height in the pot. This action also ensures there are no gaps underneath the root ball.
The tree should never be below the rim of the pot, there should be a gently rise from the lip of the pot to the base of the tree. This has aesthetic reasons but also practical ones; water can quickly run away from the trunk.

Image caption. Wire the tree into the pot and secure it by pulling and then twisting the wire.
As you would know by now, I am rather pedantic about wiring trees into their pots. This just makes so much sense to me for many reasons. These include:
- Preventing any movement of the tree after repotting and so assisting new root production which would otherwise be at risk of breaking if there were movement.
- Fixing the tree in a certain position or angle, which displays the tree at its best.
- Trees with full canopies can easily be whipped from their pots in times of wind. Of course at that time it is best to secure the tree and pot to your bench to make sure the whole planting does not move.
I use aluminium wire for this, passed through the drainage or holes specifically made for the purpose. Depending on the size of the tree you would want to use 2 - 3mm wire, because aluminium wire does not have that much strength and when tightening it, it can easily break and you will have to repeat the process.
Sometimes it is necessary to make a hole through the rootball with a thicker implement if you are unable to pass the thinner wire through. Once through you want to try and pass some of the wire below some roots and above others. This is both to provide a solid anchor but also as you would like to disguise the wire as much as possible. In this planting I used 3 anchor wires, but usually only 2 are necessary.
Give the two wires you have brought together a couple twists but don't make it too tight yet. Once you have done this with all the anchor wires then step back and check that you are still happy with the planting depth and angles. Check the tree from the side of the pot, it should be slightly tilted forward and ideally slightly behind the centerline of the pot. A good tip here is to make sure that the surface you are working on is in fact level, or you might finalize everything only to later find that when you place the tree onto a truly level surface it is not at the angle you want. You can use a spirit level to check the level of your working surface to be sure.
After making your final checks you can go ahead and tighten the wires completely. Do this by pulling on both wires to pull up the slack and then as you release the tension you twist using your pliers. Simply twisting the wire will cause it to coil and snap. Repeat this until the wire is tight and the tree cannot move. Check the planting angle again just to be sure nothing has moved during the process.

Image caption. Empty more growing medium into the container

Image caption. Working the medium into the gaps with a blunt implement.
After securing the tree into the container with wire, you can fill the gaps with more growing medium. Don't pour in too much at once, rather throw some in and then work that in before throwing some more in. Its important to use a blunt implement such as a chopstick or similar to work the growing medium into any gaps within the roots and between the root ball and the walls of the pot. If there are any large gaps roots will not grow into this area, so it's important that you ensure there are none. Using a dry growing medium to pot with makes life a lot easier too as the dry particles will very easily slide pass each other to fill any gaps. Wet medium does not do this and also tends to compact.

Image caption. Giving the planting a good watering with a fine hose spray.
Use as fine a spray as you have and don't put the pressure on too high as this will simply wash growing medium away. You want to make sort of quick side to side movements with the sprayer, don't keep the sprayer still and "blast" one spot only.

Image caption. Water until the water runs from the drainage holes and is clear.
It is important that you water the tree thoroughly after repotting. If you only do a light watering it is possible that certain areas in the pot will be missed and will remain dry. Thorough watering also results in settling the growing medium properly and also causes fine particles to be washed from the container. These fine particles can accumulate at the bottom of the pot and retains a lot of moisture in this zone, where roots like to develop. This excessive retention of water is not good so it is best that such fine material be removed from the material by sieving in the first place, and once again more can be removed by washing when you water the tree.

Image caption. The final planting.
As with any other species, after repotting it is advisable to place it in a protected spot which is sheltered from the wind. Dappled shade or a bit of morning sun would be sufficient and begin moving the tree into full sun again over the course of several weeks so it becomes adjusted to the higher light levels again.
Fertilizer should be withheld in the beginning but after say two weeks, you can slowly begin fertilizing with a well balanced slow release organic fertilizer like BonsaiBoost.
Until the tree has become stable in the pot it is not advisable to start wiring immediately. In fact until the tree has clearly recovered from the repot it would be better to not wire, as this stresses the tree tremendously.
6 Responses


Leave a comment
Comments will be approved before showing up.

Anonymous
September 17, 2015
Thanks everyone for the generous compliments! I am glad if what was written is helpful to you and more importantly that if you are not already a fan of pine bonsai, that you will become one.