


Orchids


Slab building bonsai containers
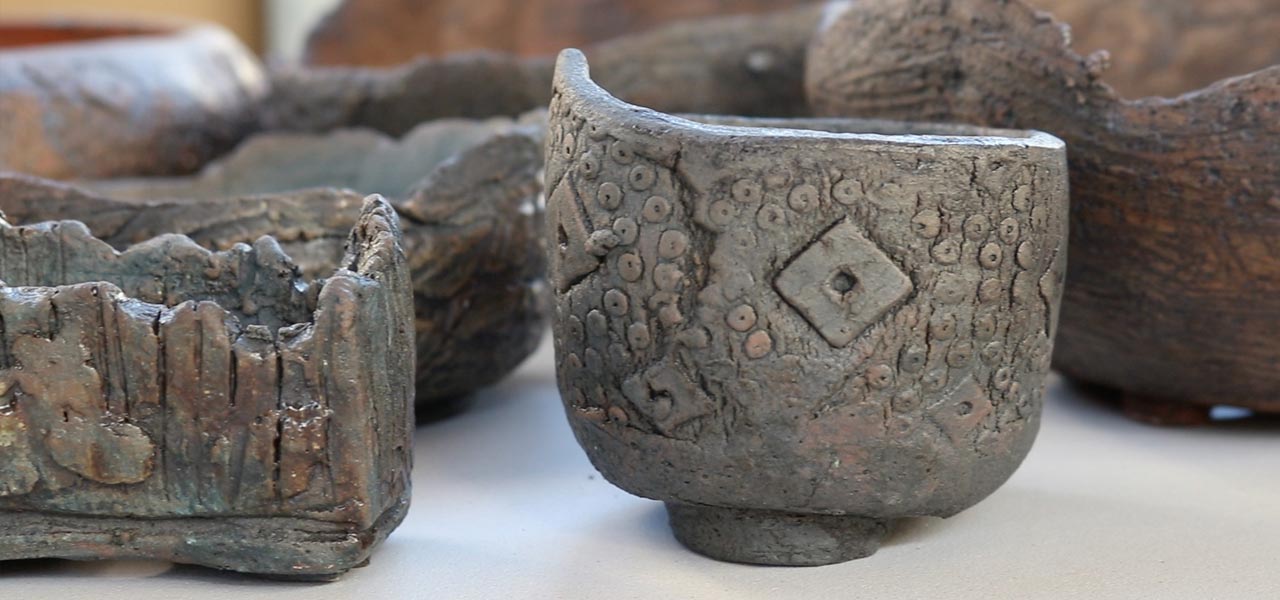
I have known local bonsai and ceramic artist Viky Petermann for a number of years and have come to admire her originality and the artistic flair she pours into her creations. One of her passions receiving much attention and support of late are her unique bonsai containers. Viky agreed to have me interview and video her building a basic container.
Background
I believe that our Bonsai trees in South Africa have a unique sense of wildness that is not reflected in the bonsai containers that are easily available locally. For this reason I started creating my own ceramic bonsai pots which reflect the qualities that I see in our locally grown trees.
The process
My prefer method for creating bonsai pots is using slabs.
The process is simple.
Starting with wedging a ball of soft clay and then rolling it out to an even thickness of about 4 mm.

Image caption. Precut, leather hard shapes.
Once this clay has hardened a little and it can hold its shape when handled, (to the stage that it is known as leather hard) I then cut out the pieces that I will join together to make the pot, in this case a base, 4 sides and 4 feet.

Image caption. Scoring with a toothbrush
I score the areas to be joined together, add water and then press them to remove any air from the seam and I then cement the seam with soft clay.

Image caption. Securing the four sides.
It is important to remember to cut out drainage and anchorage holes from the base of the pot and I do so before I attach the feet.

Image caption, Securing the feet.
I enjoy a heavily textured pot so I add texture in a number of way to the surface:
- imprinting
- scratching
- and adding clay.

Image caption. Adding details.

Image caption. Another method of adding detail and interest.
The pot then is left to dry completely (bone dry stage) and only then is it fired.
Two firings are done, the first, a bisque firing will remove all the water content of the clay.
I will then oxide and glaze the pot and then I will fire it again, this time to temperature which will vary depending on the body of clay I use between 1,060 and 1,200 degrees Celsius.

Image caption. A pot which has been glazed with oxides applied ready to be fired the 2nd time.
After the second firing the clay will be able to withstand being outside in the garden.
Leave a comment
Comments will be approved before showing up.
