


Orchids


Styling a Dwarf: Working on a Kotobuki Black Pine
In this blog post I'd like to share some work with you which I completed on a Japanese Black Pine I imported several years ago. This tree subsequently sold so unfortunately I will not be able to share its progression after this point.
Winter is the best time to do this sort of styling work on conifers in general as this is when sap flow is very low and thus lots of bending can be done without risking damage to the material being bent.
Styling note. The styling you will see applies to pines. Clearly defined, voluminous pads look unnatural on false olives, olives, maples and other such trees in my opinion. Please use nature as your guide. Understand also that the Japanese approach to styling, at least as far as I have been able to gather from discussions with Japanese professionals, is one of celebrating the best of nature or described in another manner; idealized nature.

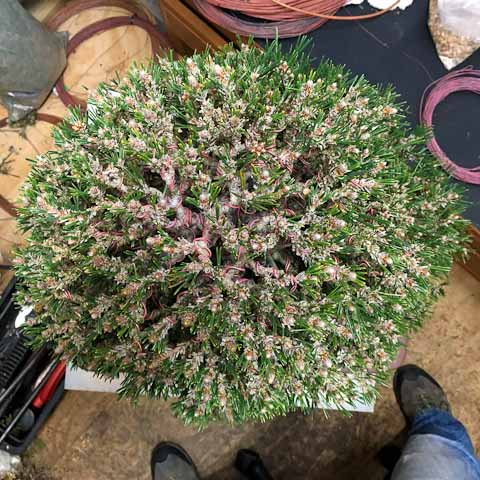
The pine soon after it was imported. It was growing in a very small container, you can actually still see the outline of the root ball. I potted it up to this container temporarily.
I am generally not a big fan of formal upright trees as they don't exude a lot of energy. However what they lack in energy they make up for in presence; which tends to be boldness and they make me feel like they demand respect due to their age and majesty. Why I purchased this particular tree is the needle size. These trees all originate from a single nursery in Japan, as it is this sole nursery which cultivates this naturally small needled variety of pine, called Kotobuki. I was fortunate enough to visit this nursery and was able to purchase two of these trees from the owner.
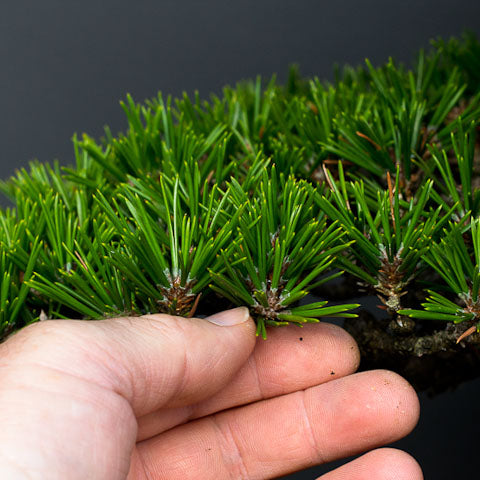
The naturally dwarfed needles of this species of pine is what makes it unique. Although it is possible to miniaturize the needles of a black pine it is not good for the long term health of the tree to maintain the needles very short, it will weaken the tree.
Techniques applied
In this blog I will apply three techniques:
- Needle plucking
- Bud selection
- Wiring
Needle plucking
You can read about needle plucking in these previous posts of mine so I won't go into too much detail now, only to say that needle plucking is a technique which is largely employed only on pines which are developed as is the case of this pine. It is used to balance the energy of the pine, ensuring that all the spring candles get the same amount of sap flow, so they develop evenly. If one part of the tree has a lot of needles and another part few, the area with many needles will grow progressively stronger and the other weaker.
It's always good, if at all possible, to have a place reserved to work on your trees where you can do so undisturbed. Lots of light is needed if you are going to work into the late hours or the night, or even into the morning.
The action of plucking needles is a bit like a chicken plucking at the ground as it collects seeds or insects. It is best performed with a pair of pine needle plucking tweezers as such tweezers are designed with teeth which have a larger pitch on the teeth enabling the tweezer to grip the strong needles of a pine when pulled without slipping.
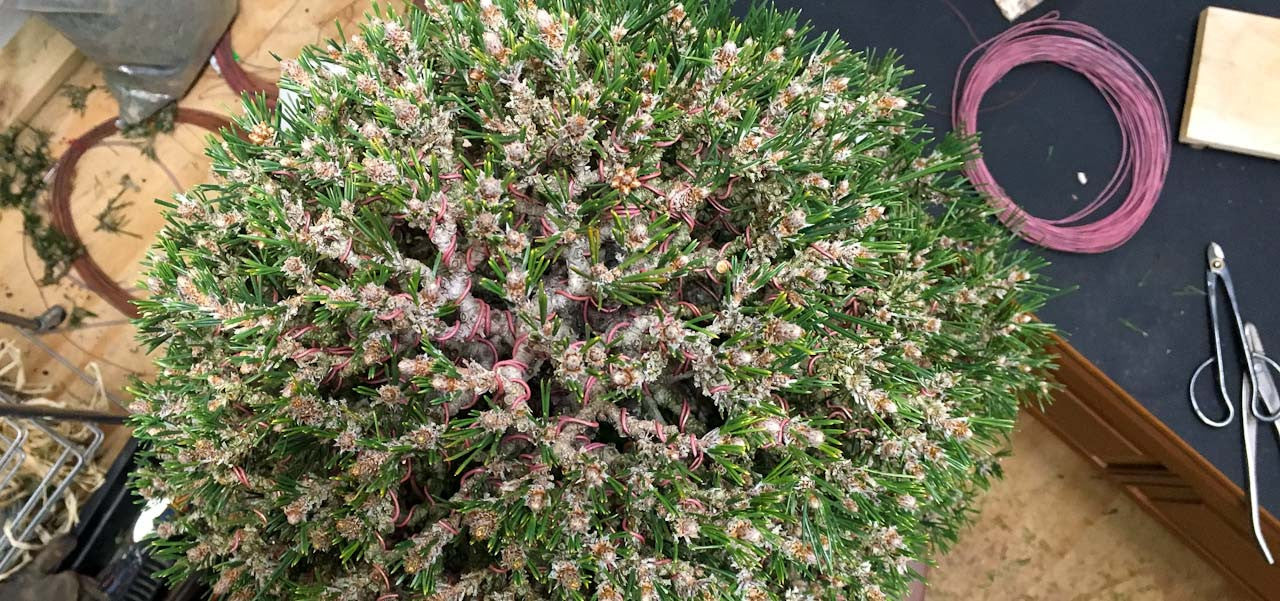
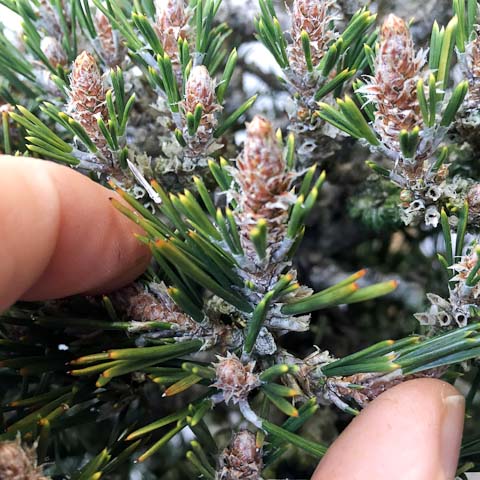
Needle plucking dense trees such as this one can take hours. Here you can clearly see the area which has been plucked and that which I still need to get to.
The goal in mind with this tree was to reduce the needles in the top portion of the tree to fewer needles than the bottom portion of the tree. This is of course as pines are apically dominant and as such one needs to leave more needles nearer the base of the tree in order to strengthen it a little by directing more sap to it - and this is determined by the number of needles.
Bud selection
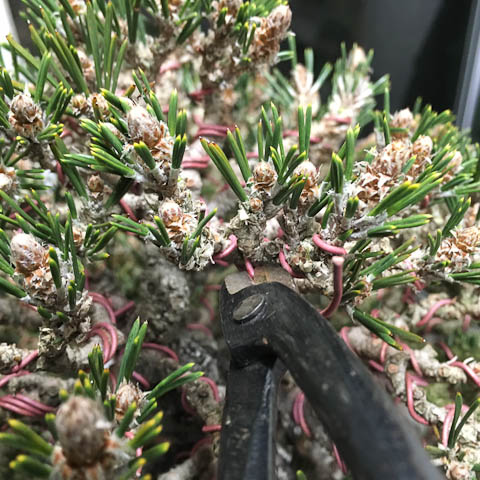
When you are working on a pine which is growing strongly it will often respond to decandling (read more about this here) with several buds. Weak pines will produce few buds. When multiple buds are allowed to develop into candles something needs to be done. One needs to eliminate these buds or the base will thicken quickly forming a knob. Using a pair of sharp, trimming scissors you will remove all but 2 of the buds.
Notice the 4 buds emerging from the same point. If left, this area will thicken and will be difficult to correct.
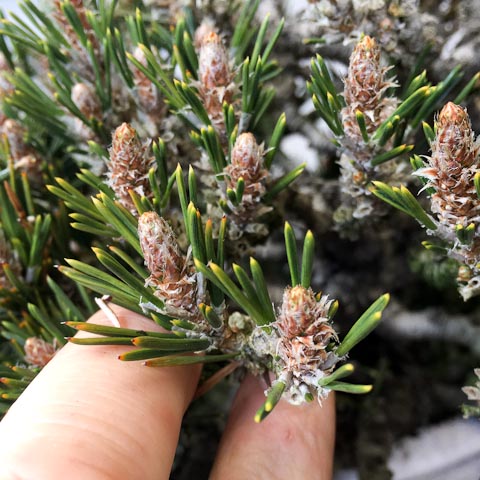
The same branchlet with the top and bottom buds removed, leaving the 2 side buds only.
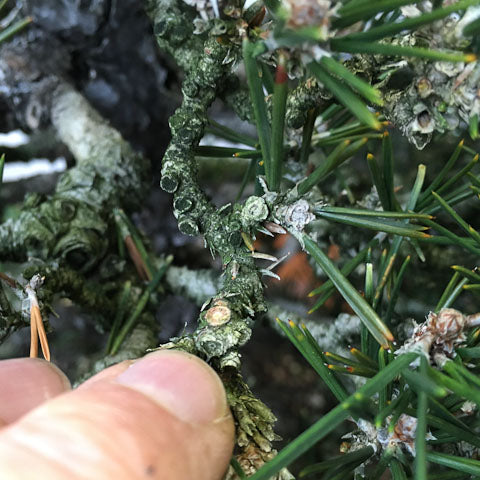
When you come across weak branches, generally in the interior of the tree it is best to leave them alone and not to remove any needles. This weak shoot does not even have a spring bud on it, but perhaps when I decandle the tree in summer it will develop one or more.
Tip
Here's a little tip which I was taught. After plucking needles for a while the grooves will fill with resin. This causes the tweezers to slip. To remove the resin burn the tips of the tweezers using a lighter and then afterwards brush the carbonized resin from the tweezers with a metal brush.
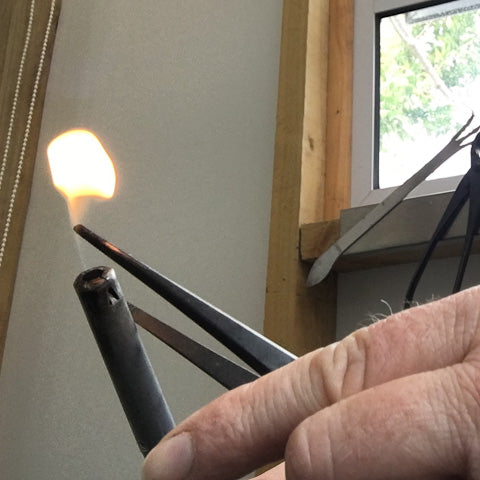
Burning the accumulated resin on the tweezer with a lighter.
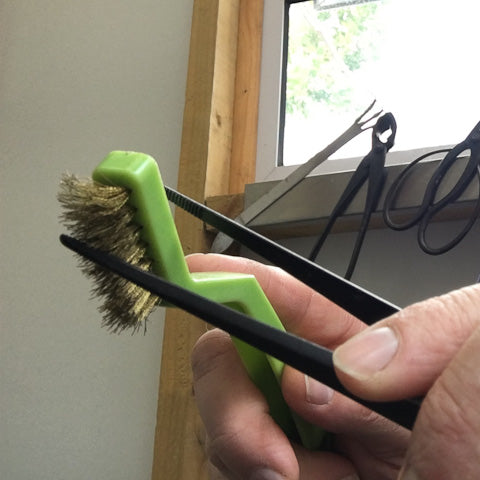
Removing the carbonized resin with a metal brush.
The pine needle plucked and unwanted buds removed.
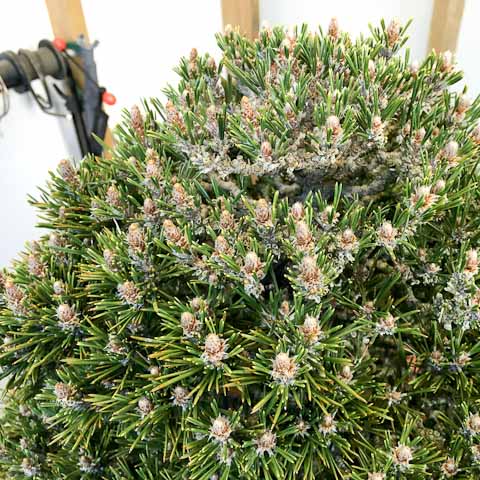
You will note that the foliage pads have become untidy in the past seasons with no clean line for the silhouette of the tree. There is a lack of uniformity in the branch angles and the apex of the tree is a bit of a mess. We are going to correct this now.
Wiring
Wiring is a brilliant way by which we can quickly and easily alter the complete appearance of a bonsai tree. We use two types of wire, aluminium and copper. Aluminium is however rather soft so when we need to wire thick branches, very thick wire is needed and applying such wire often leads to damage of the bark but more of a problem is the space on the branch it occupies. Copper is the traditional wire of choice amongst professionals. It is much stronger than aluminium and this means thinner and less wire is needed to shape a tree.
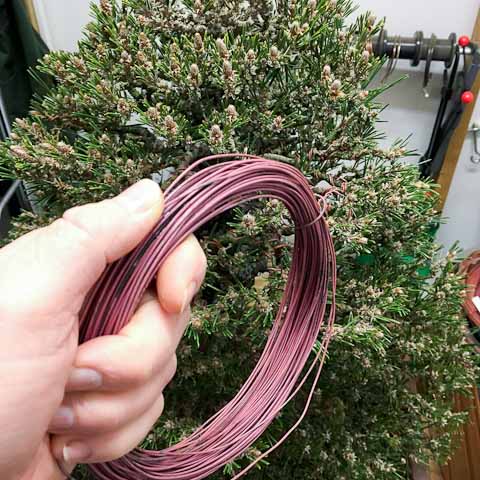
Copper wire is the wire of choice when it comes to the styling of conifers as it work hardens when applied and thus relatively thin wire can be used to alter the shape of rather thick branches.
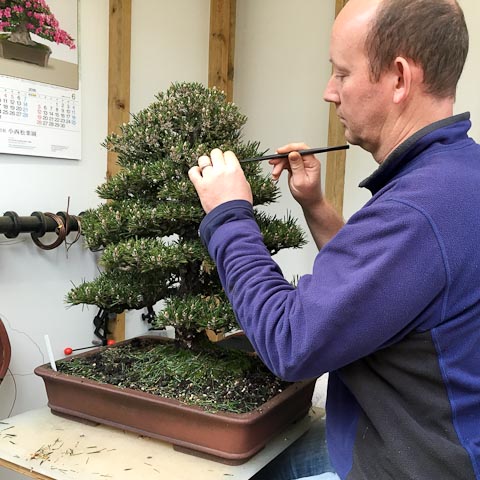
When wiring we always begin at the base of the tree and work to the top. There is a very practical reason for this. Our main branch, which is often also the first and largest branch of the tree, sets the feel or tone of the rest of the tree.
Starting the styling of a tree with this first branch is critical as the rest of the tree will receive the same treatment, but everything is positioned relative to this first branch.
Copper wire is applied to the growth to be bent and then to terminate it is best to make a small pigs tail like bend. This supports the needles and candle and also make it possible to direct the angle towards sunlight.
When wiring a tree, any tree, not only conifers, one has to consider that you are stressing the branches of the tree. If this stress is sufficient and limited to only certain branches it is possible that those branches will actually die as the tree will decide it is better simply to stop sending sap into the damaged growth and rather into the untouched growth only.
When wiring I will therefore usually wire the complete tree whether it be an evergreen or deciduous tree. This can literally take several days. There are alternatives when for instance developing a specific branch and you need to move it, then a guy wire or string might be used instead of wiring the actual branch.
Wiring of the tree complete, branches and branchlets positioned it is easy to see or check the equal distribution of foliage from the top of the tree.
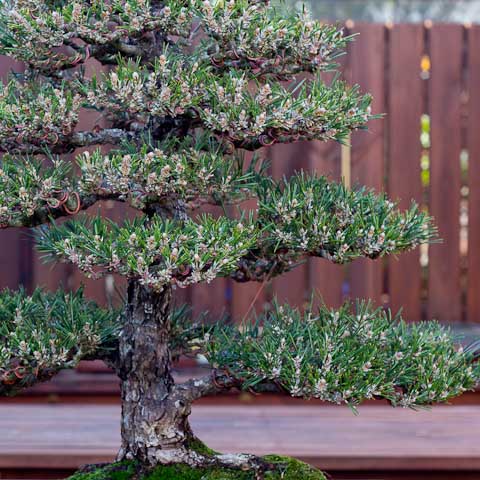
The branch pads are large and have a fairly open structure near the base of the tree and as they reach into the apex become smaller and less refined until they form a solid mass. If you look at how trees grow you will recognize that branches near the bottom of the tree get less light and therefore the growth is more sparse. Each branchlet is positioned so that it can receive its share of sunlight - there is no hedge pruning of pines.
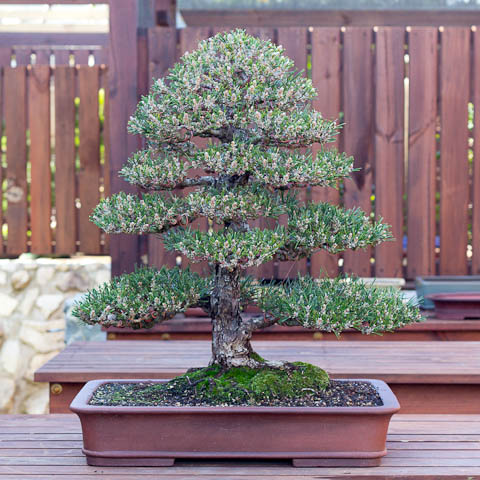
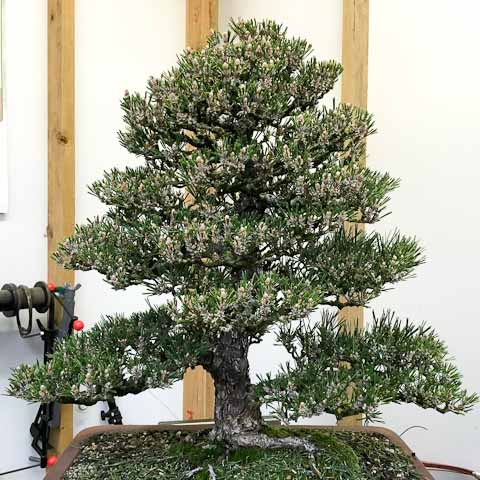
A full view of the finished tree after it was also slip potted into a more appropriate container.
Some styling comments:
- The outline of the tree is more crisp now and each branch tip contributes to it. Take note of how this occurs in nature, especially with our local pines.
- Continuity is important in designing bonsai, unless you intentionally want something to stand out. Branches which hang make a tree appear older, in contrast upward facing branches remind us of a younger tree.
- Branchlets create volume in the pads and are not flat. Many times, newcomers to the art create wonderful branches from the top but are visually flat from the front. As trees are viewed from the front and not from the top, more attention should be paid to this.
- As its a formal upright tree the apex must be positioned directly over the main trunk.
- The apex now has a well rounded, neat shape where before it was rather rough and looked unkempt.
Don't forget to clean the resin from your tools with something like the Crean mate block which makes this an effortless task. Place the tree back into full sun and monitor watering, as now it has fewer needles and thus will require less water. As the tree is dormant no fertilizer is needed at the moment either.
The future
There is a rather straight, boring surface root directly under the main branch. I will eventually remove it but I will wait for the tree to recover its strength sufficiently before doing so.
Trees at this stage of development require mainly maintenance. Technique is important to maintain the delicate branchlets which combine to form the pads. Excessive watering and fertilizer will cause them to become coarse. Additionally it is impossible to avoid the fact that these branchlets will eventually thicken with age and then it will be necessary to cut them back, so back budding must be encouraged and nurtured so they can be used in future to form the shape of the tree.
3 Responses


Leave a comment
Comments will be approved before showing up.
Chris Sharpe
July 16, 2016
Great article, do you have any growing stock of this pine (Kotobuki Black Pine) starter plants?