bonsai
gardening
Orchids
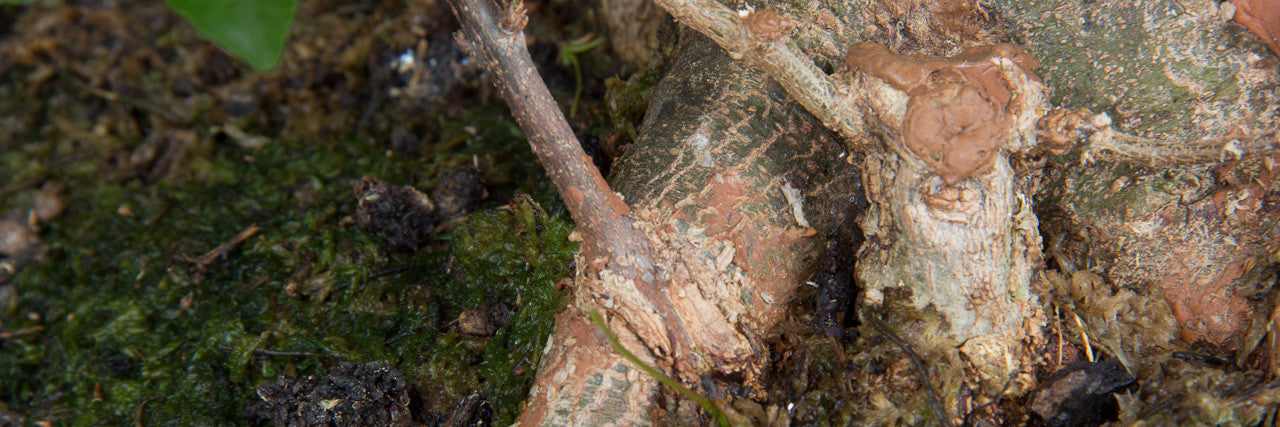
Maple Sextet, basic styling of Chinese maple bonsai trees
12 min read
Chinese maples, as some of you might know are of my favorite trees. I think a lot of it has to do with growing up with one growing in my mother's garden, which co-incidentally is where most of my trees come from. However they are really in my opinion the most or at least one of the most suitable species for bonsai cultivation. They are also great for beginners and professionals alike.
So I wanted to dedicate this post to Chinese maples, or more specifically what one should/could be doing with them now. Of course a single post cannot possibly cover all the ins and outs but we can cover some of the basics.
Its now late spring and your deciduous trees should all be growing strong, mainly on the fertilizer which you gave it in autumn last year, but perhaps also what you have been applying this spring. Trees which you repotted might have taken a little bit of a knock, so before you embark on any work on such a tree you need to ask yourself if it is advisable now or if you would rather not wait till it gains in strength later in the season.
I have selected six Chinese maples which were all healthy and growing strongly. All the leaves had hardened off and some strong branches had developed. The leaf canopies were so full that they had begun shading out the smaller, weaker shoots. So I decided the time was right to work on them.
What work should you be doing? Its a broad question so I will answer it fairly broadly and say that it very much depends on the stage of the trees development. If you are still at trunk thickening stage then you should not be considering techniques such as defoliation or pruning in fact, which is what I will primarily be discussing in this post. If you are developing your branches then this post is very applicable. If you have a highly developed tree then this post is still applicable but instead of selecting the strong shoots, as I will be doing, you will be selecting the weak shoots and removing the strong ones.
I would also like to mention something about fertilizing. When you are developing a trunk in the ground or large container you feed it very generously. When you begin working on the branches you need to feed less or you will simply end up with coarse, useless growth. So I would advise that you use something like BonsaiBoost which will slowly release nutrients over an extended period of time. Use it sparingly at the start of spring and throughout the growing season, perhaps only 1 or 2 sachet's depending on the size of the tree. In late summer and early autumn you would want to increase the fertilizing as this is when the tree is absorbing it for the following spring.
Just a couple comments on defoliation (please note these are comments only, its not an extensive tutorial on the technique):
- At this stage leaf size is not a concern so the fact that defoliating results in smaller leaves are of no consequence, but good to know for the future perhaps.
- Removing leaves in any amount whether full, partial or only a couple at a time is about allowing light into the tree to help support the weaker inner shoots. Removing leaves alone does not result in back budding.
- Removing leaves together with pruning will activate dormant buds along the remaining section of branch; this is useful for increasing ramification.
- When you defoliate, leave the tips on all the branches at first. Branches which are not thick enough compared to surrounding branches should be allowed to develop further before being pruned back. Those which are thick enough can be pruned back.
- Do not completely defoliate a sick or weak tree. Wait until it has recovered before applying this technique. You will otherwise not get the response desired and it will further weaken the tree.
- Defoliation together with pruning is a technique which can be used to speed up the process of ramification as it is like the plant has several springs in one season. Some people choose not to defoliate, this does not mean they will never get a ramified tree but I think they will have to wait a lot longer to achieve the goal and I think they may be subject to considerable dieback of twigs.
So lets get to some examples....sorry for all the scrolling but your finger is going to pain by the time you get to the end of this one! Then again we are performing a visual art aren't we, so we will naturally gravitate towards photo's instead of text.
Trident Maple #1
Image caption. Maple #1, after trunk development in 2011. Note the boring apical area ie lack of taper.
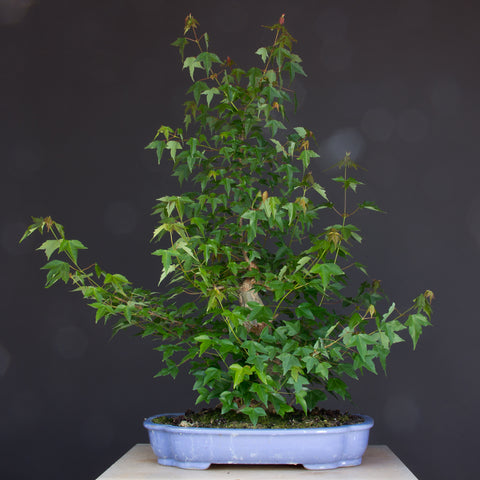
Image caption. Maple #1, current, before work.
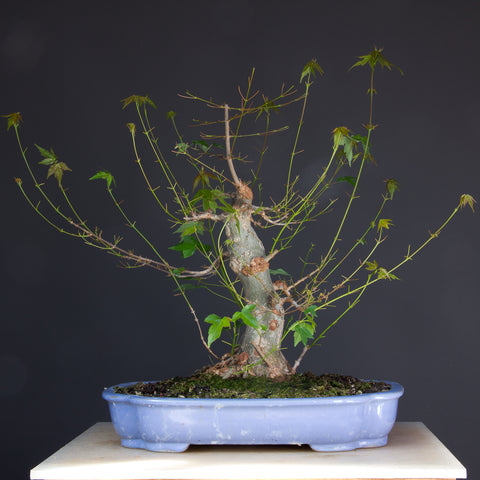
Image caption. Maple #1, after defoliation
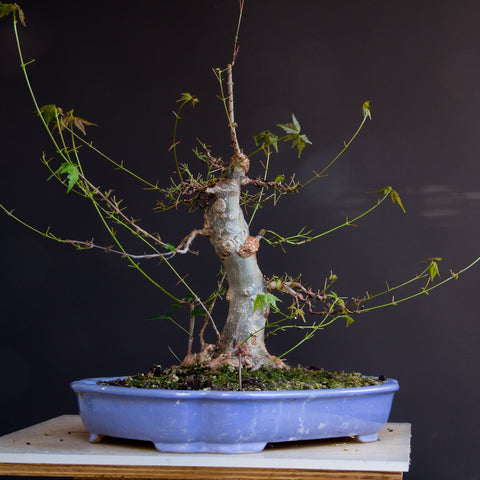
Image caption. Maple #1, after styling.
This is one of the trees grown from a seedling collected from my mothers garden some years ago, as are most of those in this post. You will also recognize it from a recent blog which I wrote "Approach grafting revisited."
As there were no buds on the new trunkline I had to use an approach graft to create a new leader. The bud which I hoped would develop, did not. That's ok though as the adjacent one did and it is with this one which I am creating the apex. For now I am using both the new branch and the remainder of the graft to help callous the scar on the rear of the trunk. So if you have a tree where the internodal distances are too long in the apex, common when a tree is developed quickly, then you can use grafting techniques to place the change in direction of the trunk where you need it to be. Sometimes, as in this case I used a separate tree which I continued to grow in a small pot to create a new apex and it is actually only one of the buds which have been activated which I will use.
When you wire deciduous trees you will be using aluminium wire and the thickness of the wire selected is usually about the same thickness as the branch you are wanting to wire. Be sure to be especially careful when wiring the new growth and always have wire on the outside of bends or the branches will kink and they may stop growing, or they will snap in which case you will need to grow another.
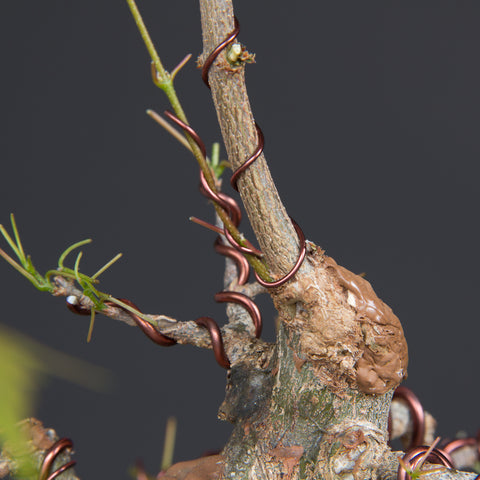
Image caption. Maple #1, detail of new shoot from dormant bud on the newly grafted apex.
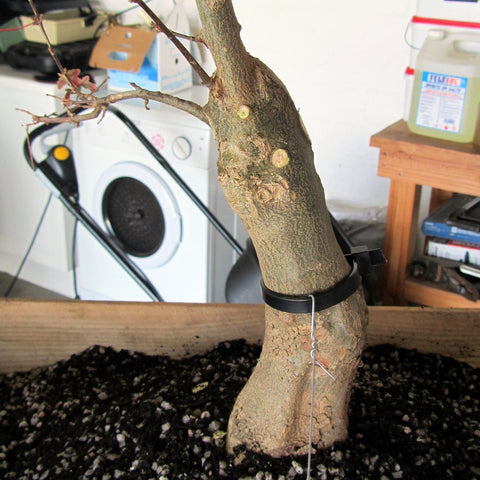
When you use grafting to improve the nebari it is best to do so using approach grafts and not thread grafts. I find after doing MANY of them in different methods that approach grafts work best, just be sure to carve a fairly deep channel for the scion to be placed into. The scion should be below the surrounding tissue. Secure it in place so there is no movement and then seal properly or it may not take at all.
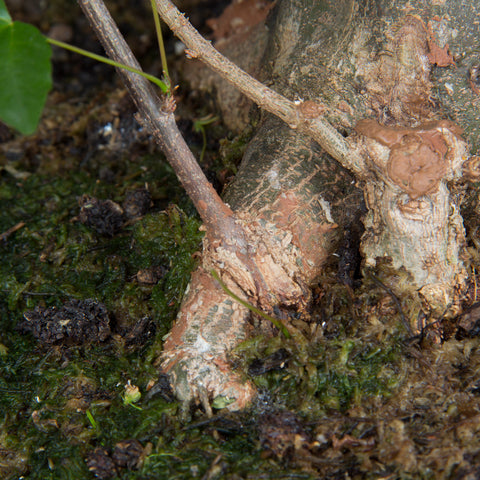
Image caption. Maple #1, successful approach graft onto an existing surface root.

Image caption. Maple #1, Foundation of the branch structure. Its important to give shape to all the branches using light wire as once the wood has hardened they become extremely brittle.
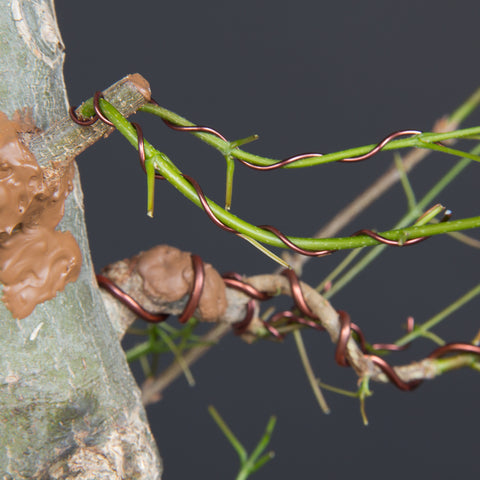
Image caption. Maple #1, these new shoots have both emerged from another successful approach graft. Notice the first internode is ideal but the distance to the next ones is too long. However these shoots have been left to grow and thicken. At some point I will most likely select one of the two shoots.
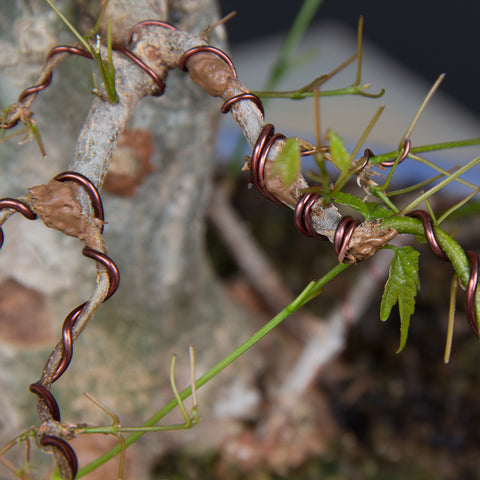
Image caption. Maple #1, notice the branch on the right; the new growth has been retained and wired into place. The older, "stagnated" branch has been removed. Selecting the strongest shoots will accelerate development of branch structure. Notice on the left how that the opposite growth of this species should be wired, shoots growing at right angles to the main branch is not desirable.
Trident Maple #2
Image caption. Maple #2, initial styling, 2014.
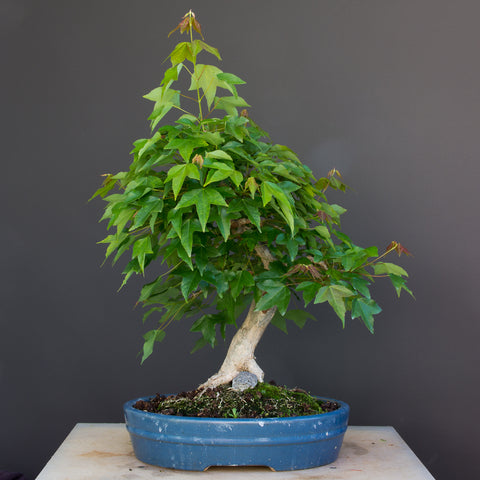
Image caption. Maple #2, before defoliation.
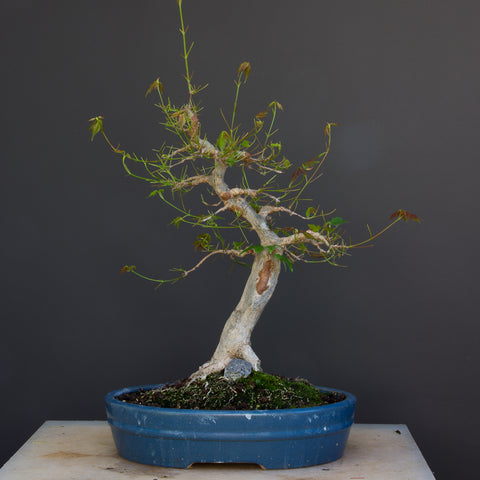
Image caption. Maple #2, after defoliation.
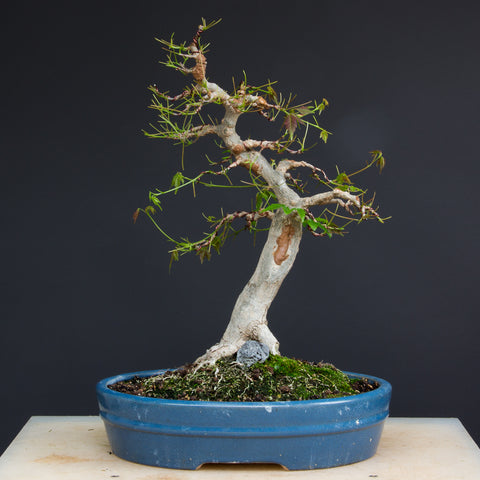
Image caption. Maple #2, after styling.
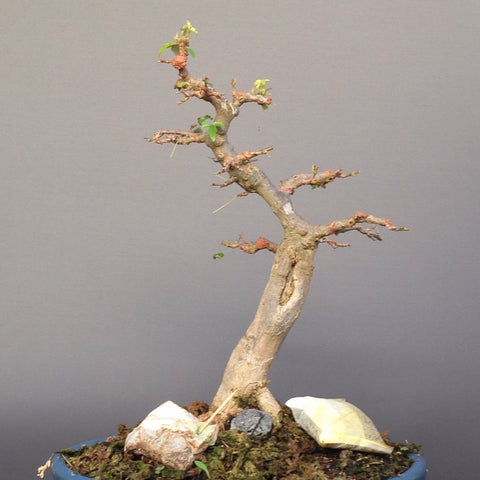
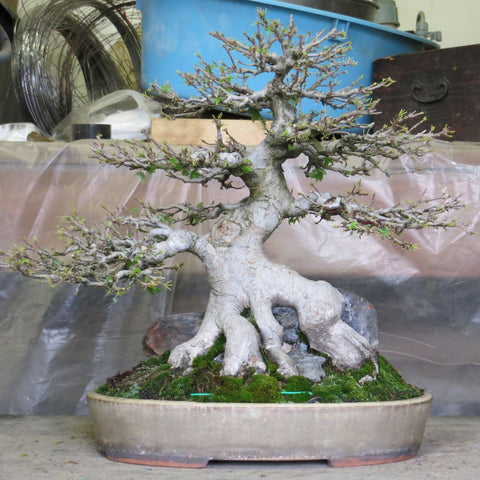
I purchased this maple from a nursery a couple years ago. Its certainly not perfect material. There are a couple reverse tapers in the trunk-line and the roots were not great either. I'm also not a fan of deadwood on deciduous trees but when they add visual interest then it can be a nice feature, in this case the old wound did not add anything in my opinion.
There is nothing much one can do about such trunk defects other than minimizing them by positioning a branch in front of them. You could use sacrifice branches to fatten the area but when you remove the branch you will need to do so carefully or you are going to end up with some nasty scarring although using a curved branch cutter or knob cutter will dramatically reduce resultant swelling. However I also don't really mind such minor defects, it creates differentiation and interest (and lots of comments from the experts when you display it somewhere) although I would not want every tree in my collection to have them.
I found a small stone when I was out for a walk one day and popped it into the gap created by the slightly higher root. As the tree has developed it has begun to clasp the rock. Eliminating that elevated root was not an option as it would have caused major, visual balance issues as the tree enters the ground. One could do a ground layering or perhaps even a series of grafts, but this little pebble creates some interest which is different from my other trees.
Wounds such as this one can be closed over by simply shaving the inner edge of the tissue and sealing it. This stimulates the tree into healing that area and it creates more callous. This will accelerate the healing a little. For especially large scars one can repeat the process every couple years till the wound is entirely closed over. For smaller scars I would recommend a liquid sealer and for large cuts the putty type. You can view our range here.
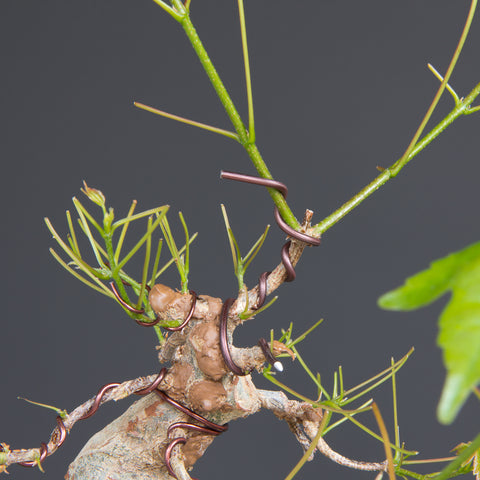
Image caption. Actually from another maple not featured here, but notice the 2 healthy shoots which have been kept in order to thicken the new apex beneath it. When nearing the desired thickness one of the branches will be eliminated.
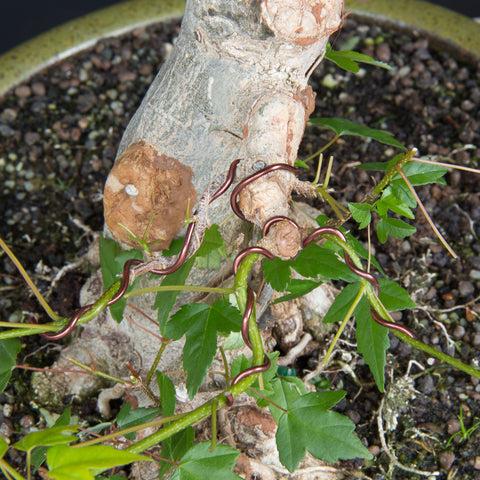
Image caption. From the same maple as above showing the beginnings of the branch structure. Notice how the strong shoots have been selected and although defoliated, the tips have not been removed neither have the branches been shortened. When they are thick enough they will be pruned back to the first set of internodes and the branches will fork, immediately doubling the number of branches and in so doing increasing ramification.
Trident Maple #3
Image caption. Maple #3, just getting started in 2011
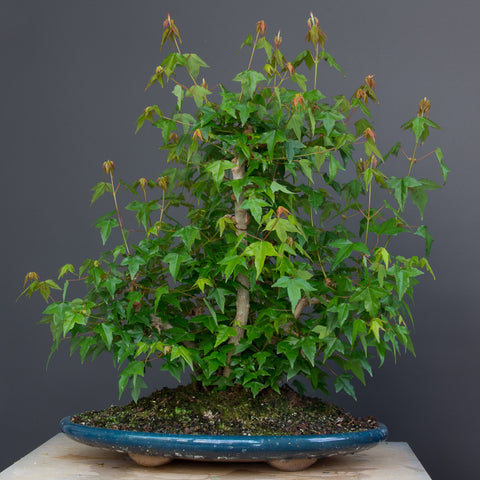
Image caption. Maple #3, before defoliation.
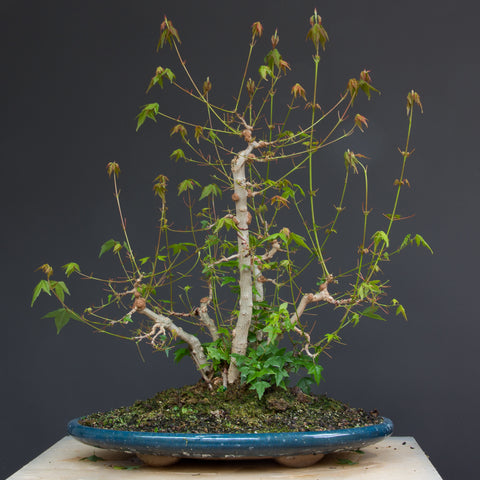
Image caption. Maple #3, after defoliation.
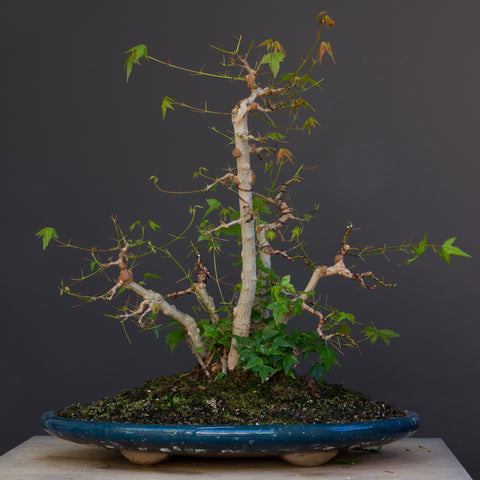
Image caption. Maple #3, after styling
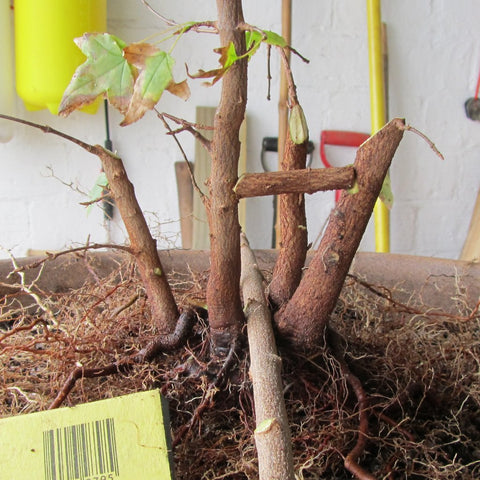
One of the fabulous growing characteristics of maples is their ability to fuse quite easily, this applies to roots, trunks or branches. In this planting I used 5 individual young trees, placed them fairly close together and tried to spread and overlap their roots as much as possible. In only a couple years these trees are completely fused and are now a clump.
As the trunks are very delicate the branches need to match this. So one needs to be very careful when styling a tree like the above and make sure you keep the branches slender. This is quite a statement as we are after all talking about tridents which can shoot strong whips at any time and during the time you back is only briefly turned. However by regulating the growth of the tree through feeding weaker fertilizers and through not allowing the branches to develop too long before pruning them back you can maintain delicate branching. Using a trimming scissors makes it much easier to get to the branches which need to be cut, especially as ramification increases.
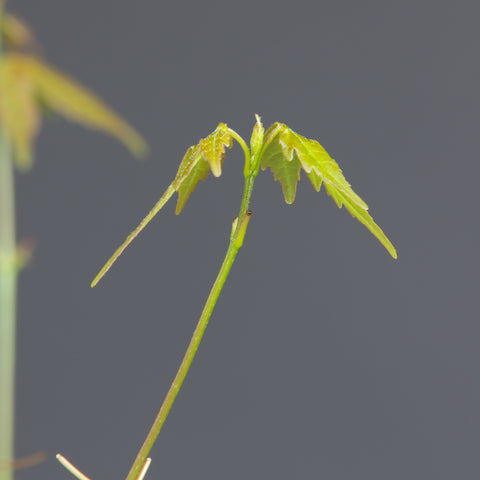
Image caption. Maple #3, be sure to leave the growing tip of the branches which you want to thicken. Remove all side growth as this will direct all energy into the tip and it will extend faster.
Trident Maple #4
Image caption. Maple #4, just getting started in 2010.
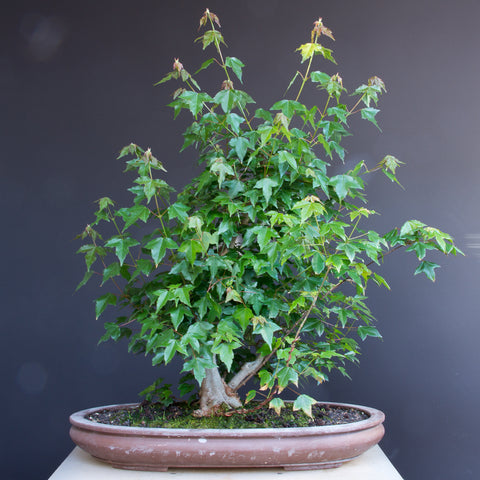
Image caption. Maple #4, before defoliation.
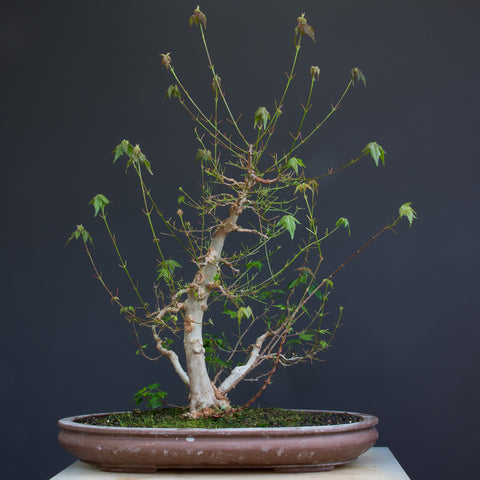
Image caption. Maple #4, after defoliation.
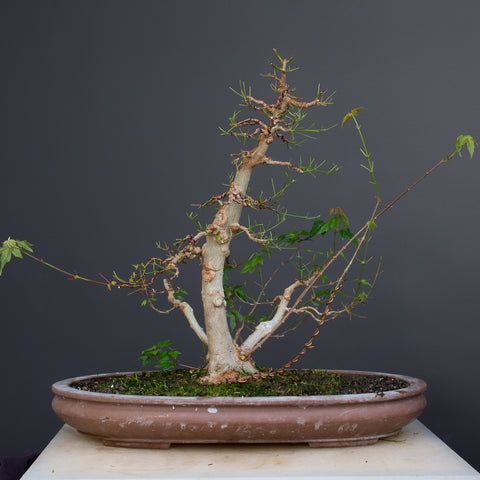
Image caption. Maple #4, after styling.
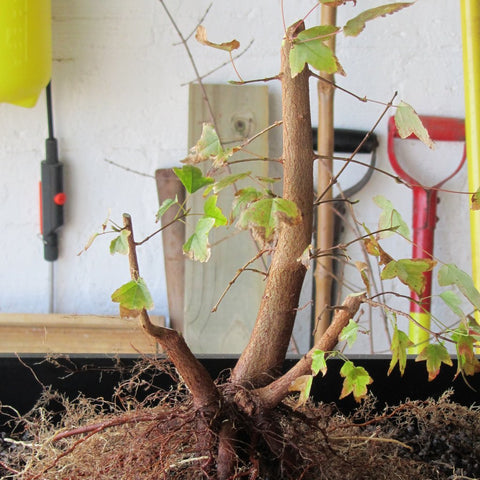
Yet another maple which I began as individual trees which are now in an advanced stage of fusing. A lot of grafts have been used to improve the nebari and this is still an ongoing process. In fact, every time I lift a maple I generally get in a couple grafts at the same time.
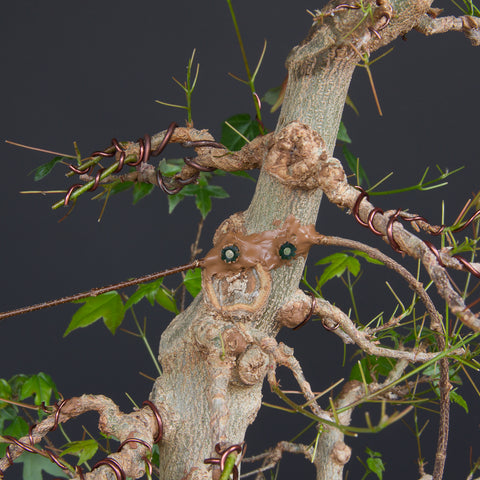
Image caption. Maple #4, newly completed approach graft. This type of graft can be done at any time during the active growing season unlike thread grafts which can only be done at the beginning of spring prior to the buds swelling.
With this tree the left side of the trunk needs more branching. One can either hope that through the act of defoliation that a dormant bud on the trunk might develop or you can graft. In this case I used one of the root graft seedlings to also graft onto the trunk. It should take no longer than this single growing season before it will be completely fused and can be separated.
This is actually a useful little 'trick,' to use the donor plant you are using for your root grafts also as approach graft material. In this way you need not unnecessarily clutter the planting with additional plant material. You can of course use branches from the tree to approach graft with but sometimes you don't want that branch to grow for a full season and would normally cut it, in which case the graft might not have taken by that time.
Trident Maple #5
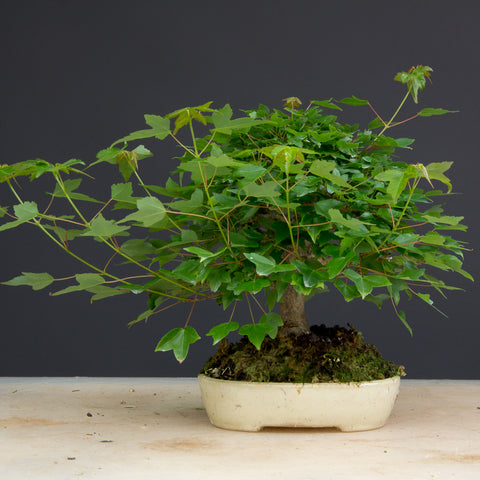
Image caption. Maple #5, before defoliation.
I have had this little shohin maple which I imported from Japan for a few years now. As you can see, its healthy and I've been able to encourage a good amount of strong shoots in the lower parts of the tree, something which is very important in apically dominant trees. The problem is that the inner shoots inside the lower part of the canopy are very weak and some in fact are almost at the point of dying. Immediate action is required.

Image caption. Maple #5, after styling.
Only the top portion of the tree was defoliated. This is to allow light into the tree, and as the apex of this species is much stronger than the lower regions you need not worry about it recovering from this treatment. The strong basal shoots were shortened, however keeping one set of new buds. If they were allowed to continue growing they will become thicker and you will lose the thin and delicate appearance. Only a partial defoliation was performed in this area as the leaves which remain will serve to provide more energy to these branches and will strengthen them. The inner, weak buds were left entirely alone and hopefully the increased sunlight will trigger them into development.
When working with small shohin sized trees such as this it is very helpful that your tools are appropriately sized. So I would highly recommend suitable scissors such as these mini scissors from Kaneshin.
Trident Maple #6
Image caption. Maple #6, before defoliation.
Image caption. Maple #6, after defoliation.
This maple is one of many which you will find at AichiEn nursery in Nagoya, Japan. I have had the privilege to work on some of these gorgeous trees. Being able to work on great trees provides extremely valuable experience which comes in handy when one works on ones own trees.
As you can see, this tree is in a much more advanced stage of development than the previous ones which we have been looking at. Of course the tree is much older also as is evident from the bark. The treatment is much the same only that after forming the basic branch structure through pruning and wiring, one begins to use clip and grow method to develop the fine twigs. In addition, rather than selecting the strong shoots which we have been doing till this stage one selects the weaker shoots and eliminates the strong ones, all in an effort to maintain delicate branch structure.
Ultimately the branches will become too thick and the tree will need to be reshaped. Doing this is tough as it means cutting back hard and developed the foliage pads again. However it is now that the importance of slow development and the shorter internodes which that implies comes into play. Without these the branches may need to be cut back far more in order to get to a set of dormant buds. Having short internodes means that you need not cut back before you can get growth again.
At this stage feeding is also important and autumn is the time that the heavy feeding is done. At the onset of spring a tree like this probably gets no to very little feed. Light feeding with BonsaiBoost will commence when the initial push is over. After each defoliation light feeding will continue. Depending on the manner in which the tree reacts defoliation may be repeated up to several times in a season, which dramatically accelerates the rate at which fine ramification can be achieved.
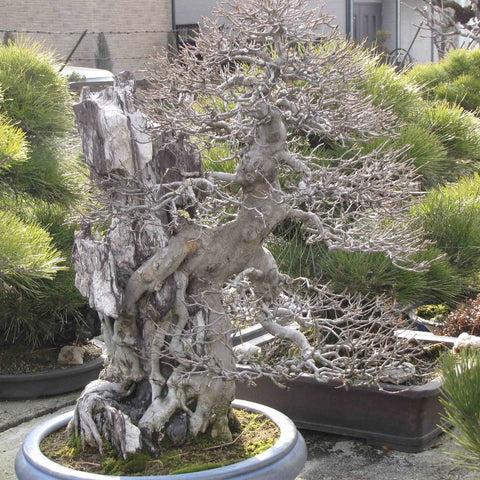
Image caption. AichiEn Trident Maple root over rock.
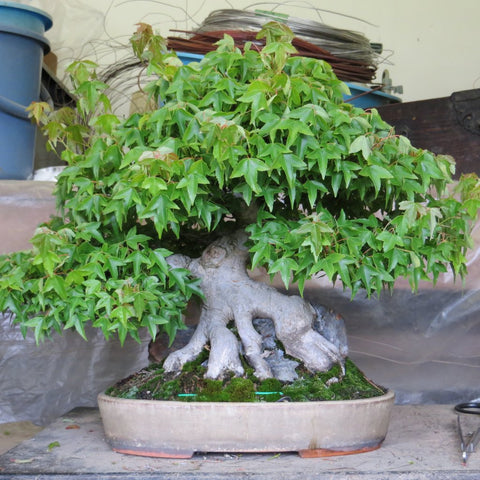
This is a tree which also belongs to the AichiEn nursery. It is an excellent example of a trident root over rock bonsai and displays many of the growth characteristics which make this species so attractive such as the peeling bark, the lumps and bumps which form from old age, the manner in which the roots clasp the rock and have fused to one another. Then of course, the wonderful ramification. Peter Tea says that Mr Tanaka told him his grandfather began this tree and took 20 years to develop the trunk. His father then developed the branches which took another 20 years. So this tree is a minimum of 40 years in the making. Goes to show that this kind of quality requires patience, dedication not to mention the correct application of appropriate techniques.
3 Responses
Anonymous
October 29, 2015
Thanks for asking Brett! Sounds like you are doing everything right….. I was taught to remove any side growth from the sacrifice branches as well to force the auxins into the tips of the branches causing them to elongate/extend faster. Perhaps you can try this. BonsaiBoost is all I use as well, nothing more needed. You could of course consider field growing but then you risk the branches getting too fat too quickly but it will definitely speed up results. Give them some more time perhaps and I’m sure you will see the results you want in a season or two.
Brett
October 29, 2015
Hi Terry
So much useful information in here. I am struggling to get my primary branches to fatten up. I have completed the trunk work and have my branches where i would like them with the help of layering, but they just won’t fatten up… I am letting them grow freely and feeding with bonsai boost. Any suggestion?
Leave a comment
Comments will be approved before showing up.
Recent Articles
-
Enthusiasts Top Wiring Tips
July 17, 2023
-
Top fertilizing tips
March 28, 2023
-
Top watering tips
February 13, 2023
-
Creating Japanese Maple forests
October 24, 2022
-
How to dig bonsai material
August 15, 2022
-
How I style bonsai and you can too
April 30, 2022
-
Swamp Cypress Bonsai Styling
July 03, 2021
-
How to hide large scars quickly
June 14, 2021
-
14 Tips for Field Growing Bonsai
May 31, 2021
-
Aquaria: An Introduction
January 06, 2021

Subscribe today!
Join our community, receive our best content, including seasonal tips, be the first to know of back in stock and new product launches.


Magda Maritz
October 27, 2022
Hi Terry, will a chinese maple forest work in the Mossel Bay area? I’d love to do one, but not sure how they will grow in this area?
Thanks so much
Magda