


Orchids


Makeover of a Chinese Elm
At the recent ABC4 bonsai convention held in Stellenbosch, an elm which I had made available to the demonstrators to style was selected by Francois Jeker.
I got to thinking about the tree and its history so I thought I would do a blog post on it and share with you how the tree has been changed till the most recent styling at the convention.
As you read through the history I hope firstly that it will prompt you to record your trees development over the years better so that you will have something to reflect on one day when you have a masterpiece, and secondly that you might pick up some helpful tips on styling elms and perhaps more generally; deciduous trees.
The general consensus is that this is a Catlin type elm. I purchase it originally from a nursery in Johannesburg, who had imported it from China. There were several to choose from at the time but when you are confronted with such a choice, the most important things to look for are the trunk firstly and secondly the roots. Why you may ask. Well simply because changing the trunk in any way takes time and to correct bad roots can also be a lengthy process.

Image caption. The tree as I bought it in 2009.

Image caption. The tree as I bought it in 2009 from another side.
As you can see from the two preceeding images, the elm was styled quickly and therefore had a very coarse result. There was little taper in the secondary branching and the internodes were very long. Essentially the tree was styled to achieve a pleasing outline in as short a time as possible. However the end result could only be passed off when the tree had leaves, because once removed and the bones of the tree were revealed it was very obvious that the styling lacked sensitivity.
There were also many stubs of branches which had been removed. These would have to be reduced using a knob cutter and then sealed properly to promote callousing. Dead branches were removed with a branch cutter.
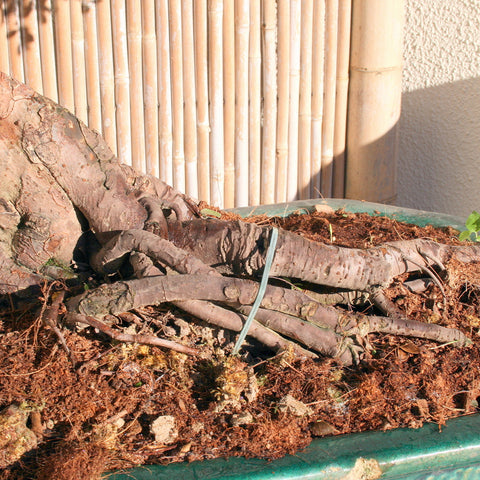
Image caption. The trees roots as they were originally in 2009.
One of the growth characteristics of this species of elm is their rather tube-like roots. For me this tangled mess was an eyesore but I believed that through simply removing a bit of them as each year went by, I would be able to remove the offending roots.
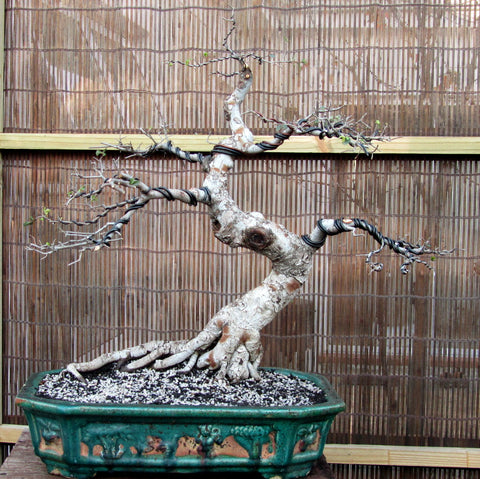
Image caption. 2010
A year after I had brought the elm down from Johannesburg, I began the styling process. At first I removed all the branches which were straight and lacking taper. The very obvious cloud-like foliage pads had to be eliminated and a more natural approach applied. The branches were wired using anodized aluminium wire to give them some shape. Depending on the growth of the tree you can leave such wire on for several months to a season. If it does begin to bite into the bark its not too much of a problem at this stage as it's still several years away from the ramification stage and by then the evidence of wire bite would have been healed.
I also decided to repot the tree, removing it from this very gaudy pot. One needs to remember that a pot should never overpower the tree, it is meant to complement it. If you would like to read my rather in depth article on how to choose a bonsai pot, you will find it here. While repotting the tree I found many thick storage roots and very few finer, feeder roots. This is the result of a growing medium which is too moisture retentive. You need to use a mix which is open and drains quickly. It must retain some moisture and then during the course of the day it must dry out but not too dry of course. There are many products which you can use to mix your own bonsai soils, and we can supply them also should you need.
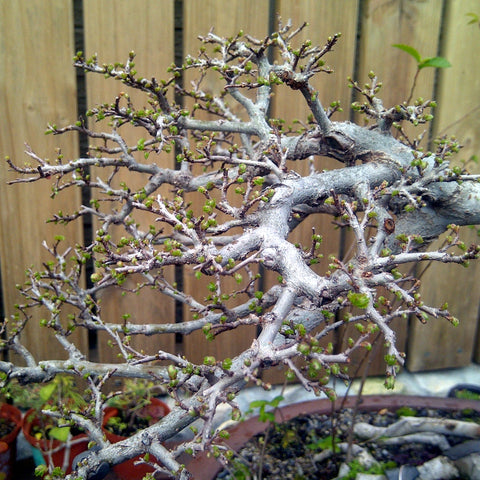
Image caption. 2012
I began the ramification process but soon realised I had made a mistake by starting it too early. When I did the initial pruning to eliminate unwanted growth I needed to develop the pads first with primary and then secondary branching. The finer ramification would form the final 10 - 15cm of the foliage, to form the outline of the tree. By starting the finer ramification too early I was essentially boxing myself in, as there would be insufficient place for these fine twigs to survive as they would be bumping into one another, let alone the fierce competition for sunlight. Defoliation would certainly help but I decided to thin out the growth and rather develop the main branching a little more before proceeding with the ramification process.
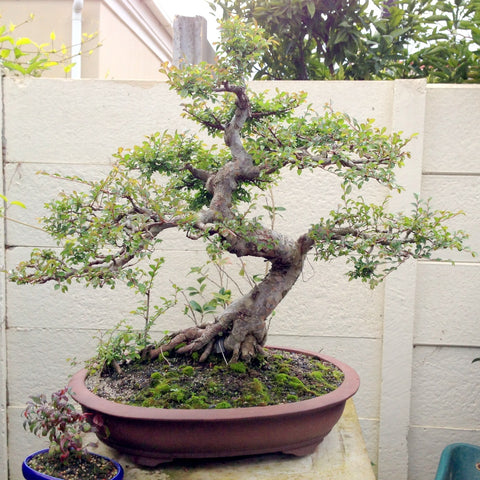
Image caption. 2013
In the above photo you can see that I have begun removing some of the roots and also note the healthy budding of the tree. It is always very important to work only on healthy, strong trees if you expect the tree to respond well to any treatment you might perform on it. A sick or weakened tree will be weakened further and you might undo some of the work you've done as the tree might decide to shed some branches. I only use BonsaiBoost on all my trees. It's completely organic and does not result in long internodes as it is a slow release fertilizer.
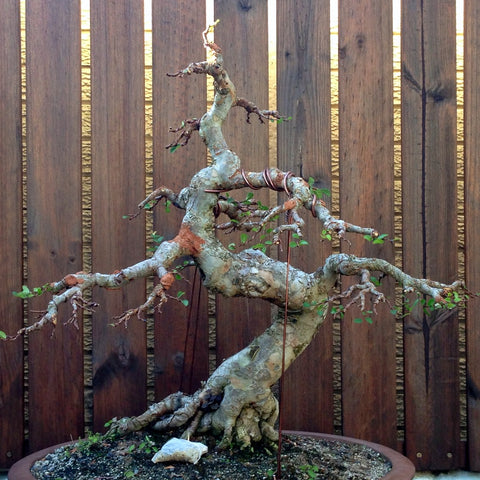
Image caption. Early 2014.
In the above photo you can see that I have done some heavier work on the primary branches. I actually cut the top of the main branch (1st branch on the left) using a saw and also the undersides of some of the other branches. I then used stays to bring the branches down and sealed the cuts well. Branches which angle downward initially give the tree an appearance of maturity. In contrast to that, branches angled upward make the tree appear younger. In my opinion the branches of this tree were too horizontal which makes it more difficult to build volume in the foliage. So I needed to bring the branches down.

Image caption. Late 2014 before wiring.
The long branches which you saw are called "sacrifice branches." This is because they are used for a period of time to achieve a certain goal and then they are removed. In this case there were being used to thicken the branches. So the longer you allow the branch to become the thicker the base will get. It is very important that there is a logical and aesthetically pleasing transition between the trunk, then the primary branches and secondary ending finally with the delicate twigs. As the ratio of thickness between the primary branches and the trunk were pleasing I needed to attend to the secondary branches now.
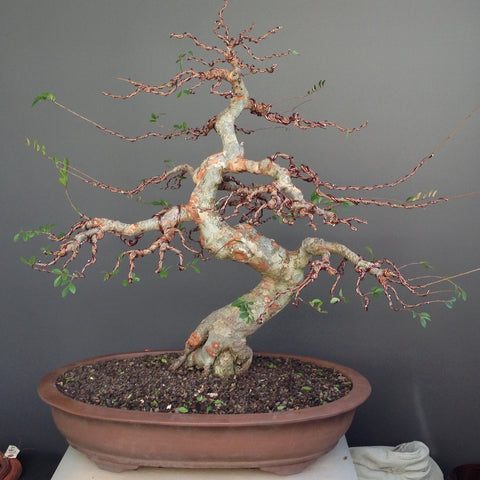
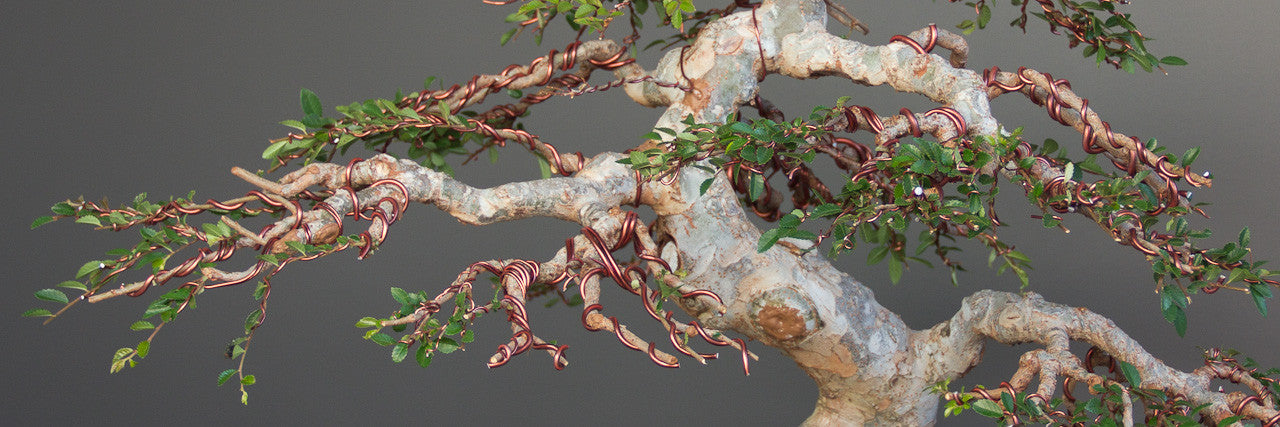
Image caption. Late 2014 after pruning and wiring.
Later that same season the entire tree was defoliated so that I could see what I was doing. Branches which had attained the desired thickness were shortened and wired. The growing tips of the branches which still needed a little thickening were left untouched but they were wired to give them a little shape. When you do this it's important to give the branches curves in both the vertical and horizontal planes so they have an interesting shape.
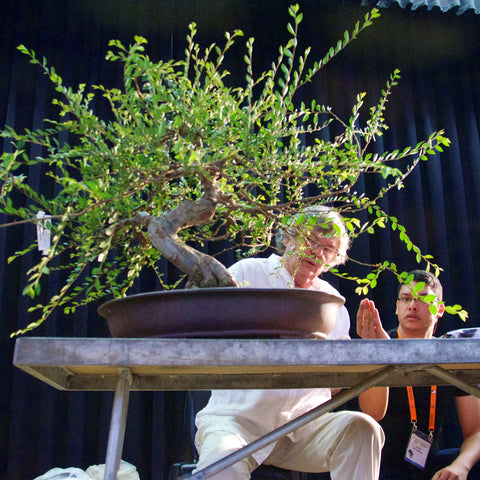
Image caption. October 2015 prior to Francois Jeker working on the tree at the ABC4 convention in Stellenbosch.
In this the 2nd last image, you can see how the tree has gained strength in preparation to being worked on again. Once again, the fertilizer of choice was BonsaiBoost and the growing medium is our Professional Bonsai Growing Medium. The combination of these two products has led to vastly improved health of the tree which makes it possible to subject it repeatedly to pruning and wiring without debilitating it. The open, fast draining growing medium promotes the development of a fine network of feeder roots as they seek out moisture. The slow release fertilizer makes nutrients available to the tree each time you water in very weak concentrations. Due to the proliferation of feeder roots the tree is much better equipped to absorb these nutrients and channel them into growth. A strong, healthy tree can be worked in several times in a season without concern. A weak tree however might only be worked on once per growing season, so the time required to achieve a pleasing result is greatly extended.
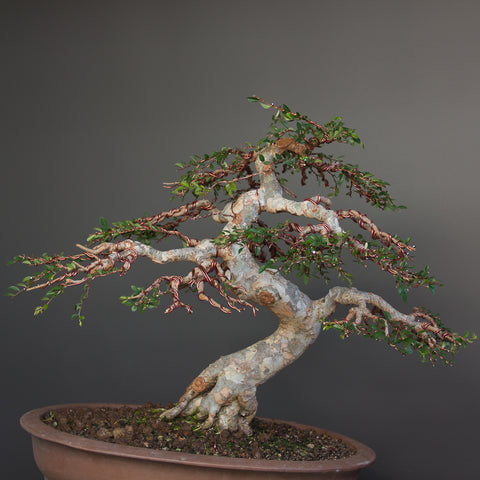
Image caption. After Francois' demonstration
So let's sum up what he has done and what I believe Francios' vision is for the future of the tree.
Changing the planting angle
It is amazing to see how much of a difference a change in the angle of the tree can make. Don't be afraid to tilt your trees backwards and forwards, to the left and to the right. You might see a more appealing angle. In the elm, the tilt to the right has lifted the main branch, which is an improvement as originally it was very much on the same level of the balancing branch (1st branch on the right)
Reducing the apex
By reducing the size or length of the apex we can effectively reduce the total height of the tree and in so doing make it appear more compact. The shape of the old apex also did not make sense when the rest of the trunk was considered. The great curves in the trunk were not echoed in the apex. So the apex was shortened and one of the side branches was brought over using wire. This branch will now be allowed to develop some girth before it will be lopped off, creating a better taper at the same time compared to the previous apex. Good call Francois, it was something I was grappling with for some time!
Balance and Movement
Something which is missing, in my opinion from bonsai classes offered by some nurseries and clubs is guidance on styling. I mean the basic techniques are taught but when it comes to the creative side little time is afforded to the subject. I know we are practising an artform so it is difficult to tell someone how they should artistically interpret trees but there are some basics which can be spoken about and these include balance and movement. These two aspects require a much more indepth post than I am inclined to write now so I just wish to mention the basics.
In this tree the main branch is to the left. The main branch is the branch which sets the "tone" or "movement" of the tree. As the main branch extends quite far to the left and is quite horizontal, the movement is quite fast to the left. The apex should be in sync with it and should therefore also move to the left. By using the word apex in this context I am referring to the entire apical area of the tree, which now shifts the visual mass of the roughly triangular outline of the tree to the left. To further emphasise this movement but provide a sense of balance, the balancing branch (first right) is considerably shorter than the main branch. You will not the entire canopy on that side of the tree is much shorter or compact than the left.
Another good call Francois!
Branch Structure
Looking forward I will now need to focus on developing some volume to the branches. I know we generally refer to 'foliage pads' but this tree will not have clearly defined pads, but rather a rough silhouette created by the primary, secondary and finally tertiary branch network. Some gaps on the tree will need to be filled with approach or thread grafts. One problem created in this final styling which Francois was not really able to fix in the demonstration was that some of the branches overlap branches below. This will need to be corrected or the bottom branches will weaken with time as light will be shielded from them. This is something you should continuously watch when styling your trees as it is very easy for the top branches to overtake the bottom one's during development.
Well that's enough for one post. Hope you have enjoyed the read and also the photo's showing how this Chinese elm has evolved over the space of 8 odd years.
7 Responses


Leave a comment
Comments will be approved before showing up.

Miguel Angel H.
March 28, 2023
Excellent presentation Terry on all your video plus photography, please on your Chinese Elm where if able to share where did you get the oriental pot for it.thank you Sir again for uour videos