


Orchids


Restyling of a locally grown Japanese White Pine
Introduction
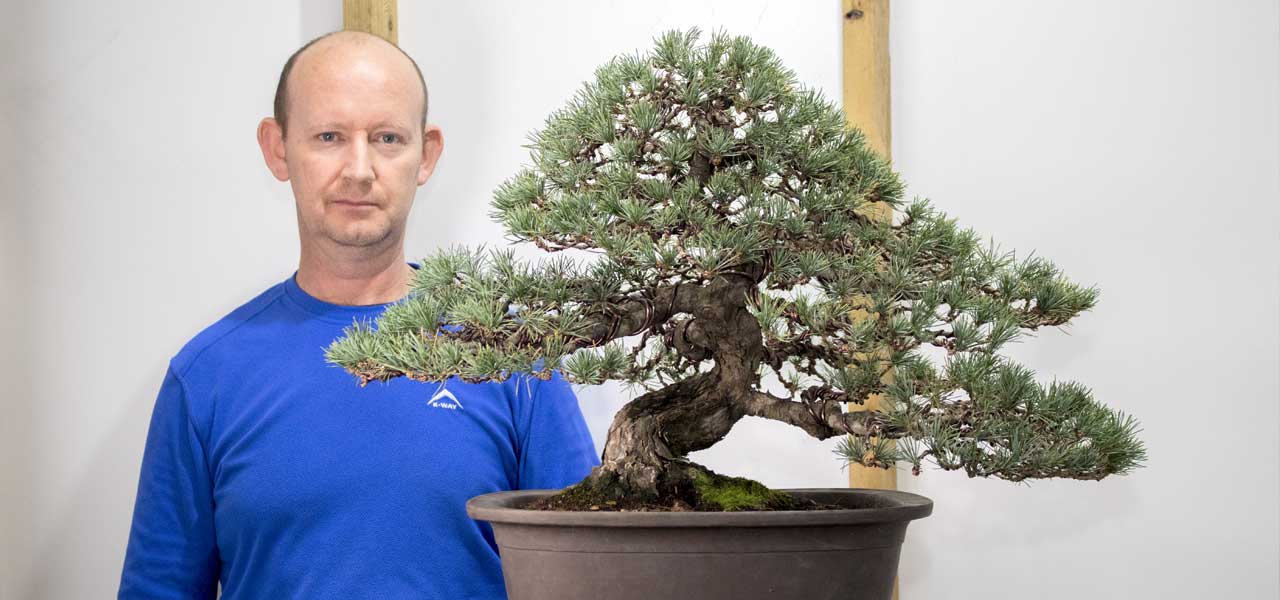
A customer of mine who purchased this tree from Rudi Adam's collection after his passing brought this tree to me for styling.

Image caption. Before image of the Japanese white pine
He told me that apparently Rudi had grown this tree from a very young age, acquiring the material on a trip he made to Japan many years ago. We are not certain if Rudi brought only a cutting of a Japanese White pine which he in turn grafted onto locally grown Japanese Black pine root stock or if he brought back a grafted tree and developed it from there. Either way, it has great provenance and was a privilege for me to work on what must be one of the first specimens of Japanese White Pines in South Africa.
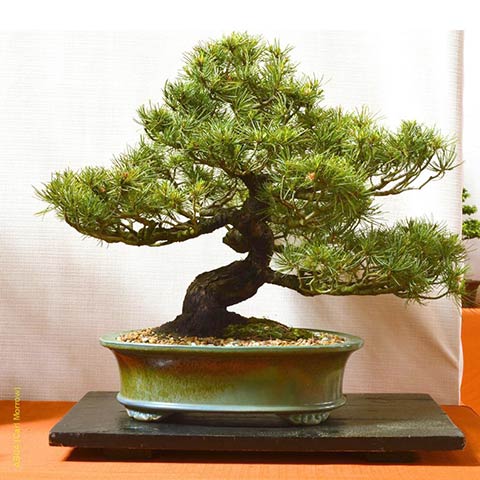
Image caption. The pine as it was exhibited by the late Rudi Adam in 2015 at the Africa Bonsai Convention. Photo courtesy of Carl Morrow.
Assessing the work required
When you work on a tree you should always first study it a little and go through a sort of checklist in your mind:
- What work is required?
- What techniques will be required and do I have what I need at hand to perform them?
- Is this the right time to be doing what I am planning?
- Is the tree healthy enough to perform this work and respond positively to it afterwards?
Overall health
Looking at the tree it was reasonably healthy although due to improper technique many inner branches had died due to a lack of sunlight. So one of the first tasks would be to remove this dead growth.
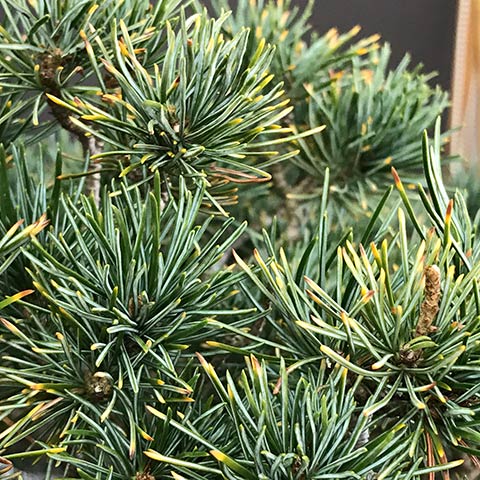
Image caption. Yellowing tips on pine needles is usually indicative of too much water. This can be due to over-watering or in this case a combination of growing media containing too much water retentive organic material and excessive rain.
Poor wiring technique
Someone had made an attempt to wire the tree previously but had not committed to the process as only selected branches were wired. As is often the case when this is done, it was these branches singled out for wiring which were also found to be the weakest. In order to wire the tree properly this old wire would need to be removed by cutting it from the tree so as to have minimal impact or pose the least risk of unnecessary stress to the tree.
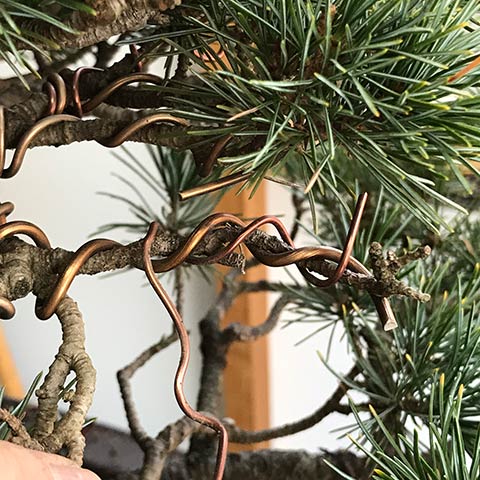
Image caption. Wire applied too loosely led to this branches demise when it was bent. Rather than terminating the thicker wire earlier the previous artists continued with it and likely also damaged the branch during application thereof.
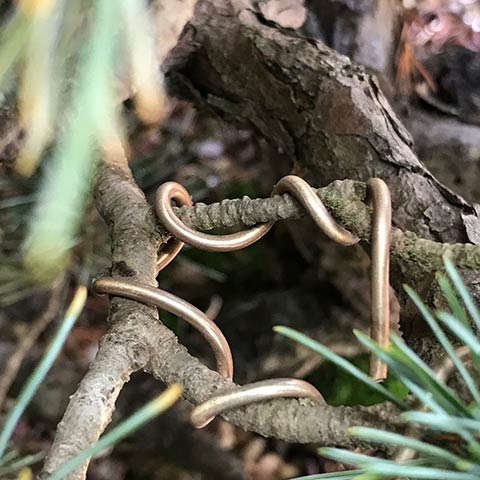
Image caption. Wire was again applied too loosely to have any meaningful function at this branch junction. When it comes to having to bend these branches into the desired shape there is nothing to hold them into position and the stylist ends up having to overbend the branches dramatically.
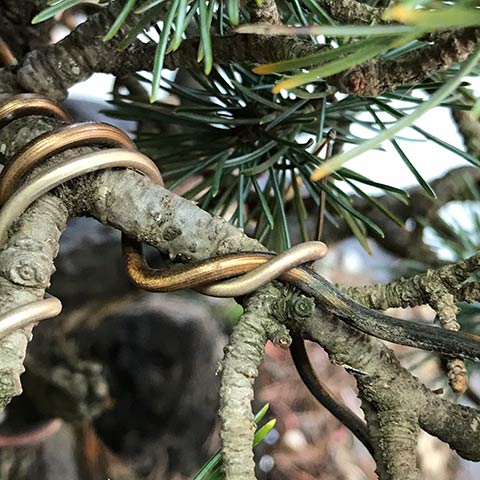
Image caption. Although it is fine to overlap thicker wire with thinner when it is unavoidable this was completely unnecessary and considering the more delicate bark of Japanese white pines, this most likely damaged the branch at the point of pressure.
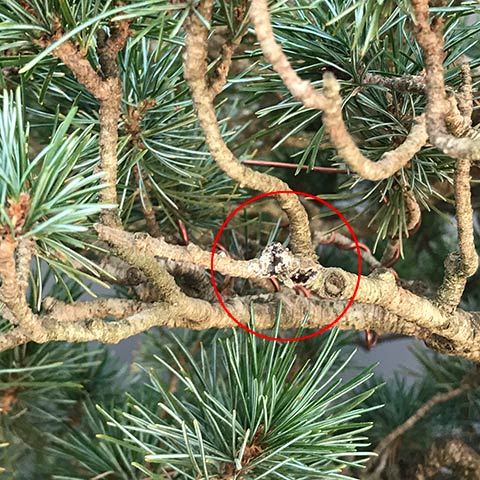
Image caption. The result of too-thick wire incorrectly anchored killed this branch.
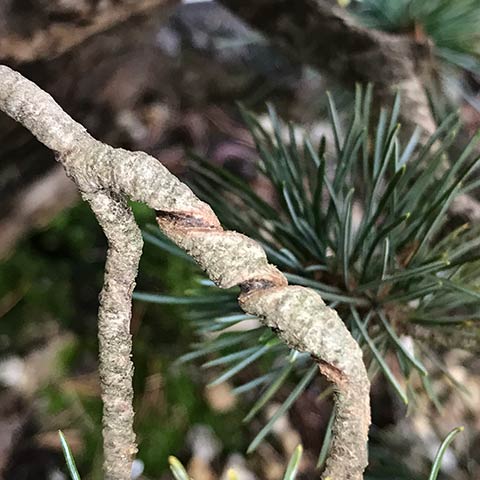
Image caption. Wire bite is not a problem on younger pines, in fact it can be used to fatten up their trunks fairly rapidly. However here we have wire bite in the canopy and it has resulted in bad scarring which has created reverse taper in the branch. The only remedy for this will be to one day remove this branch entirely - better to have avoided the wire bite to begin with.
Old needles
It was observed that several seasons of old needles still remained on the branchlets. It is fairly obvious where these old needles begin and where the newer more functional needles begin as there is a very short internode or neck between these. Unlike two needle pines where needles are plucked, the bark on white pines is much thinner and were you to pluck needles on this species you may well lose the branch through essentially ring barking it. So the needles need to be cut but it is important to allow the base of the needles and their sheath to remain as each one as the potential to produce new buds, which is important for the future of the tree as it will provide much needed new growth which can be cut to as required. Although this work should ideally be done in Autumn, and it is now late Winter, I decided that it was better to do it now rather than not plus it would certainly making wiring much easier too.
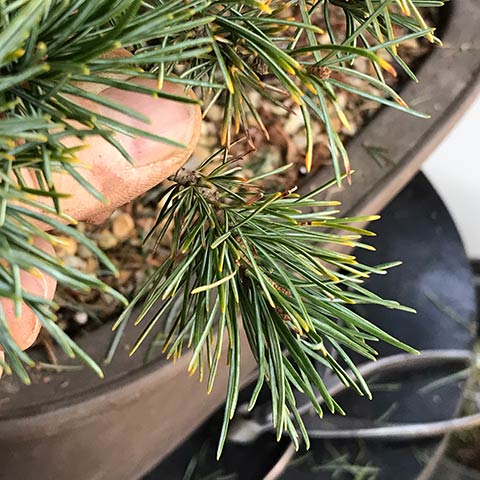
Image caption. Branchlet with old and new needles.
Order of work
Removing old wire
I first set about cutting the old wire from the tree. When cutting the wire from branches it is important that you use a wire cutter with a rounded nose or head rather than the sharp point which most DIY cutters have. The latter design will most certainly result in you inadvertently cutting the branch too.
Removing dead growth and thinning
After removal of the wire was complete I then went through the tree carefully to identify and remove the dead branches. At the same time I spent time looking at the various branches for places where more than 2 branches emerged, cutting away the extras. When deciding which branch/es to remove I would consider the length of the branch, how many buds or branchlets it had (whether the ramification was better than others it was being compared to) and how coarse the branch is.
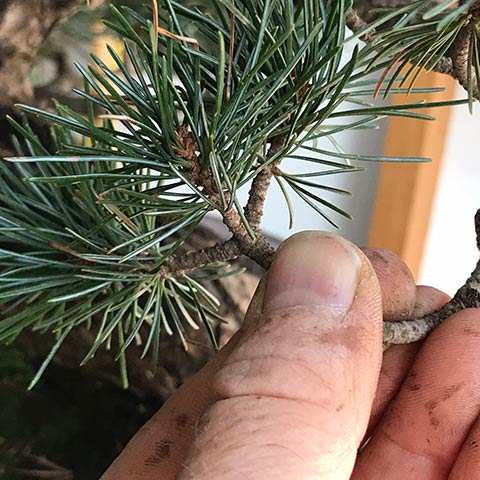
Image caption. Three branches emerging from the same point. I kept the two of similar length growing opposite one another and eliminated the one growing upwards and in the middle.
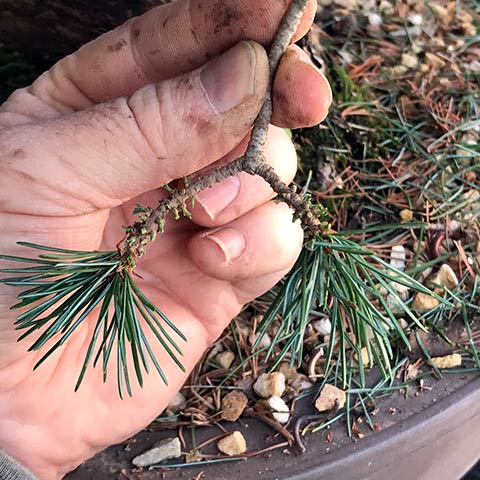
Image caption. After removing the third branchlet.
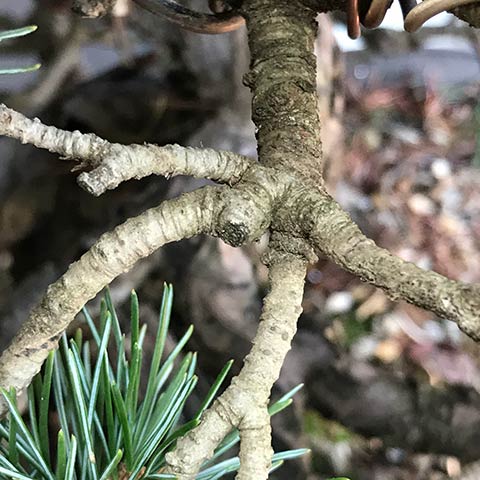
Image caption. Here we find 4 branches growing from one point. We need to keep only two, eliminating the others.
Cutting needles
Once thinning of the tree was done I started at the bottom and worked to the top of the tree with a pair of sharp, clean trimming scissors and carefully cut the old needles from every branch. Amongst other things this will promote more sunlight penetration into the tree and will also make my work easier when it came to wiring.

Image caption. After cutting the old needles. Notice the very short gap between the old and the new.
Wiring
Wiring is an unavoidable step in the styling of conifers. As I have mentioned above, it is also not advisable to wire selectively, although there are exceptions to this. So when wiring a conifer it is strongly encouraged that you wire the tree entirely so as to equally stress the entire tree.
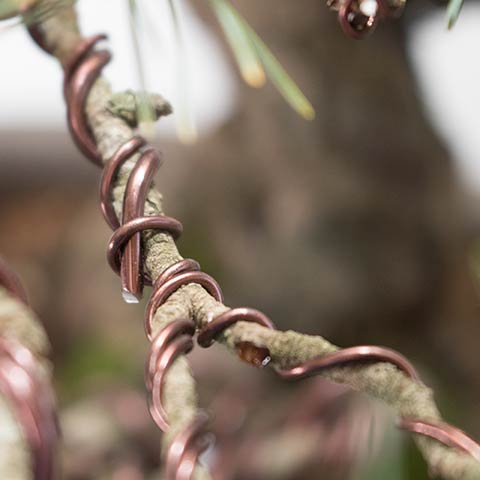
Image caption. When you need to transition to thinner wire you need to anchor the wire you are stopping with the thinner wire you will use further, against the branch to prevent it coming away from the branch when you bend it.
Although I would have preferred to use copper wire on this tree due to its superior hold which would allow me to hide the wire a little better as thinner gauges could be used, the customer supplied me with aluminium. As aluminium does not work harden {easily} it is important to get a feel for the thickness of wire to use for a particular thickness of branch. Using too thin wire inevitably leads to the branch returning to its previous position. In contrast using wire which is too thick is likely to end up damaging and perhaps even snapping branches as you attempt to apply it.
Styling
The styling of trees is a very much debated topic and as bonsai is an art form the artists vision of the tree may or may not appeal to you. As a professional, working on customer's trees requires additional consideration as the customer needs to be happy with what work you do. Working on this particular tree also required that I practice a certain degree of respect to the previous grower who developed it. This meant I was never going to convert this informal upright into a cascade for instance, and certainly not without first discussing it in detail with the customer. However this tree was never going to be subject to a drastic makeover, all that was going to be required was proper creation of foliage pads and perhaps re-positioning of some of the structural branches where necessary.
It is advisable to start the styling on the most important branch, which usually is the bottom branch. Once you have defined the "look and feel" of this branch then the rest of the tree follows suit from there, and things begin to fall into place automatically.
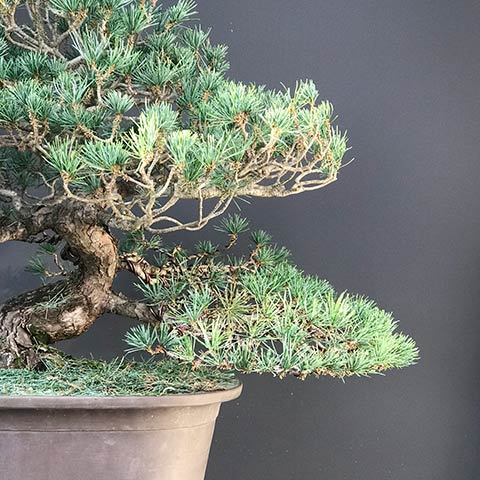
Image caption. First branch styling completed. The foliage pad, having the shape of a hand, has been given a very clear shape whilst making sure that each growing tip is given as much exposure to sun as possible. Branches are also layered to give volume. It is not branches growing from the top of others which are used to achieve this, usually there are eliminated.
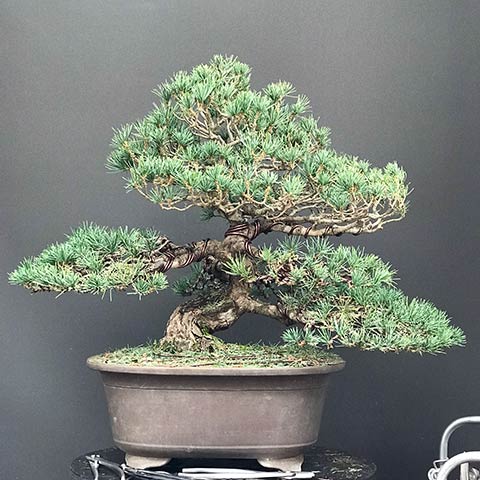
Image caption. Continuing up the tree each branch is wired and then styled. This also makes wiring the branch above easier!
As this tree has likely never been styled as intensely as this before and as some of the maintenance tasks were neglected, branches had become rather leggy. It would have been great if there were inner branchlets to cut back to but in most instances there wasn't, so branches had to be bent in order to get them to fit the profile of the foliage pad. In the future, with the right care this tree will produce new buds and as it does branches can be replaced with new ones which are perhaps of a better length and better positioned.

Image caption. Where old needles were cut buds can potentially develop.
Sometimes it is necessary to re-position a structural branch. Although there is undoubtedly several ways of achieving the same result I prefer using guy wires and stays. I prefer NOT to try by applying very thick wire as I find it does more damage than good both when applying it; to the bark and surrounding branches and when putting the bend in; due to lack of control.
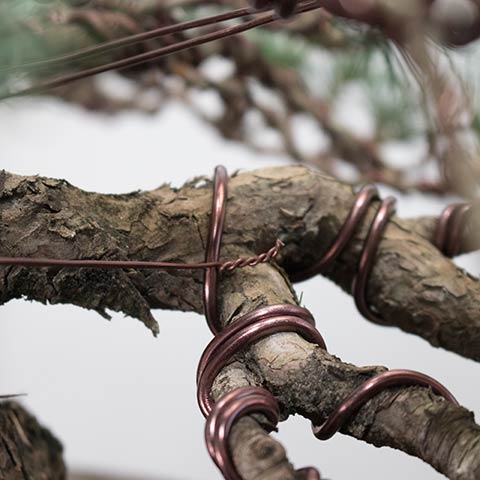
Image caption. This heavy branch needed to be moved and rather than try to use heavy gauge wire I used a guy wire instead anchored to wire at both points. You can then bend the branch by hand or using a branch jack. Take up the slack by twisting the one end of the guy wire. When you are done neatly trim off the excess twisted wire.
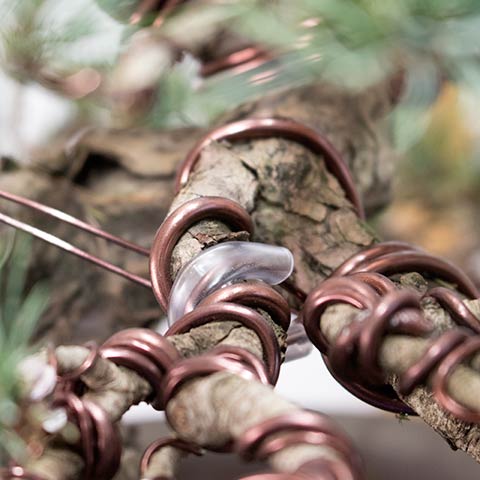
Image caption. If you need to use a guy wire but cannot squeeze it through some existing wire then simply push the wire through some rubber tube to prevent it from placing direct pressure to the branch being bent.
After working through the rest of the tree I came to the apex. Many of the branches in this area were far too long and some severe bends were required in order for them to conform to the outline of the canopy. As above, as new buds form and can be developed into branches, they can be used to replace the overly long ones.
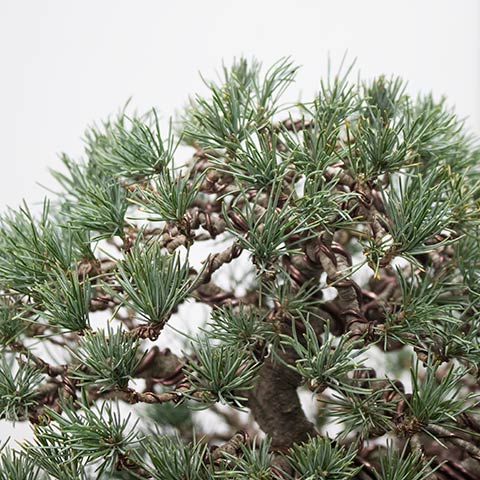
Image caption. The apex of this tree is very rounded and all the individual branches need to fit into this outline. Placing complex bends into the branches serves to visually shorten then dramatically. Eventually they can be replaced by shorter branches.
Going forward
I was personally rather surprised at how well the tree turned out considering the rather wild before appearance. Now that styling has been completed it can simply be improved over time with ramification increasing with each passing year. The overall needle length on this tree is fairly uniform and this is a great positive.
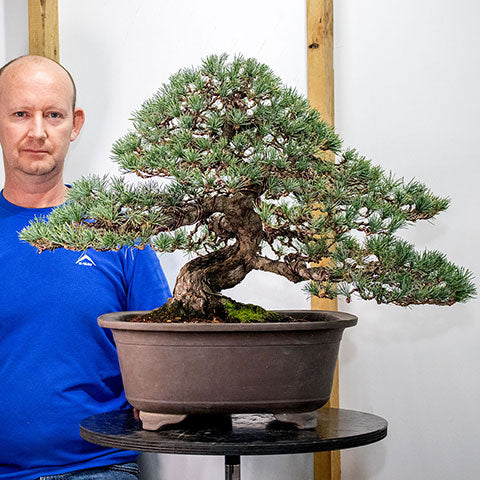
Image caption. The tree after styling. A total of 20hrs of work was required to achieve this.
I'd like to see the second branch on the right being shortened over time as it currently shades the lower, first branch a little too much. However during this styling it was not possible to shorten it visually any more than I was able to do.
Fertilizing of white pines is primarily done in Autumn so the customer will be certain to apply generous doses of organic fertilizer when the time comes.
The container which the tree is in is pleasant, a mass produced Japanese ceramic. However it is too deep and the tree is planted very deep inside it as well. This space was filled with crushed stone, which has since been removed and replaced with fine akadama and surface dressing (sphagnum moss and green moss) to encourage surface rooting.
After discussing the options with the customer he has requested that I look out for a better quality container more deserving of this tree. However I have discouraged him from considering to repot the tree this season as well due to the extensive styling work completed on it. We hope to do this next year, and at the same time move it over to a more free draining medium of akadama, hyuga (pumice) and stone which should invigorate the tree greatly. Using a shallower container and correcting the too deep level at which it is currently been potted will expose more of the lower trunk's curves and nebari.
A fun time-lapse showing all the work completed.....
Want to sign up to my mailing list and receive future articles like the above to your inbox? Sign up here.
Leave a comment
Comments will be approved before showing up.
