


Orchids


Seasonal Work on an Upright Hackberry
A little more of the history behind this tree can be read in a previous blog here. However in brief it is a tree which I started from seed around 15 years ago, first field growing it and then developing it further in a container.
I have learnt much about bonsai styling and aesthetics since I first began styling this tree and there are many things I would do differently if I were able to repeat this trees initial styling. However I have found that it is not so easy to radically alter the design of Hackberry (Celtis sinensis) as any large scarring will not heal over in a container very quickly. So I am attempting to improve on the design as much as I can with this tree, although it is unlikely ever to look natural.
As mentioned in the preface, in autumn when the leaves begin to fall off the tree it is a good time to get stuck into it and do some of the common maintenance tasks required in preparation for the winter and spring to come.
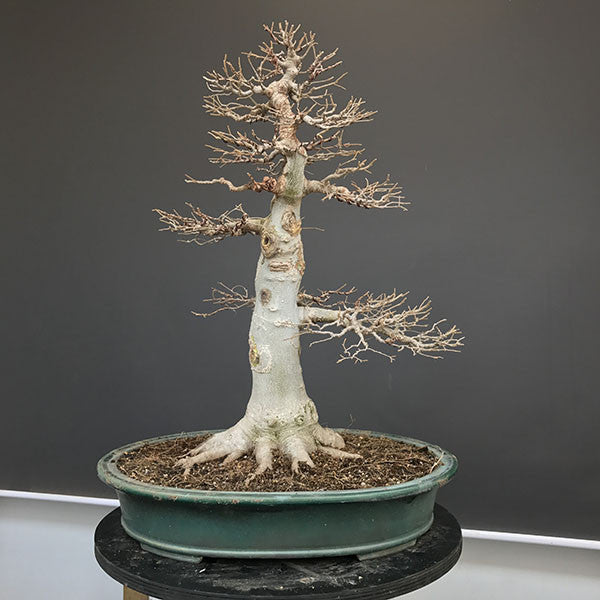
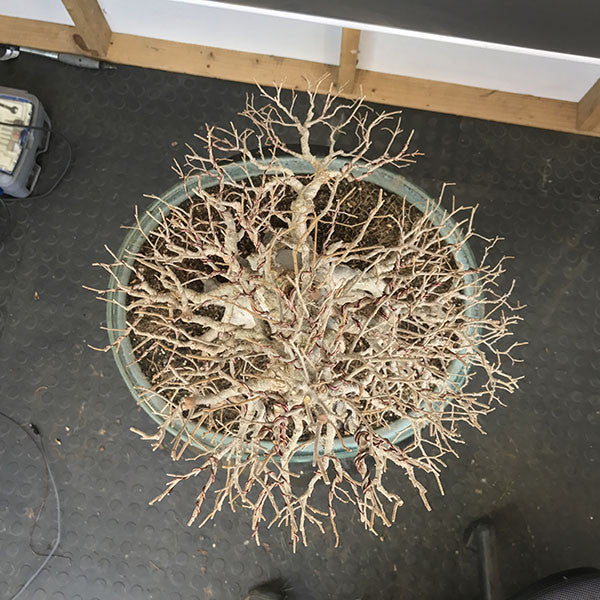
We will first briefly run through the tree as it looked before I began working on it now and assess the work which needs to be done.
Assessment
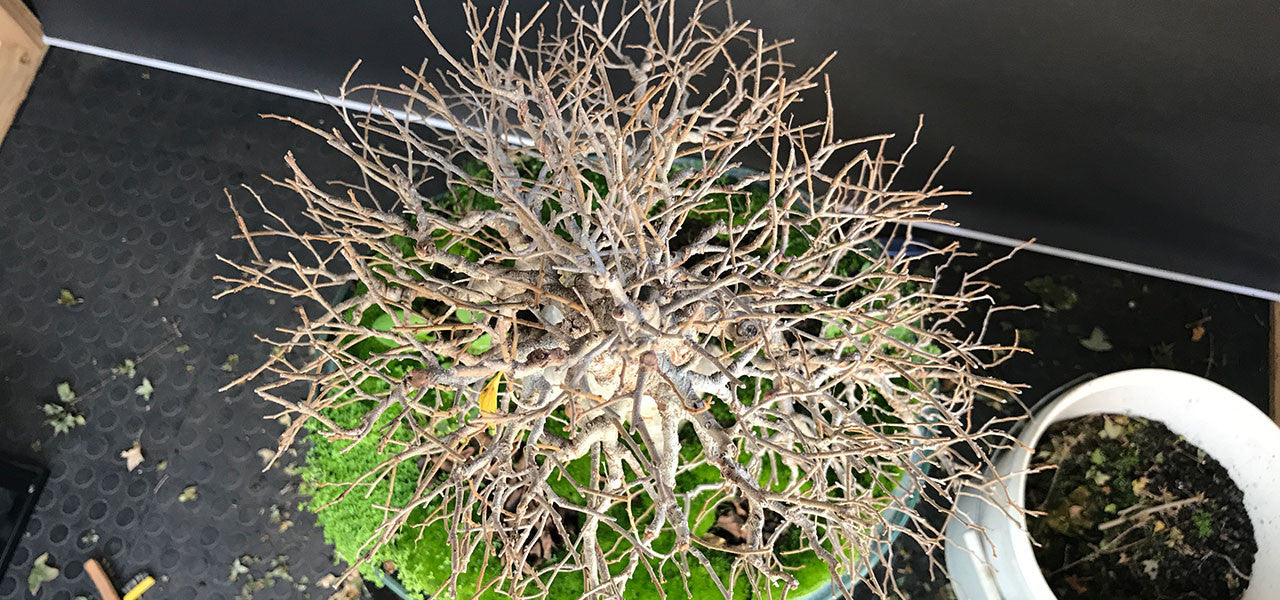
All the leaves have been removed from the tree at this stage. This has revealed the structure of the tree and how the branches have or have not developed during the past season.
It is clear that some tidying will need to be done on the foliage pads and the long twigs shorted cutting back to fewer buds and thus producing a more ramified tree in the following spring.
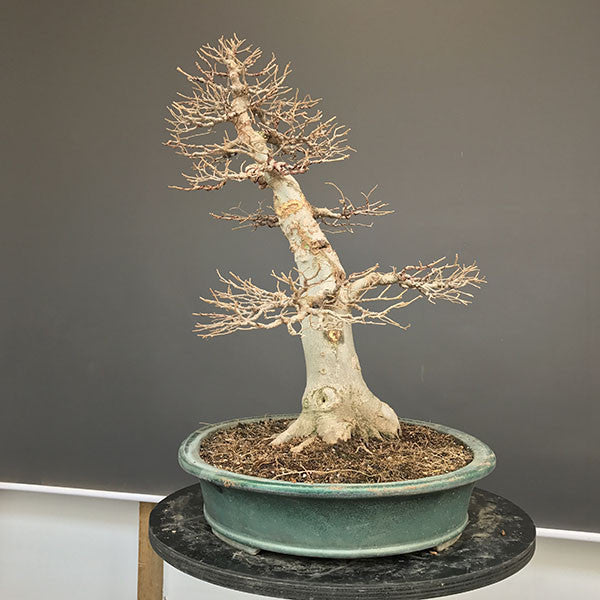
Branch Structure
The above photo clearly shows how branches have extended and should now be reduced so that ramification can be improved. Dead or weak branches can also be removed now to reduce the clutter and also make wiring easier.
Rampant Moss
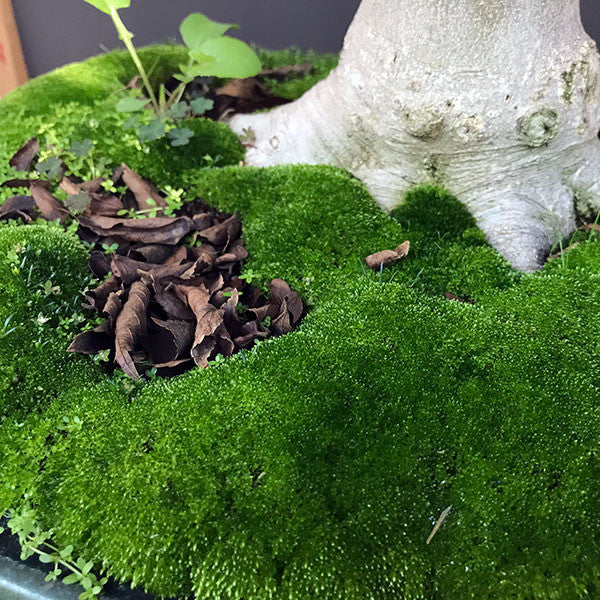
Although healthy, lush green moss is nice to look at it does create several problems over winter. It can enhance the water retention of your growing medium substantially preventing the same from drying. This moss should be removed as it has become too thick, and instead new moss can be planted in spring or you could simply allow it to develop naturally as no matter what you do, you will never remove all traces of moss unless of course you repot and also bare root.
Flourishing weeds
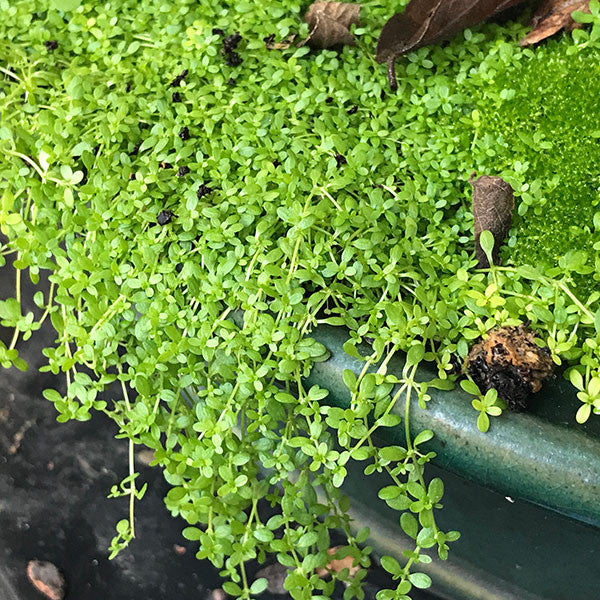
With the advent of the winter rains, at least where I live, weeds begin to thrive. Be sure to remove them before they spread too much or before they begin developing seeds or the problem will be worsened. I use a pair of tweezers to pull the weeds from the growing medium.
Failed Grafts

After several failed attempts I am beginning to think that it is not possible to thread grafts branches on Hackberry. I was almost successful with an approach graft but it was very weak and in the end I decided to simply remove it. I may try again in the new season as being able to graft a few branches onto this tree will dramatically increase my chances of improving this tree dramatically.
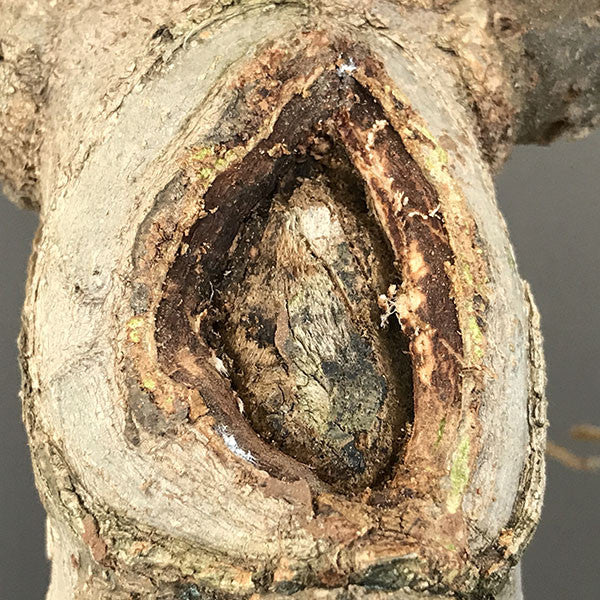
Scarring and Healing
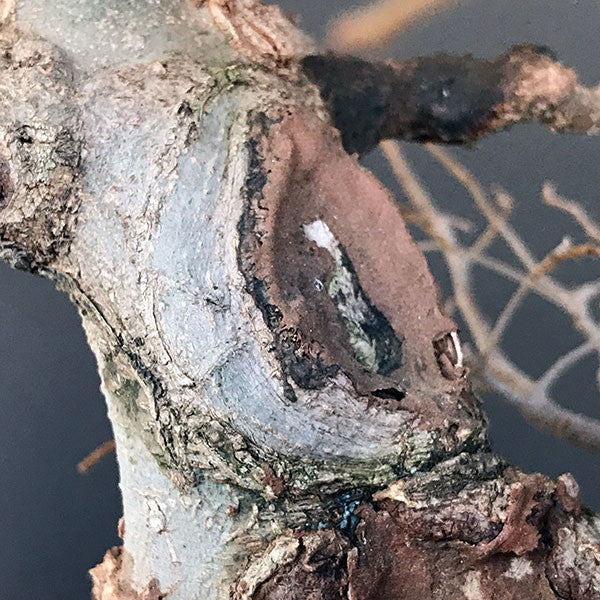
It has been some years now that it has taken for this cut to heal to the point that you see it now. There are clearly a few more years to go before it will heal over entirely and my advise to you would be that if you do have a Hackberry with scars you wish to heal over, try to perform this almost completely while it is still in the ground or in an oversized container as once you begin styling the tree the sap flow is dramatically reduced and along with it the ability or need for the tree to callous over scars of this size.
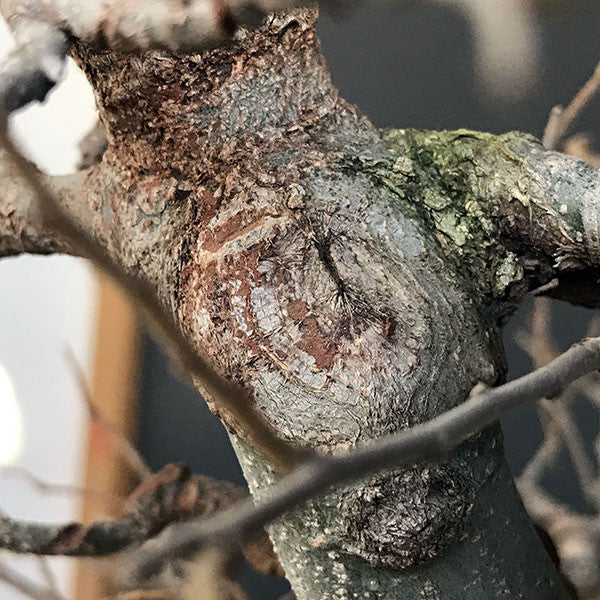
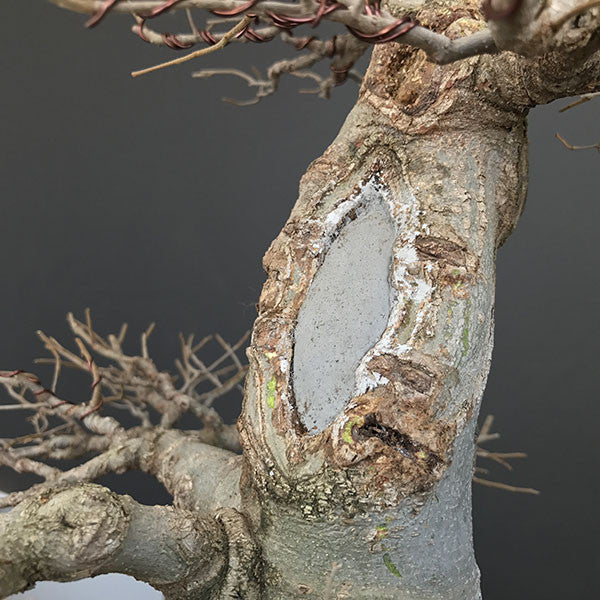
This image on the other hand shows how well a Hackberry can heal when the proper techniques are applied and growth is allowed to continue above the cut. You can of course see evidence of the sealer which was used to treat the scar however this will soon fall off also.
Condition of the roots and growing medium
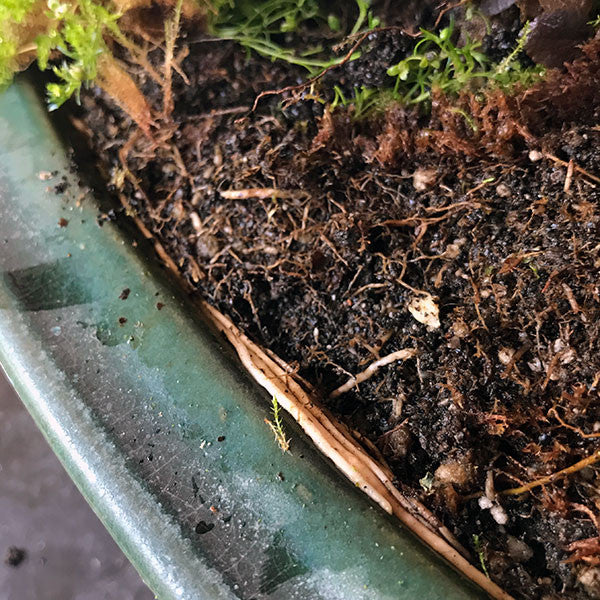
Its been about 2 years now I believe since this tree was potted into its current container. As you can see the roots are circling container. They have most likely been encouraged to grow near the surface as a result of the moss which was there. However it is time to repot the tree as the container is filled with fine hair roots and I would like to get it into some Akadama and pumice rather than the current medium it is in which is pure Groperl, which I used as a substitute before I began importing the aforementioned mediums.
Summary of work to do
- Tidy the branches pruning twigs which have grown too long and extend beyond the profile of the tree.
- Cut out any dead growth and seal all cuts.
- Remove the moss and weed carefully.
- Remove sealer residues, score the bark on the edges of the unhealed scars and seal carefully.
- Prepare sufficient growing medium for repotting in early spring when buds begin to swell.
Results
Pruning
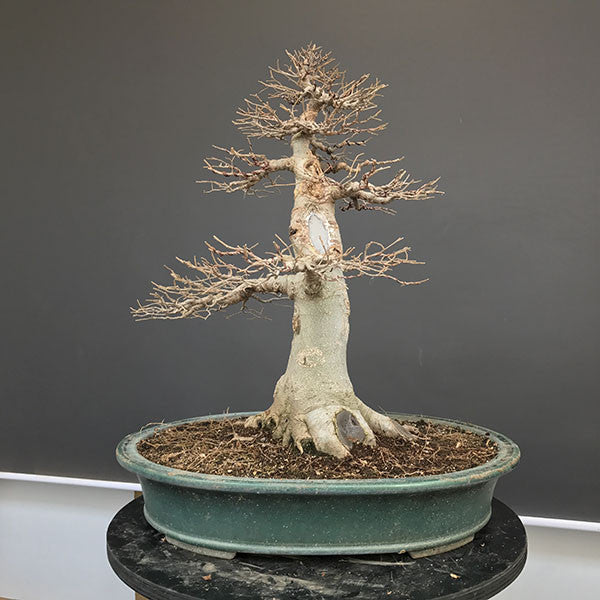
First task completed was to prune the tree back into shape. The following images show the tree from all four angles.
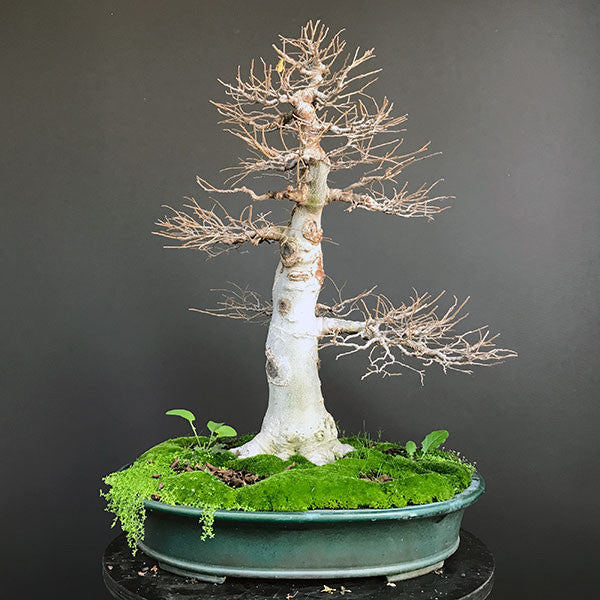
Pruned back, weeded and moss removed this Celtis sinensis is looking a lot neater again. As mentioned before, were I to able to go back in time there are many things I would do differently. I much prefer the apical area than the lower part of the tree but as all efforts so far to graft on this tree have failed I am really only left with 2 options: layer the top off or accept this tree as is - a formal upright. I favor the latter option. Who knows, perhaps in the future I can get it to bud lower down on the trunk, but as time passes and the trunk matures such chances diminish with each passing year.
When pruning a bonsai tree which is in development you want to allow branches to grow as long as possible until they have reached the girth or thickness you want - and then prune them back. However as this tree is beyond that point and I am in the refinement stage, the focus is on ramification. As such all the branches are pruned back to an appropriate length and ideally keeping at least 2 buds on new wood, or more. Repeated cutting back to the previous seasons wood will progressively weaken the tree. Why 2 buds? So that in spring both buds will activate and ramification will be doubled.
Bonsai trees should be planted and styled in a slightly forward leaning angle. I believe that in retrospect this angle is a little too great but it also stems from the series of trunk chops which were performed during the field growing process.
As a result of this angle, the canopy of the tree will need to be deeper. In other words, to ensure that the bottom branches are not shaded by the front part of the apex these branches need to be expanded. However in contrast, because the apex leans so far forward the rear of the apex will need to be expanded to maintain the overall shape or outline of the tree.
It is best, when you need to make any major cuts, to do these so they face to the back of the tree. This tree was field grown from seed and to achieve the trunk taper, the trunk had to be chopped back three times. Only the last scar has healed over entirely at this stage, however I do envisage that in some years to come, all of these scars would have healed. It will not be a quick process though as Hackberry do not heal over readily, in my experience.
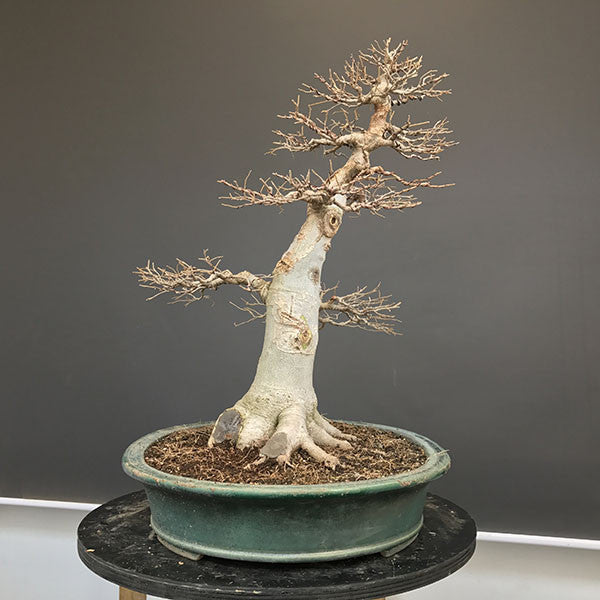
Here is the tree from the left side, where you can see one or two failed attempts at thread grafting branches. You can also notice how the angle of the branches move progressively from a roughly horizontal position to a more vertical one in the apex. This is entirely natural and how trees grow, as they develop towards the sun.
This rather unorthodox view of this Celtis sinensis is actually a rather valuable one. Although nobody would normally view your tree from this angle it is a good habit for you to get into. It is confirmation of whether you are developing the tree in all dimensions, that is to say that you are giving the tree sufficient depth and are not merely focusing on width, which is easy to see from the front. It also alerts you to the existence of problem areas eg. an area of the tree where branches suddenly protrude or seem to recede from the overall outline.
Treatment of scars
This scar was created when the trunk was cut back while it was still being field grown. You can clearly see the new, darker tissue which developed over the past season thanks to the good sealer which was used.
I decided that instead of scoring the live tissue at this time, late autumn, in order to stimulate callousing I would rather do it in late spring when the first defoliation is done. As the tree is going dormant it would simply not make sense to do such work right now as no healing is going to take place. I could do it in early spring, however with strong trees you risk losing a lot of sap through bleeding. I have often seen the pressure of the sapflow lift a sealer and begin trickling down the tree, especially with Trident maples.
So for now, I will not do anything with this scar until after performing the trees first defoliation of the season in late Spring, when the leaves become slightly leathery to the touch. At that time the edges of the wound will be scored using a jin tool and the exposed cambium sealed. This technique accelerates healing of wounds such as this which are large.
On close inspection of the large wound to the back of the tree, another product of the field growing process (and bad technique as I should have allowed this wound to close a lot more in the ground before lifting it and putting it into a container) I found that the wood was rotting. So I removed all the rotting wood with the jin tool and filled the cavity with Rock Set, or you could use any cement mixture. This ensures that no water will pool and that the rotting will cease. You can see the process in the video below, and if you are impressed with what the tool I used can do you can order it here
Yes, I could have carved the wound and opened it up rather than closing it, however I simply do not like deciduous trees which are carved. This is personal taste only, please do not misunderstand me, I am not saying that carving is bad! At times a tree can be improved by carving it, however this is not one of those times - at least not in my opinion.
[The horizontal scars are failed attempts at approach grafting branches which would have helped to close the wound faster. I have yet to claim any success with approach grafting this species]
Foliage Pads
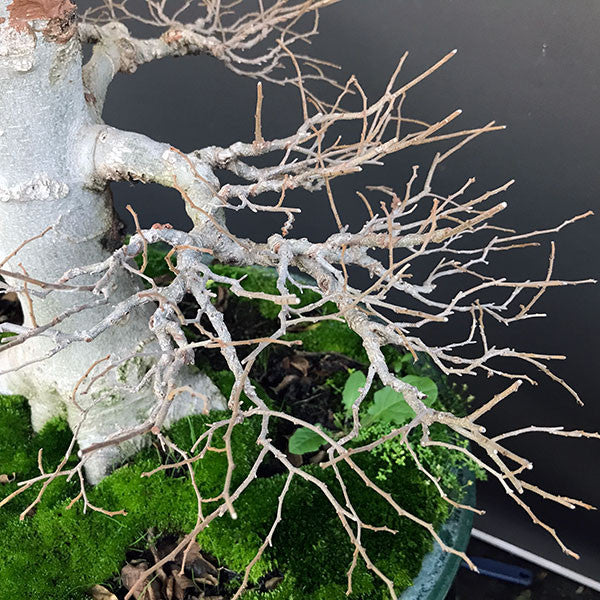
The pruning performed on this tree was to neaten the outline of the canopy. However the tree is also made up of individual branches and thus foliage pads, which in this case are rather distinct. Therefore pruning should also promote a vertical volume of the pads. Very importantly, branches or twigs which would otherwise shade those below should also be shortened so the bottom twigs are able to receive sunlight towards the end of their growth.
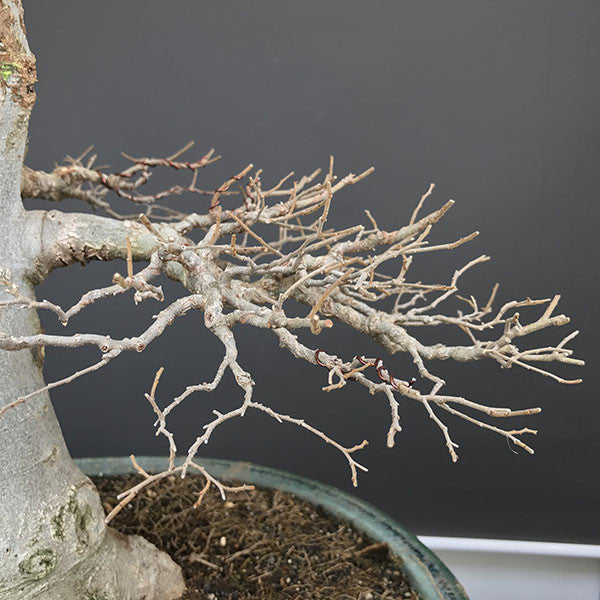
When viewed from the front, branches should have interesting movement. I often see branches which have been designed with very interesting movement viewed from the top, but grow as straight as arrows when viewed from the front. Try to pay attention to that as it will create much more interest.

As the aerial view of the same branch showing quite clearly how the branch ramifies, with branches extending towards an imaginary outline, which when viewed from the top as a complete tree fills a roughly oval or circular shape (see the earlier aerial view of the tree).
Winter wiring
Wiring and then shaping results in very small fractures. Performing this in winter when there is no sapflow is tantamount to you breaking a leg, putting it into a cast but stopping your blood from flowing. Healing will certainly not happen and you might lose your leg. The same can happen in a bonsai tree. The risk is pretty low if you are rather decisive with your bends ie bend it once and leave it, but if you are indecisive and bend, then change your mind and bend again a few times, you may well find that in spring no growth issues from this branch and it will be dead.
The other risk with wiring now is wire bite. In order for a branch to remain in the position in which it is bent, some growth must happen and this growth must harden off. Spring is the strongest growth period of the year so with a young, strong tree wired in winter wire bite is almost certainly going to occur by the time you can remove the wire in late spring or so. Removing it too early will simply result in the branch returning to its original position, you will have wasted wire and the hours of wiring.
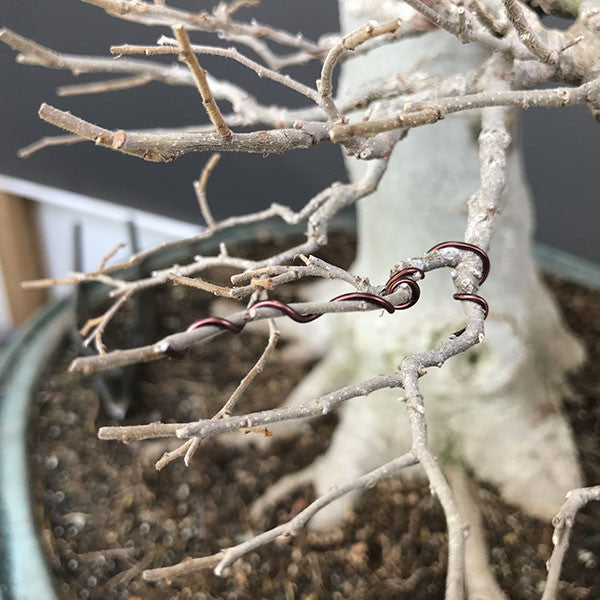
I have lightly wired some of the branches of this tree, just to get them into position. No major bends were made and I was careful also to wire on the outside of the bends which I knew I intended to make.
I'm not stating this as fact but what I have noticed based on my experience is that if you wire the last growth of the season, which has a slightly different tone that the older growth there is a strong possibility of losing it. Whether this is due to the points I eluded to earlier or not I am not certain however I was cautious not to wire any such growth now and will rather wait till late spring when the tree is properly wired.
Repotting
As mentioned earlier, this tree will need to be repotted into a more suitable growing medium of Akadama, Pumice and crushed lava with a little agricultural carbon. The roots of Celtis will fill a container very rapidly. If you are developing a tree then you will want to repot more frequently, say every 2 years or 3 at most. When you have a more refined tree and slower growth is desired then you might be able to stretch it a little longer but not by too much or you will start finding problems with the root system.
If you do find that water struggles to penetrate your root ball then a full repot may not yet be needed. Simply use a rake to remove the top cm or so of the growing medium and with it the matt of fine roots which would have developed. You should see more "whole" particles of growing medium at that point. Top up the container with fresh media and end with some grated sphagnum moss.
Conclusion
As I have mentioned several times already, there are many things which I would love to be able to do over with this tree which I began when I still styled trees as often depicted in Western books ie side branch, back branch, left branch etc. My eyes have been opened since then and trees which I now grow are much more natural and in my humble opinion are more pleasing. Perhaps in time I will be able to remedy some of these faults, but for now it serves as a reminder of my beginnings as a bonsai artist.
7 Responses


Leave a comment
Comments will be approved before showing up.

Ferdi van Greuning
June 29, 2022
Awesome article. I often find myself having to reinvent my Bonsai habits for a better word. Unless you constantly reading articles such as this one, we find ourselves doing the same stuff over and over not bettering our trees and merely going through the motions. Thanks for an informative, well structured and written read Terry!